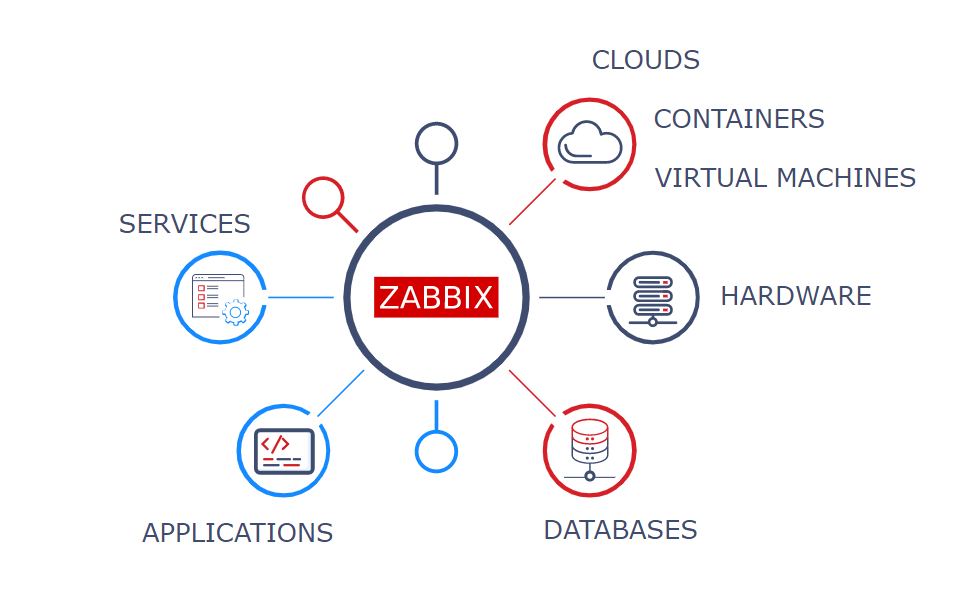
What is Zabbix ?
Zabbix is Open Source software used for monitoring the application, Server and networking, and cloud services, zabbix provide metrics, such as network utilization, CPU and disk space .. etc.
In this post i will try to mention everything for Zabbix installation and configuration, include to this some of the issues that you will face during the installation with screenshots, the idea of this post to help people and allow them to understand and simplify the installation/configuration.
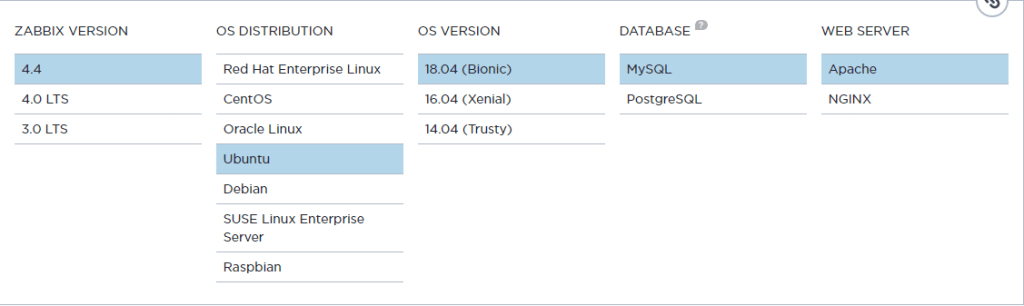
You can Refer always to Zabbix documentation which include different versions, remember this post is for Zabbix 4.4.2 and maybe will work on other versions, but never tested before. The documentation HERE.
You can Download Zabbix From HERE, Depends on your operating system and version, Zabbix supporting two different databases during the installation which is MySQL & PostgreSQL.
Zabbix Installation
Step#1:- Install Apache, MySQL and PHP
sudo apt-get update
sudo apt-get install apache2 libapache2-mod-php
sudo apt-get install mysql-server
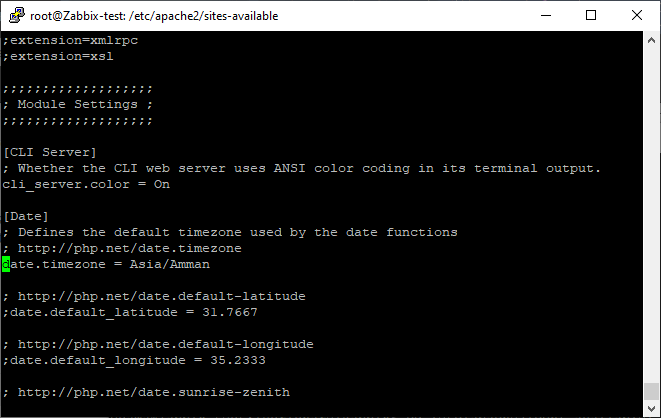
sudo apt-get install php php-mbstring php-gd php-xml php-bcmath php-ldap php-mysqlOnce the installation is done, you have to update the timezone for PHP, you can do this by edit the file
/etc/php/php<version>/apache2/php.iniSearch for the line include word “Date”, remember when you edit the file you will find “;” at start of the line, in php this is comment , so you have to remove and update the timezone, the List of Supported Timezones in php HERE, once you find yours edit the file.
[Date]
;http://php.net/date.timezone
date.timezone = 'Asia/Amman'
I also attached pictures to show you how the file will look like
Step #2: Before Install Zabbix Server
before install Zabbix server, there are one required step should be done first which is enable the zabbix repository, the download Link (HERE)that mentioned above gave you the steps , again you can find the link here and choose which Operating system Zabbix will be installed on
From the above, once you choose everything, scroll down to find the repository.
wget https://repo.zabbix.com/zabbix/4.4/ubuntu/pool/main/z/zabbix-release/zabbix-release_4.4-1+bionic_all.deb
dpkg -i zabbix-release_4.4-1+bionic_all.deb
apt update
Step #3: Install Zabbix Server
sudo apt-get update
sudo apt-get install zabbix-server-mysql zabbix-frontend-php zabbix-agent
Now all the necessary packages has been installed on the operating system, the configuration start from the base which is the database.
Step #4: Create Zabbix Database Schema
Login to MySQL by the below commands to create the database and user.
mysql -uroot -p
Enter the password
mysql> create database zabbix character set utf8 collate utf8_bin;
mysql> grant all privileges on zabbix.* to zabbix@localhost identified by 'zabbix';
mysql> quit;
Now we have to import the data into the schema we just create, to do this we should run the below command, notice these steps should be done in order otherwise an issue will be appeared, You will be prompted to enter your newly created password.
zcat /usr/share/doc/zabbix-server-mysql*/create.sql.gz | mysql -u zabbix -p zabbixStep #5: Configure Zabbix file to access the database.
Edit the following file
/etc/zabbix/zabbix_server.confSearch for the following Lines using your favorite editor either vi, vim , nano .. etc
DBHost=localhost
DBName=zabbix
DBUser=zabbix
DBPassword=password
Step #6:- Restart the services to make everything ok
Start Zabbix server and agent processes and make it start at system boot.
systemctl restart zabbix-server zabbix-agent apache2
systemctl enable zabbix-server zabbix-agent apache2
OR
sudo service apache2 restart
sudo service zabbix-server restart
After starting the Zabbix service, let’s go to Zabbix web installer and finish the installation.
Connect to your newly installed Zabbix frontend: http://server_ip_or_name/
Before doing this, which is access to above Link, i faced an issue, which is i was 100% everything is Ok, but everytime i access the link, HTTP response code with 404 NOT FOUND, i was searching about this, and the solution was like the following
Change the directory to
/etc/apache2/sites-availableUnder this location, you will find two file
- 000-default. conf
- default
Edit these two file to change the following Line
Change DocumentRoot /var/www/html -- > DocumentRoot /usr/share/zabbixRestart the Apache again, Now the Link will work.
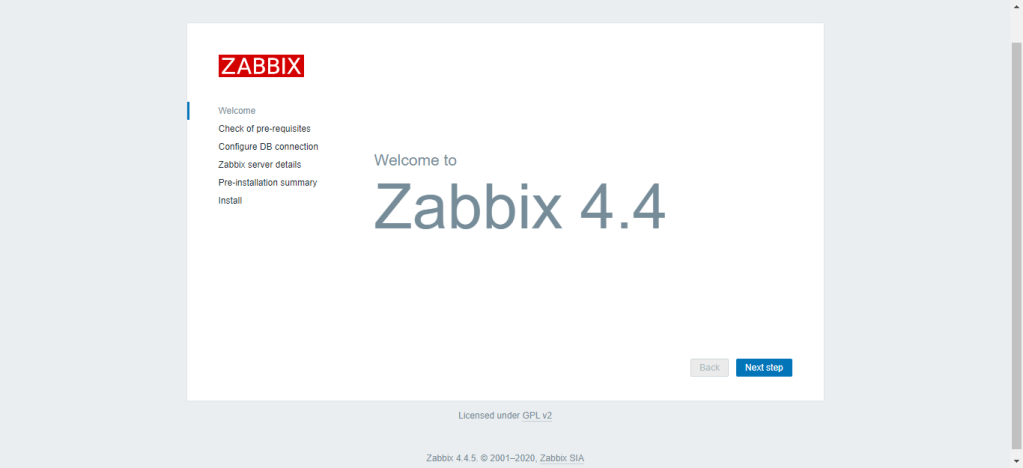
Step #7: complete the configuration via Zabbix Web Installer.
- Zabbix Setup Welcome Screen
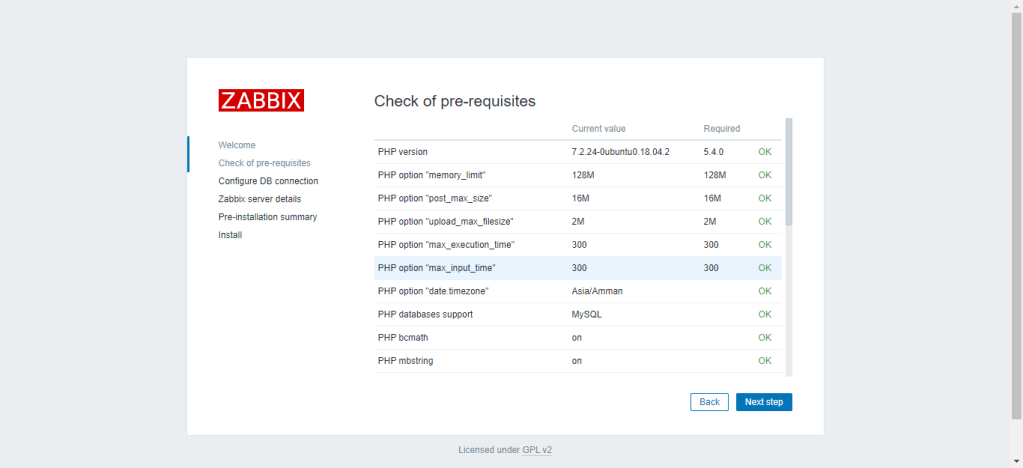
- Check for pre-requisites
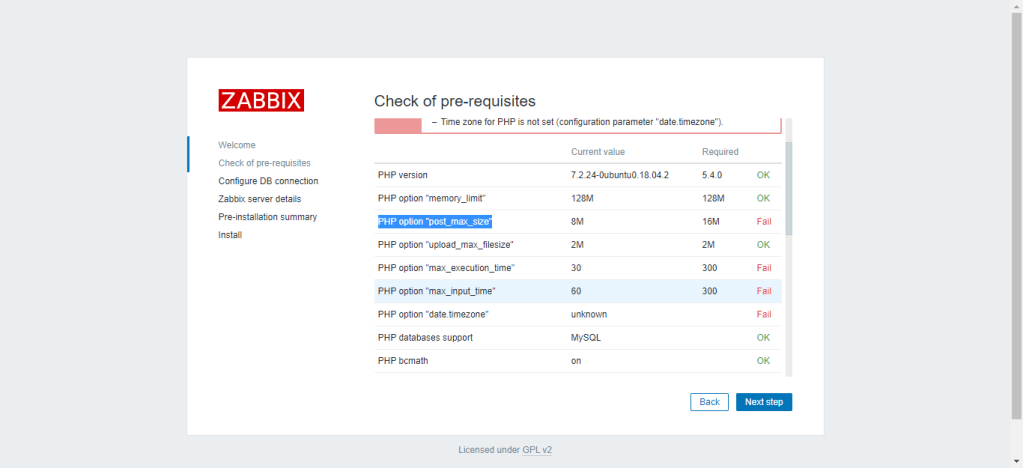
to solve the above you have to fix the value from one file which is
/etc/php/php<version>/apache2/php.iniand search for the option, for example, post_max_size the current value is 8M just change to 16M and So on, remember after you change the value you have to restart the Apache to take the effect and then check the pre-requisites again.
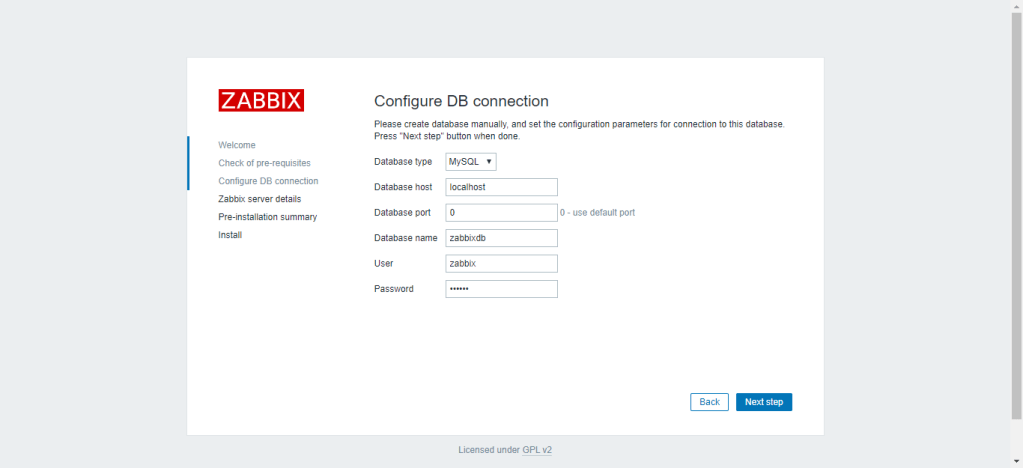
- Configure DB Connection
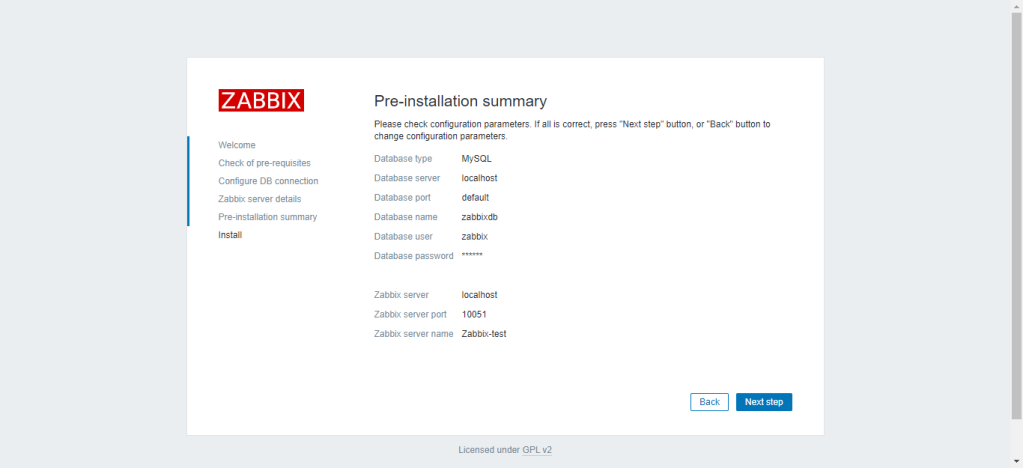
Enter database details created in Step #4 and click next to continue.
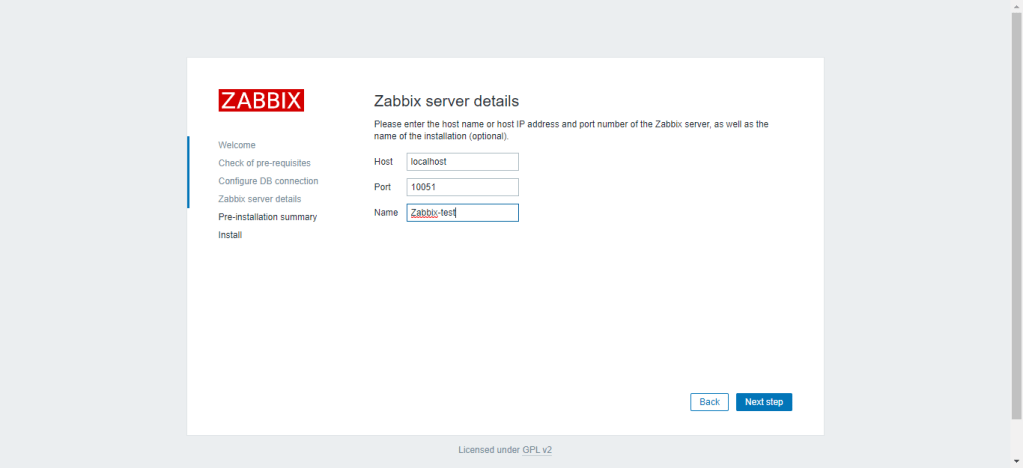
- Zabbix Server Details
This is the host and port of running Zabbix server, Don’t change the values of the port and host, no need to do that, since it’s running on the same server, for the Name, you can give name for the instance.
- Pre-Installation Summary
- Done
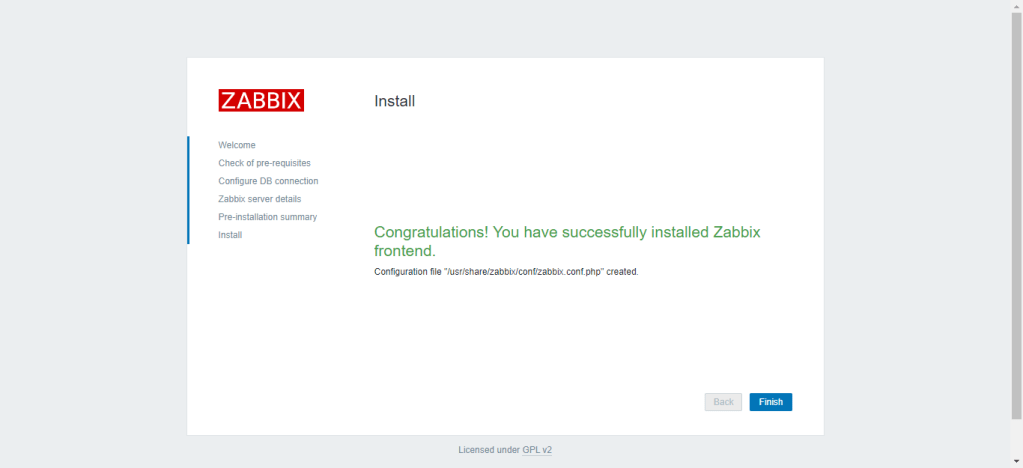
Enjoy the zabbix ☠🍻
Osama

Leave a comment