Another Post Describe how to install Oracle SOA, Steo by Step To Install Oracle SOA and Extend Admin Server.
As Usual you can download this document From SlideShare.
Download Document Here.
Thank you
Osama Mustafa
For the people who think differently Welcome aboard
As Usual you can download this document From SlideShare.
Download Document Here.
Thank you
Osama Mustafa
The Benefit of Using Temp Undo Tablespace :
SQL> show parameter TEMP_UNDO_ENABLED;
NAME TYPE VALUE
———————————— ———– ——-
temp_undo_enabled boolean FALSE
SQL> alter session set temp_undo_enabled=TRUE ;
Session altered.
also you set this parameter on database level :
SQL> alter system set temp_undo_enabled=true;
System altered.
SQL> show parameter temp_undo_enabled ;
NAME TYPE VALUE
———————————— ———– ——-
temp_undo_enabled boolean TRUE
View Related to temp undo tablespace :
SQL> desc V$TEMPUNDOSTAT;
Name Null? Type
—————————————– ——– —————————-
BEGIN_TIME DATE
END_TIME DATE
UNDOTSN NUMBER
TXNCOUNT NUMBER
MAXCONCURRENCY NUMBER
MAXQUERYLEN NUMBER
MAXQUERYID VARCHAR2(13)
UNDOBLKCNT NUMBER
EXTCNT NUMBER
USCOUNT NUMBER
SSOLDERRCNT NUMBER
NOSPACEERRCNT NUMBER
CON_ID NUMBER
RMAN Enhancements in Oracle 12c [ID 1534487.1]
Master Note For Oracle Database 12c Release 1 (12.1) Database/Client Installation/Upgrade/Migration Standalone Environment (Non-RAC) [ID 1520299.1]
Oracle Database 12.1 : FAQ on Queryable Patch Inventory [ID 1530108.1]
Oracle Database 12c Release 1 (12.1) Upgrade New Features [ID 1515747.1]
Complete Checklist for Manual Upgrades to Oracle Database 12c Release 1 (12.1) [ID 1503653.1]
Changes For Oracle Database 12.1 Standalone Installation [ID 1483380.1]
Requirements for Installing Oracle Database 12.1 on Solaris 10 SPARC [ID 1517948.1]
Requirements for Installing Oracle Database 12.1 on RHEL6 or OL6 64-bit (x86-64) [ID 1529864.1]
Requirements for Installing Oracle Database 12.1 64-bit (AMD64/EM64T) on SLES 11 [ID 1519770.1]
How To Downgrade Oracle Database 12c Release 1 (12.1) To Previous Versions [ID 1516622.1]
How to Drop/Truncate Multiple Partitions in Oracle 12C [ID 1482264.1]
Oracle Database 12c Release 1 (12.1) DBUA : Understanding New Changes With All New 12.1 DBUA
[ID : NOTE:1493645.1]
RMAN RECOVER TABLE Feature New to Oracle Database 12c [ID 1521524.1]
How to Merge Multiple Partitions in Oracle 12C [ID 1482263.1]
How to Create Interval-Reference Partitioned Tables in Oracle 12c [ID 1519042.1]
Include to all above documents you can find all new features and document in one place, my friend Steve Karam on his blog (Click Here) collect all folks articles that has been posted about DB12c, it’s really worth to take alook and share it.
Thank you
Osama mustafa
SQL> select * from test ;
no rows selected
SQL> desc test ;
Name Null? Type
—————————————– ——– —————————-
TEST_ID NOT NULL NUMBER
TEST_NAME VARCHAR2(20)
SQL> truncate table test cascade ;
Table truncated.
More Features coming up 🙂
But with oracle database 12c this concept is changed new features add when you create table called generated as identity.
Check the Below Demonstration which explain this new features :
SQL> create table test (test_id number generated as identity , test_name varchar2(20));
SQL> desc test ;
Name Null? Type
—————————————– ——– ————–
TEST_ID NOT NULL NUMBER
TEST_NAME VARCHAR2(20)
SQL> insert into test values (1,’osama’);
insert into test values (1,’osama’)
*
ERROR at line 1:
ORA-32795: cannot insert into a generated always identity column
The TEST_ID Column will be inserting automatically no need to use in insert command.
SQL> insert into test (TEST_NAME) values ( ‘Jennifer’ );
1 row created.
SQL> select * from test ;
TEST_ID TEST_NAME
———- ——————–
1 Jennifer
SQL> create table test2 (TEST_ID NUMBER generated as identity (start with 1 increment by 1 cache 30 order), TEST_NAME varchar2(20));
Table created.
SQL> insert into test2 (test_name) values (‘JENNIFER’);
SQL> insert into test2 (test_name) values (‘STEVE’);
SQL> insert into test2 (test_name) values (‘USER’);
SQL> select * from test2 ;
TEST_ID TEST_NAME
———- ——————–
1 JENNIFER
2 STEVE
3 USER
For the first time in Oracle Database you can move objects online without offline or shutdown database which is very useful and helpful for any DBA’s
Check the example below :
SQL> select file_name from dba_data_files ;
FILE_NAME
——————————————————————————–
/u01/app/oracle/oradata/db12c/system01.dbf
/u01/app/oracle/oradata/db12c/sysaux01.dbf
/u01/app/oracle/oradata/db12c/users01.dbf
/u01/app/oracle/oradata/db12c/undotbs01.dbf
SQL> select File_name from dba_data_files ;
FILE_NAME
——————————————————————————–
/u01/system.dbf
/u01/app/oracle/oradata/db12c/sysaux01.dbf
/u01/app/oracle/oradata/db12c/users01.dbf
/u01/app/oracle/oradata/db12c/undotbs01.dbf
Thank you
Osama mustafa
Hardware
you need to configure Swap Memory And make sure you RAM is enough to avoid Out Of memory during the installation.
Software
as i mention before check certified OS with database, in my case i will use Redhat 6 update 4.
install Packages :
binutils-2.20.51.0.2-5.11.el6 (x86_64)
glibc-2.12-1.7.el6 (x86_64)
libgcc-4.4.4-13.el6 (x86_64)
libstdc++-4.4.4-13.el6 (x86_64)
libaio-0.3.107-10.el6 (x86_64)
libXext-1.1 (x86_64)
libXtst-1.0.99.2 (x86_64)
libX11-1.3 (x86_64)
libXau-1.0.5 (x86_64)
libxcb-1.5 (x86_64)
libXi-1.3 (x86_64)
make-3.81-19.el6sysstat-9.0.4-11.el6 (x86_64)
compat-libcap1-1.10-1 (x86_64)
compat-libstdc++-33-3.2.3-69.el6 (x86_64)
gcc-4.4.4-13.el6 (x86_64)
gcc-c++-4.4.4-13.el6 (x86_64)
glibc-devel-2.12-1.7.el6 (x86_64)
ksh <== any version of ksh is acceptable
libstdc++-devel-4.4.4-13.el6 (x86_64)
libaio-devel-0.3.107-10.el6 (x86_64)
inside /etc/sysctl.conf
fs.file-max = 6815744
kernel.sem = 250 32000 100 128
kernel.shmmni = 4096
kernel.shmall = 1073741824
kernel.shmmax = 4398046511104
net.core.rmem_default = 262144
net.core.rmem_max = 4194304
net.core.wmem_default = 262144
net.core.wmem_max = 1048576
fs.aio-max-nr = 1048576
net.ipv4.ip_local_port_range = 9000 65500
Use this command to restart kernel /sbin/sysctl -p
/etc/hosts
Serverip Hostname
/etc/security/limits.conf
oracle soft nofile 1024
oracle hard nofile 65536
oracle soft nproc 2047
oracle hard nproc 16384
oracle soft stack 10240
oracle hard stack 32768
/etc/pam.d/login
session required pam_limits.so
after edit OS parameter you need to create Oracle user :
groupadd -g 101 oinstall
groupadd -g 102 dba
groupadd -g 103 oper
useradd -u 100 -g oinstall -G dba,oper oracle
passwd oracle
copy media to your Server , and do the following :
chown -R oracle:oinstall /u01/database
chmod -R 775 /u0/database
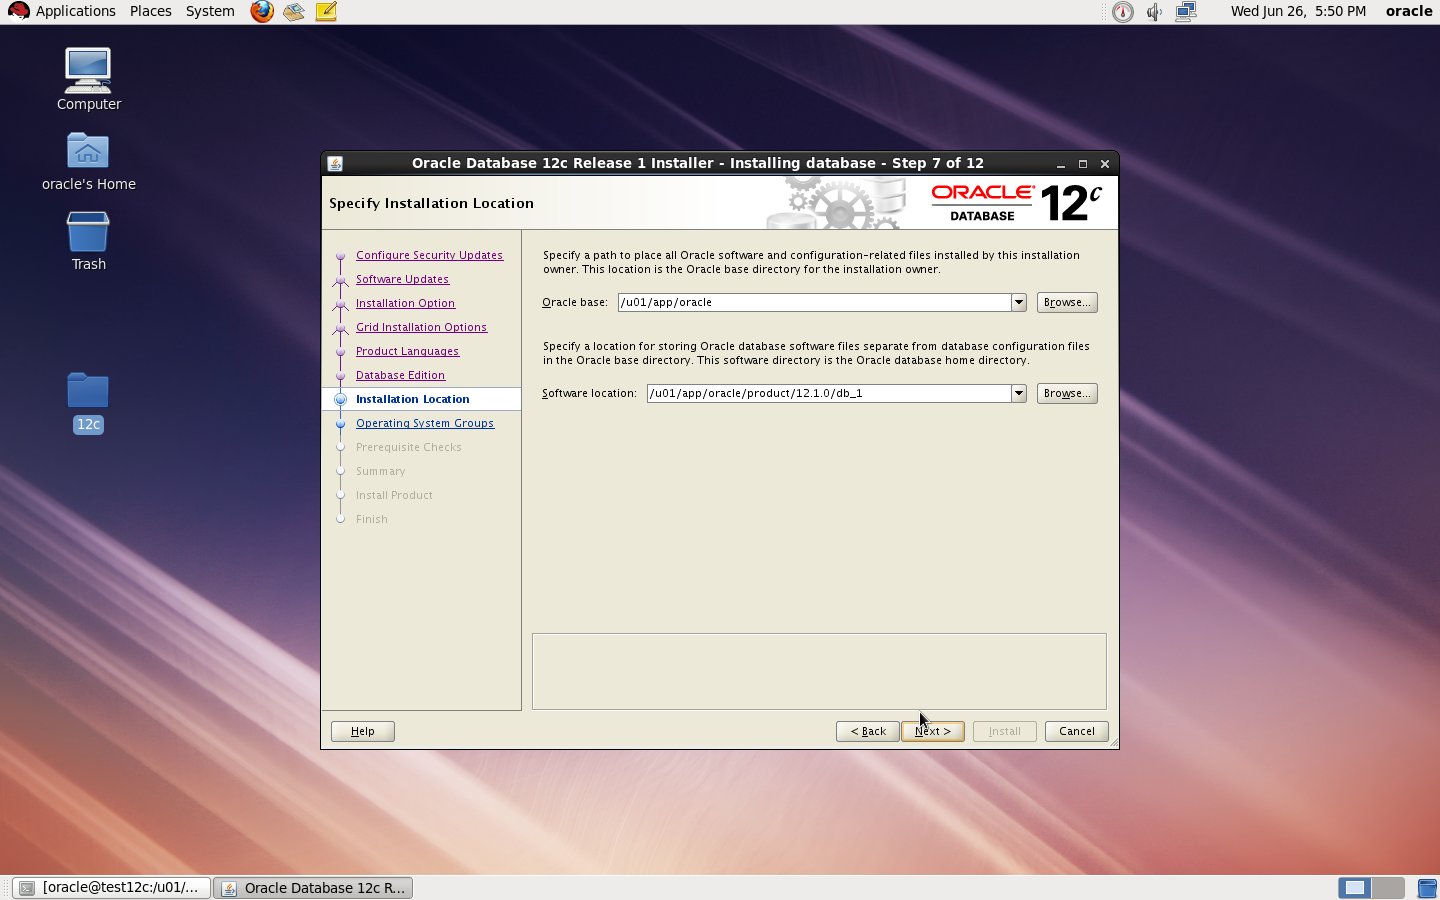
mkdir -p /u01/app/oracle/product/12.1.0/db_1
chown -R oracle:oinstall /u01
chmod -R 775 /u01
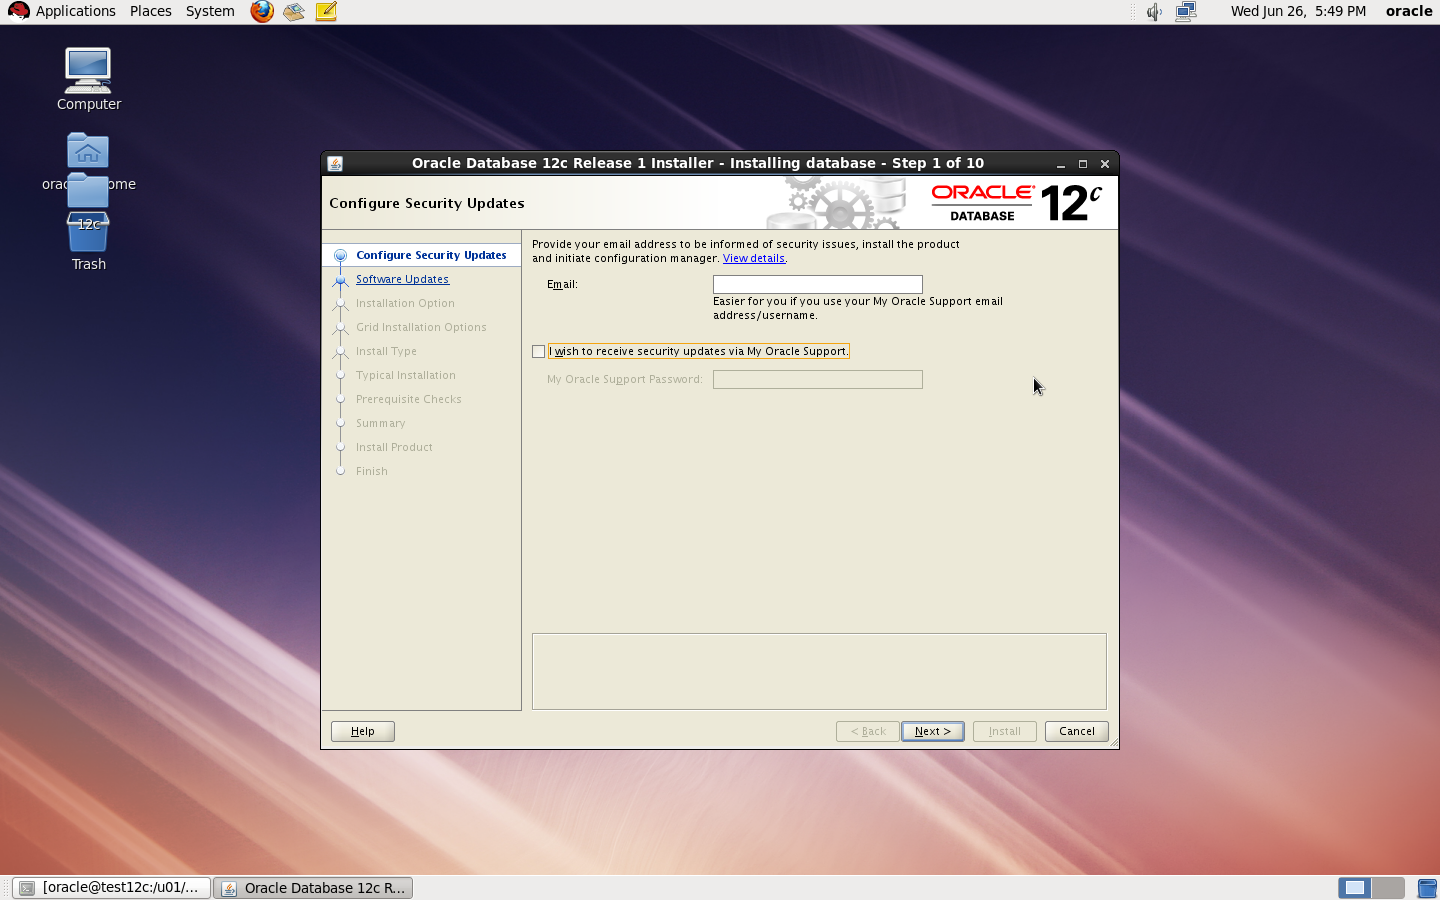
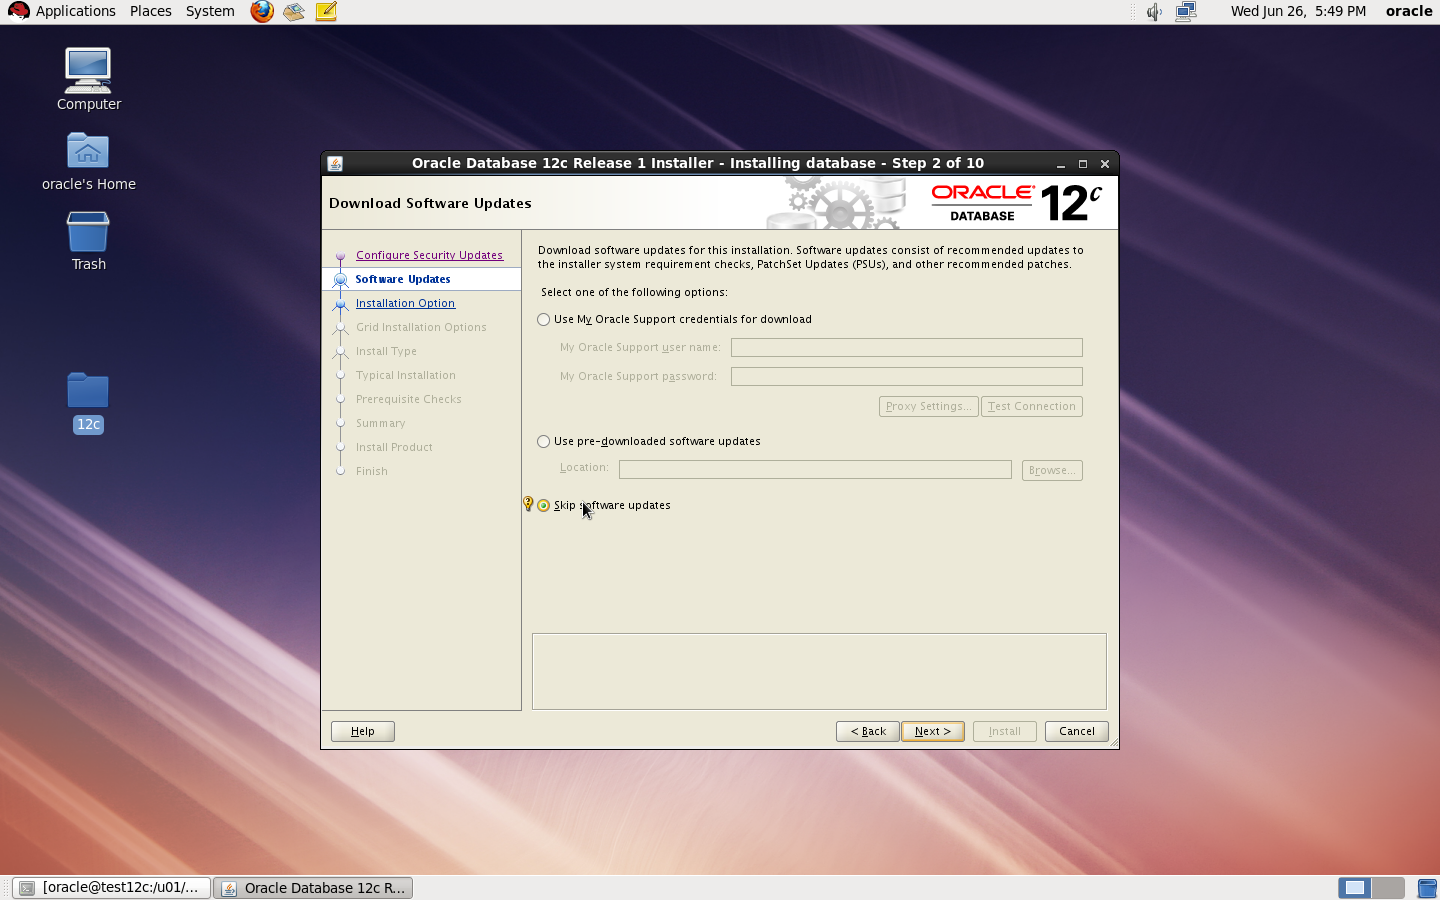
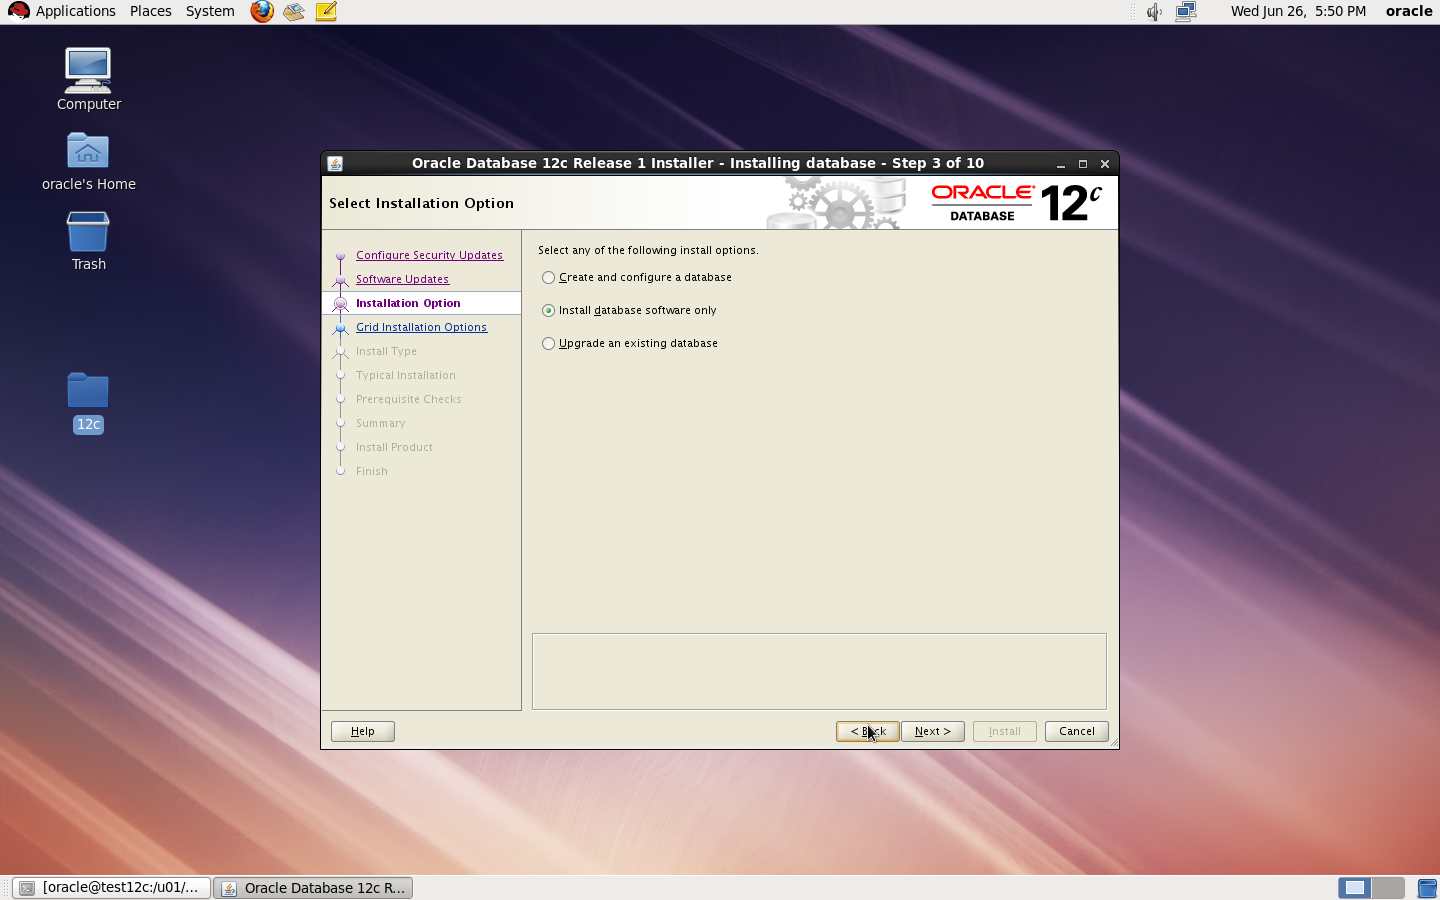
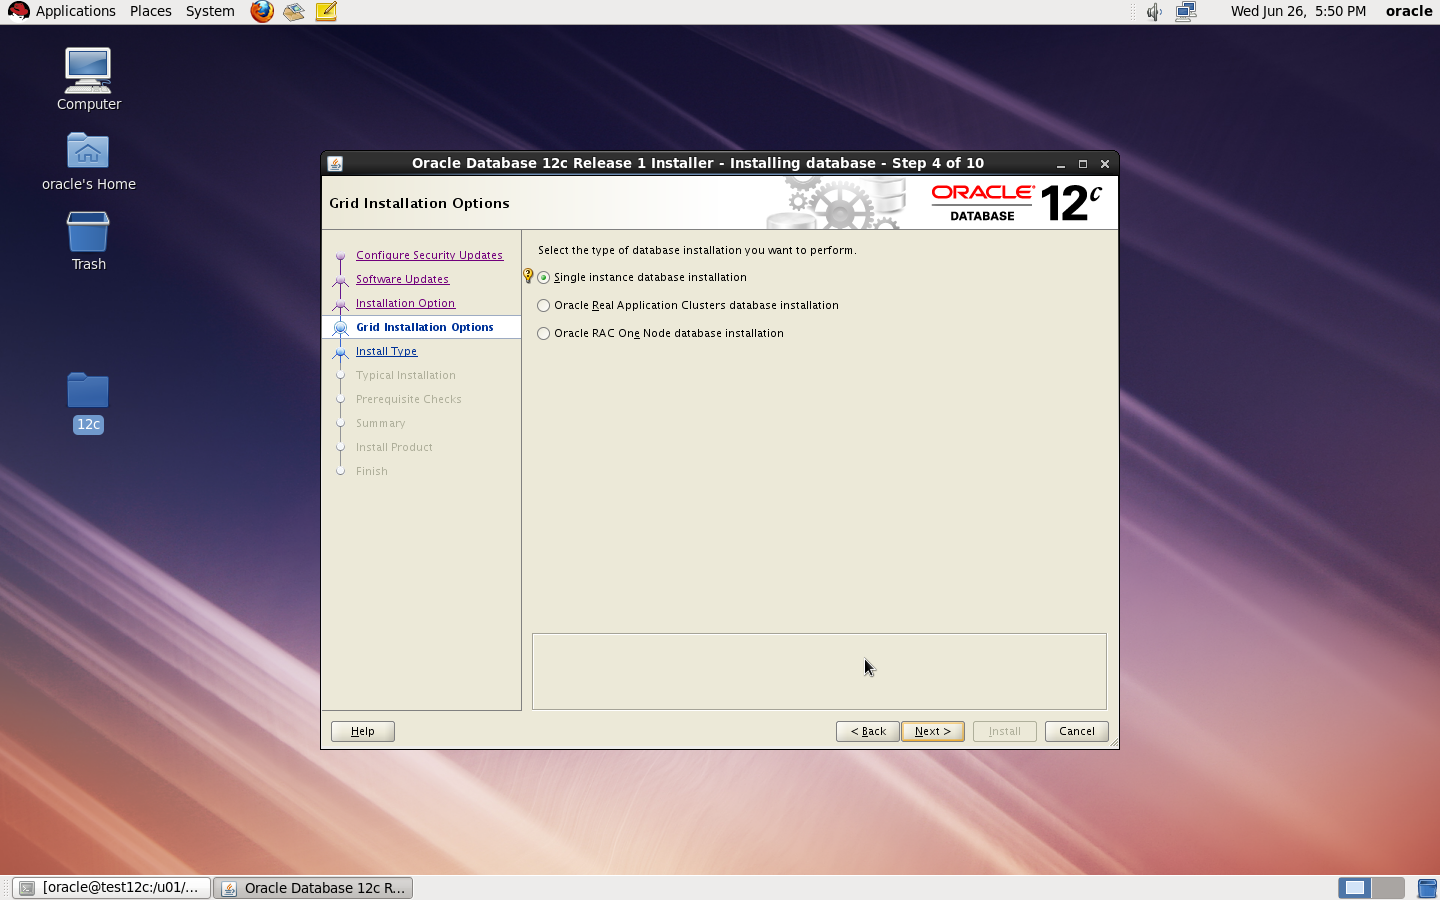
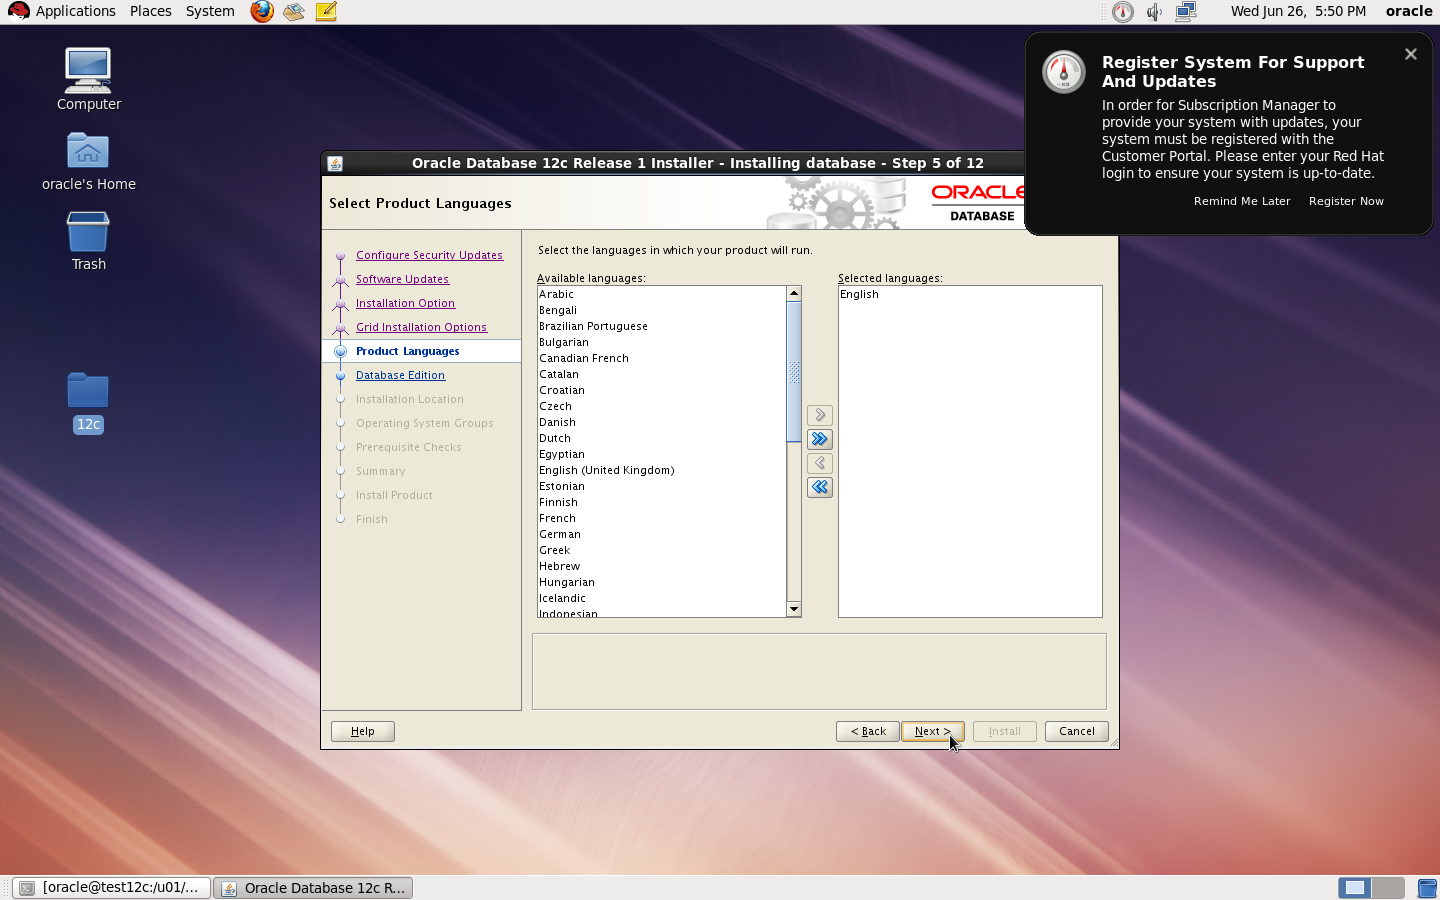
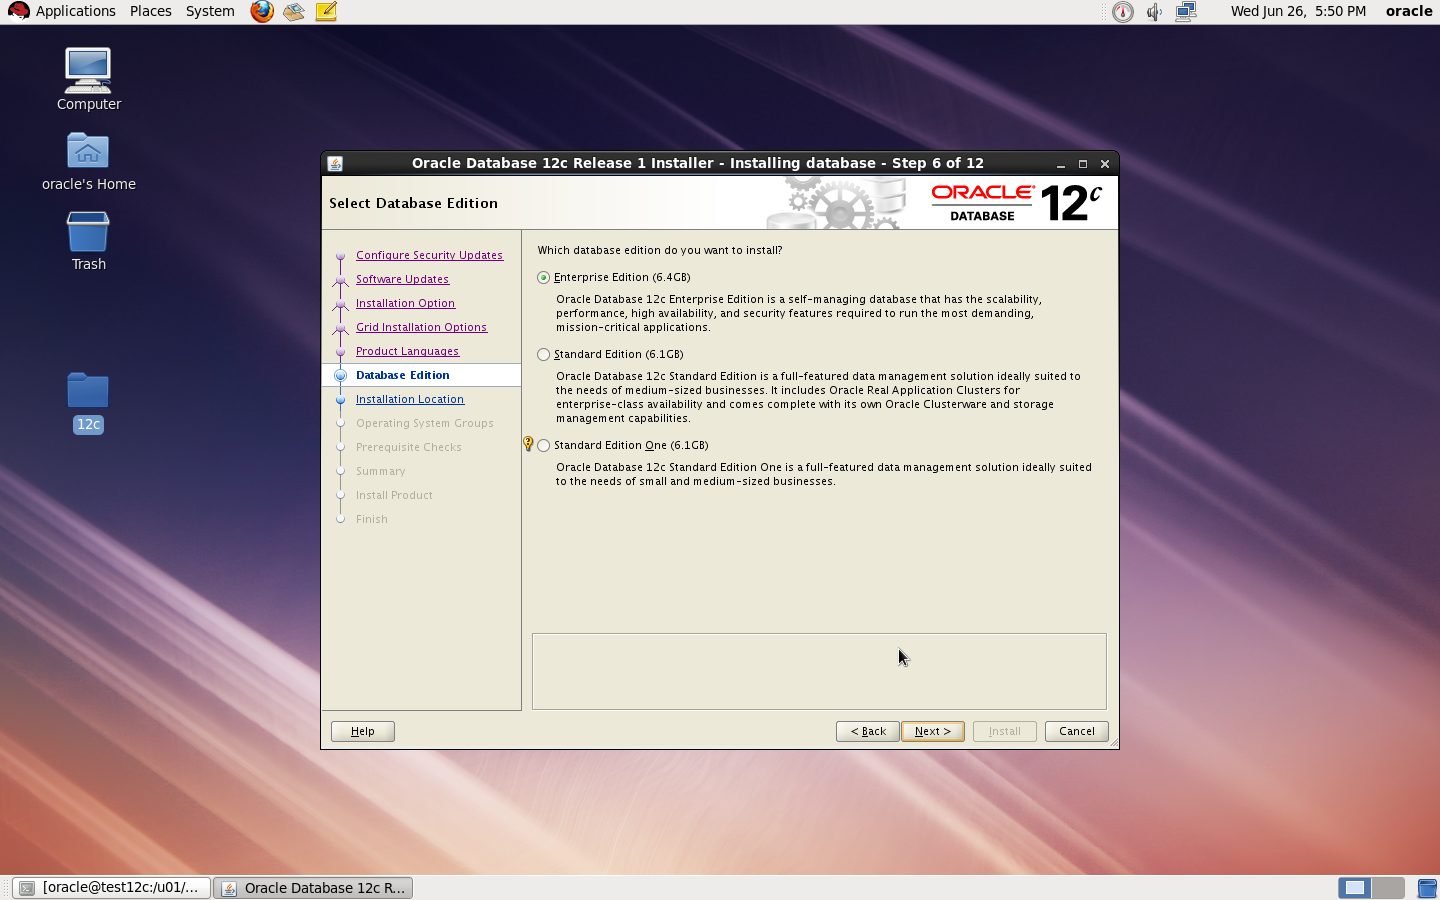
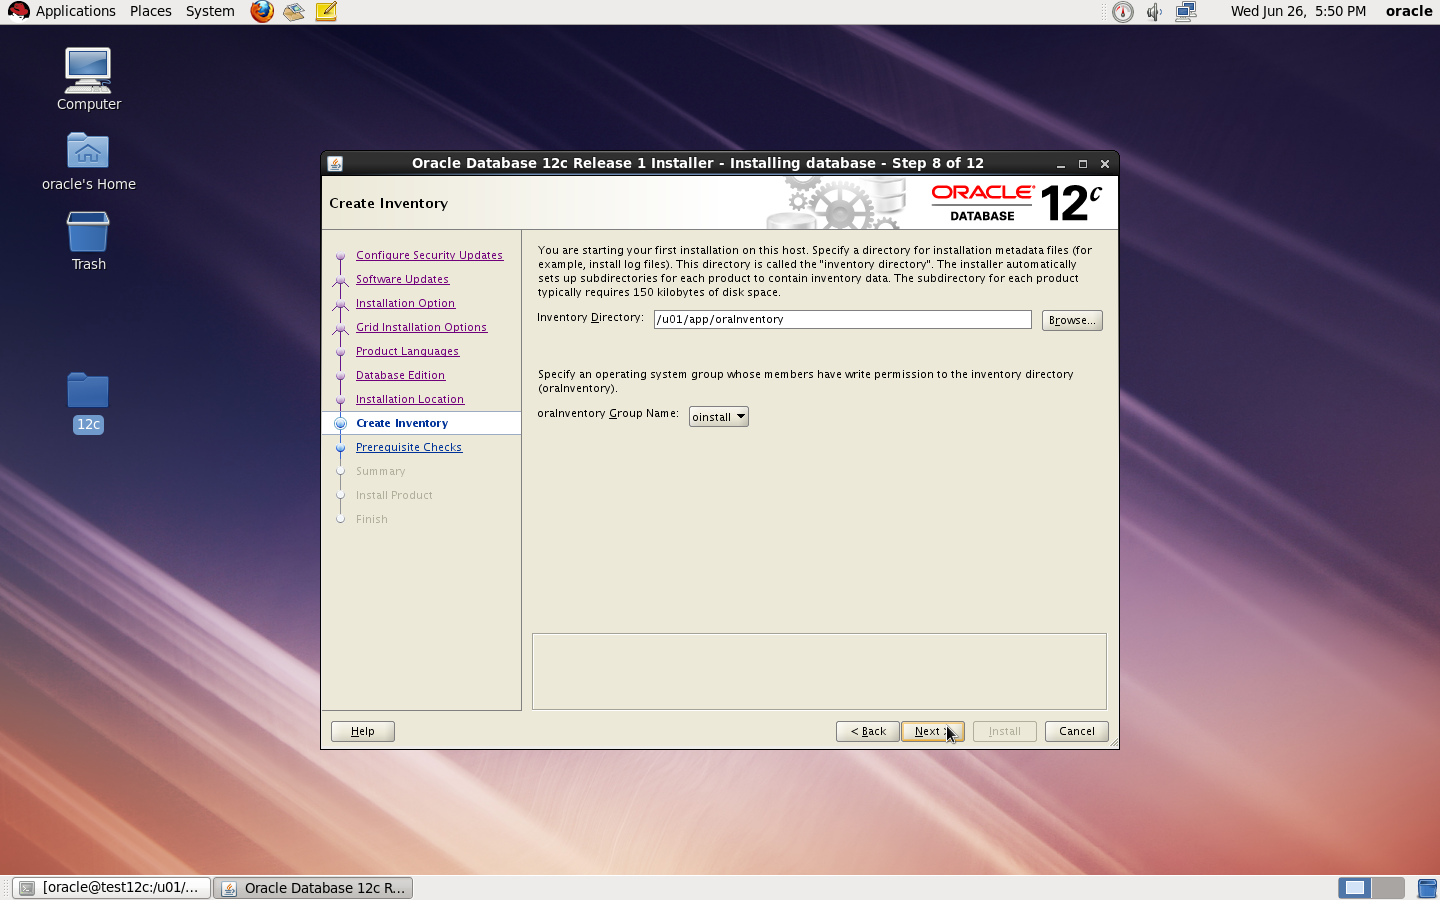
now start installation by ./runInstaller

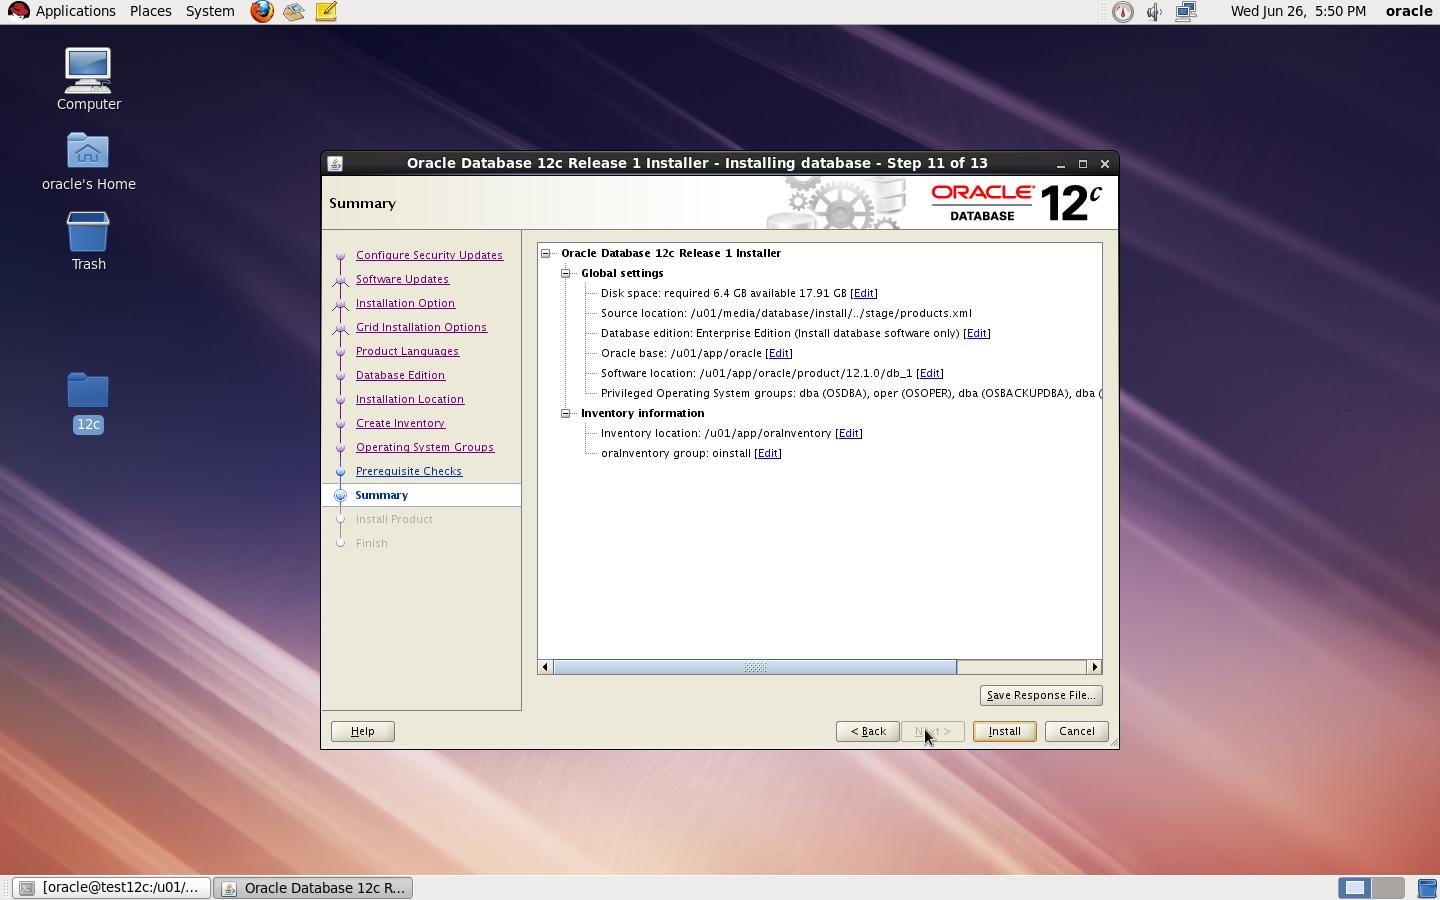
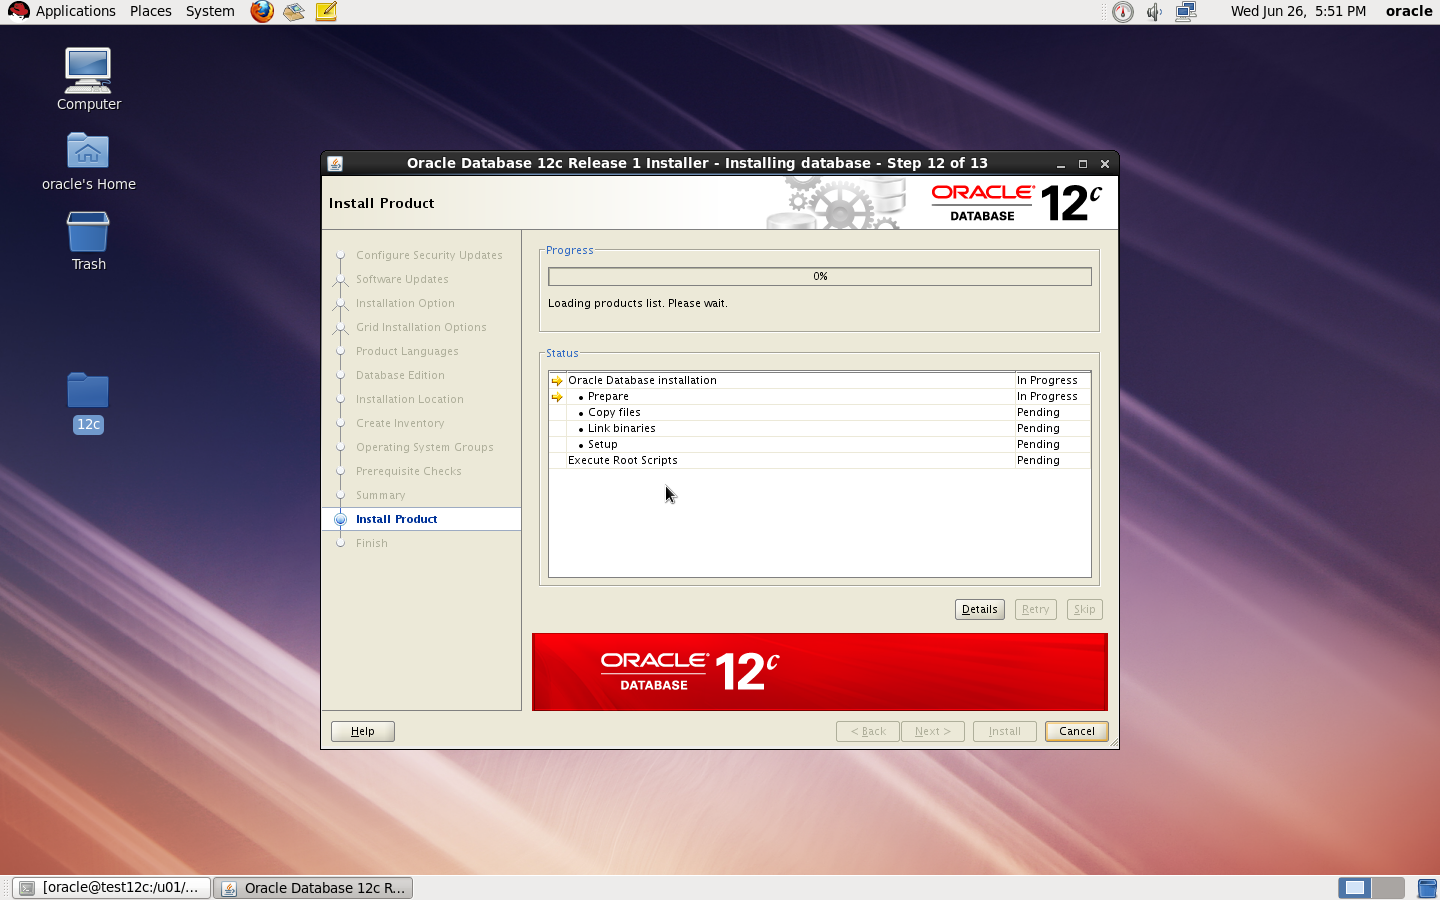
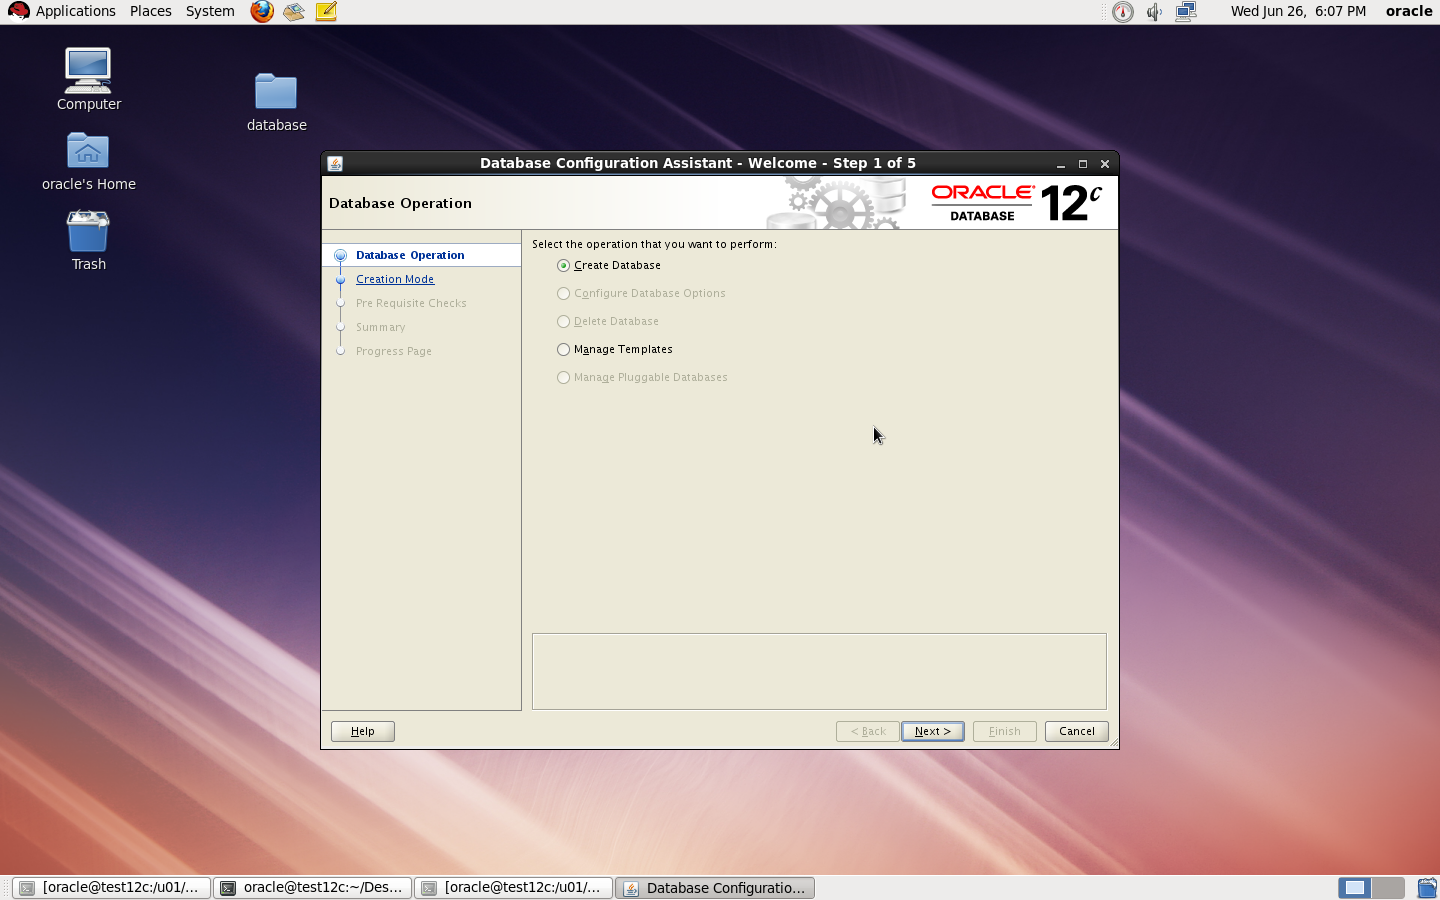
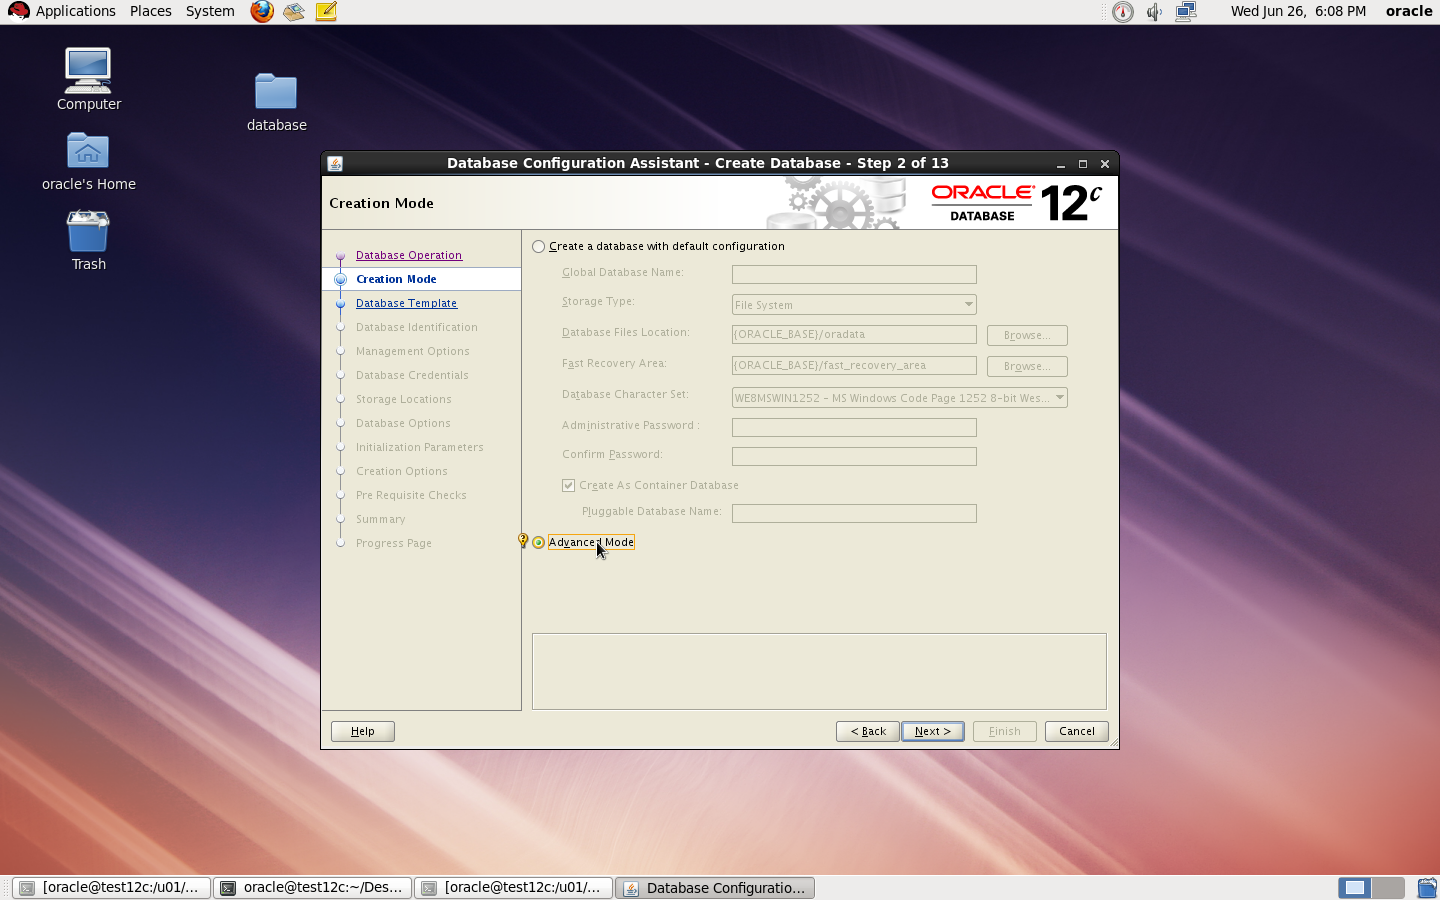
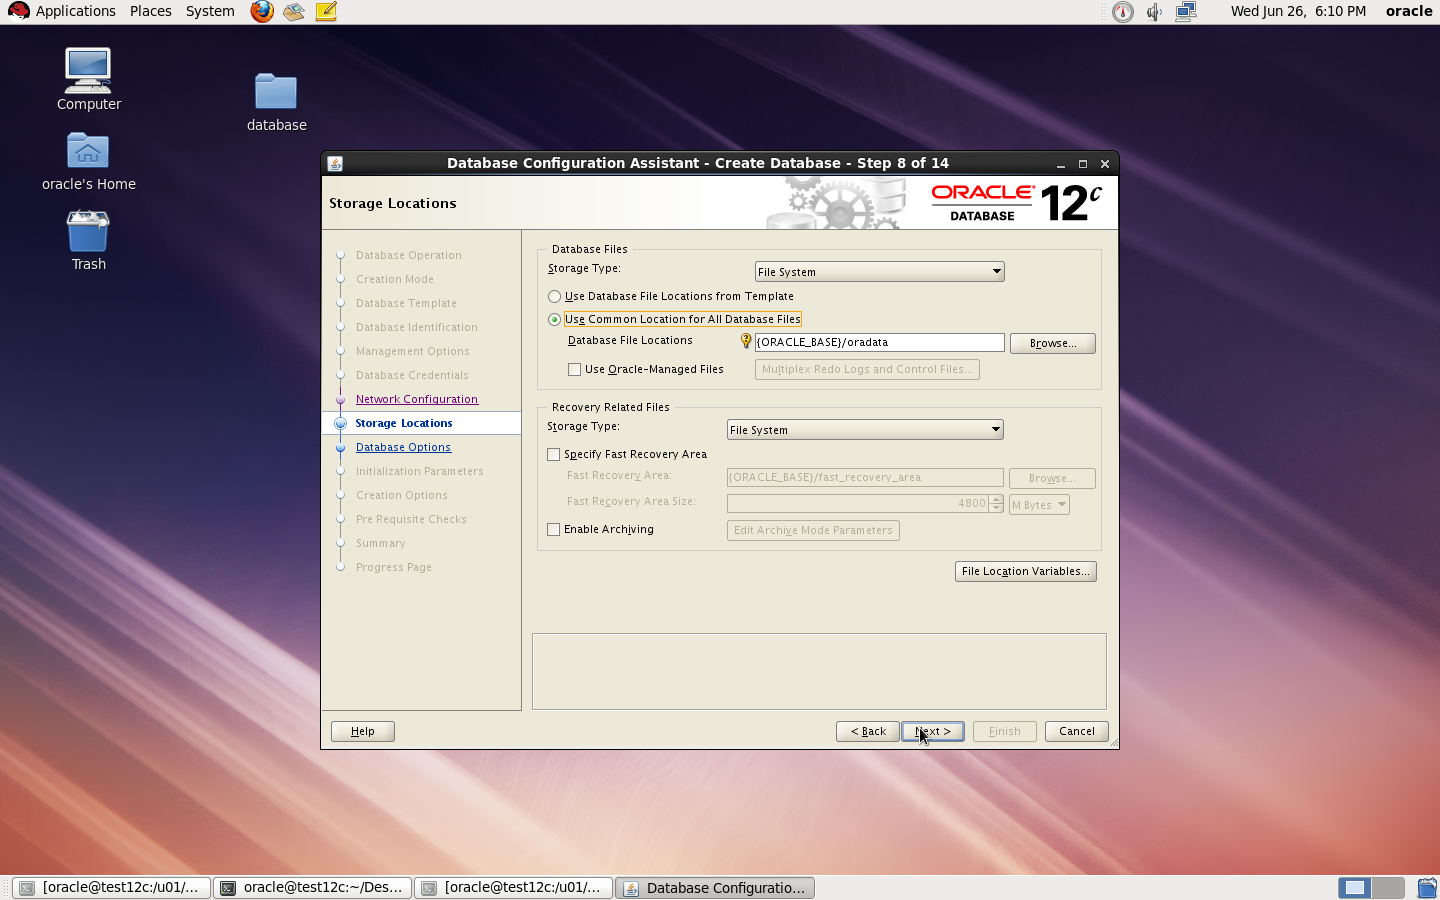
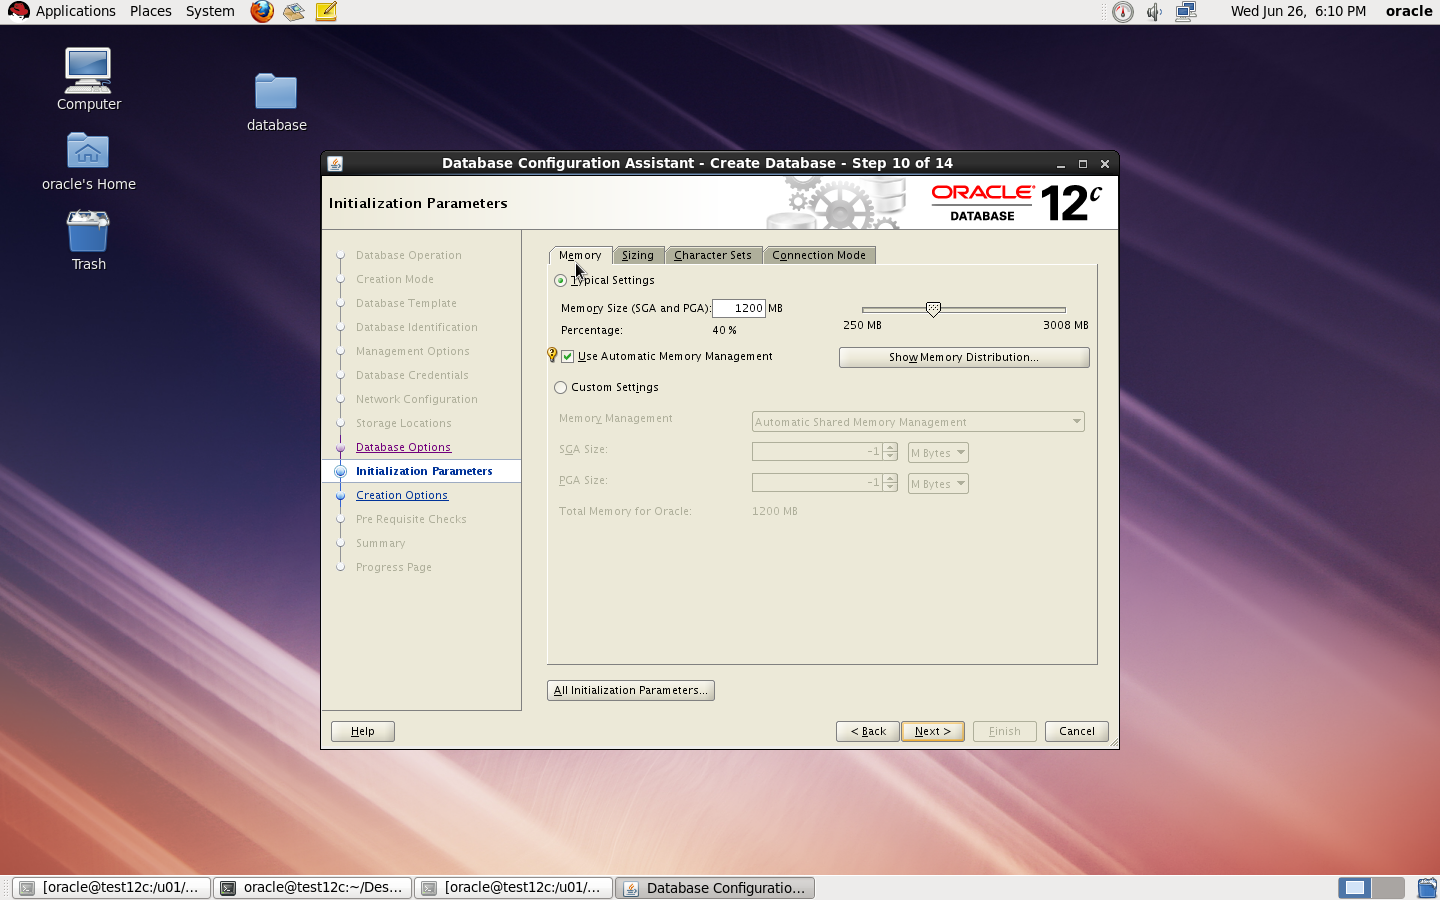
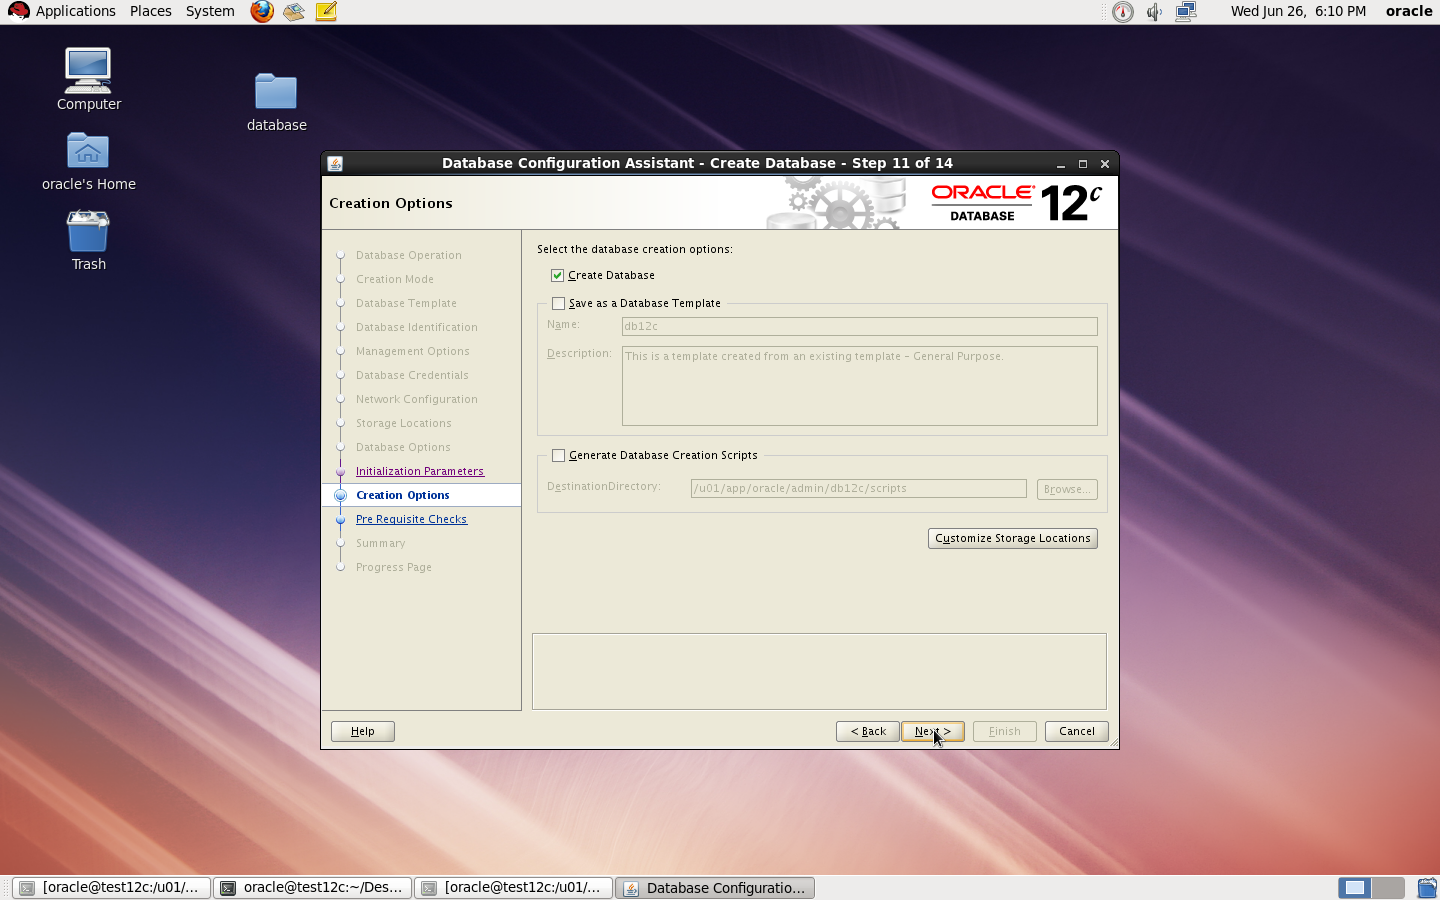
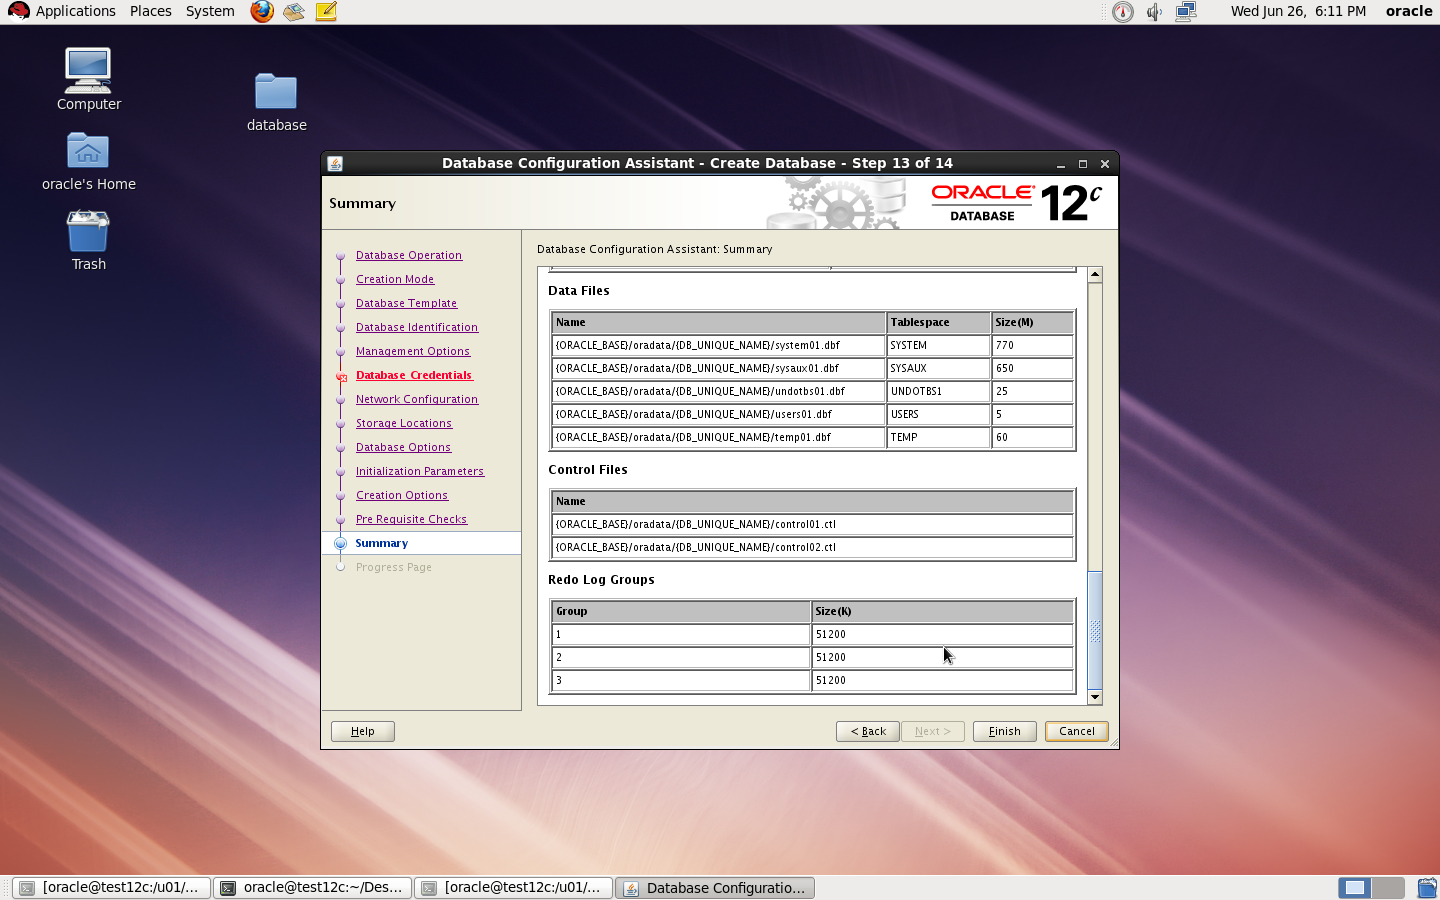
to Create Database you need to configure listener using netca and after finished successfully use dbca like below :


I Upload the article Here
Thank you
Osama mustafa
/u01/app/oracle/product/11.2.0/dbhome_1/sysman/config
under this directory you will work on
