There are three types of cloud storage: object, file, and block. Each storage option has a unique combination of performance, durability, cost, and interface.
Block storage – Enterprise applications like databases or enterprise resource planning (ERP) systems often require dedicated, low-latency storage for each host. This is similar to direct-attached storage (DAS) or a Storage Area Network (SAN). Block-based cloud storage solutions like Amazon Elastic Block Store (Amazon EBS) are provisioned with each virtual server and offer the ultra-low latency required for high-performance workloads.
File storage – Many applications must access shared files and require a file system. This type of storage is often supported with a Network Attached Storage (NAS) server. File storage solutions like Amazon Elastic File System (Amazon EFS) are ideal for use cases such as large content repositories, development environments, media stores, or user home directories.
Object storage – Applications developed in the cloud need the vast scalability and metadata of object storage. Object storage solutions like Amazon Simple Storage Service (Amazon S3) are ideal for building modern applications. Amazon S3 provides scale and flexibility. You can use it to import existing data stores for analytics, backup, or archive.
AWS provides you with services for your block, file and object storage needs. Select each hotspot in the image to see what services are available for you to explore to build solutions.
Amazon S3 use cases
Backup and restore.
Data Lake for analytics.
Media storage
Static website.
Archiving
Buckets and objects
Amazon S3 stores data as objects within buckets. An object is composed of a file and any metadata that describes that file. The diagram below contains a URL comprised of a bucket and an object key. The object key is the unique identifier of an object in a bucket. The combination of a bucket, key, and version ID uniquely identifies each object. The object is uniquely addressed through the combination of the web service endpoint, bucket name, key, and optionally, a version.
To store an object in Amazon S3, upload the file into a bucket. When you upload a file, you can set permissions on the object and add metadata. You can have one or more buckets in your account. For each bucket, you control who can create, delete, and list objects in the bucket.
Amazon S3 access control
By default, all Amazon S3 resources—buckets, objects, and related resources (for example, lifecycle configuration and website configuration)—are private. Only the resource owner, an AWS account that created it, can access the resource. The resource owner can grant access permissions to others by writing access policies.
AWS provides several different tools to help developers configure buckets for a wide variety of workloads.
Most Amazon S3 use cases do not require public access.
Amazon S3 usually stores data from other applications. Public access is not recommended for these types of buckets.
Amazon S3 includes a block public access feature. This acts as an additional layer of protection to prevent accidental exposure of customer data.
Amazon S3 Event Notifications
Amazon S3 event notifications enable you to receive notifications when certain object events happen in your bucket. Here is an example of an event notification workflow to convert images to thumbnails. To learn more, select each of the three hotspots in the diagram below.
Amazon S3 cost factors and best practices
Cost is an important part of choosing the right Amazon S3 storage solution. Some of the Amazon S3 cost factors to consider include the following:
Storage – Per-gigabyte cost to hold your objects. You pay for storing objects in your S3 buckets. The rate you’re charged depends on your objects’ size, how long you stored the objects during the month, and the storage class. There are per-request ingest charges when using PUT, COPY, or lifecycle rules to move data into any S3 storage class.
Requests and retrievals – The number of API calls: PUT and GET requests. You pay for requests made against your S3 buckets and objects. S3 request costs are based on the request type, and are charged on the quantity of requests. When you use the Amazon S3 console to browse your storage, you incur charges for GET, LIST, and other requests that are made to facilitate browsing.
Data transfer – Usually no transfer fee for data-in from the internet and, depending on the requestor location and medium of data transfer, different charges for data-out.
Management and analytics – You pay for the storage management features and analytics that are enabled on your account’s buckets. These features are not discussed in detail in this course.
S3 Replication and S3 Versioning can have a big impact on your AWS bill. These services both create multiple copies of your objects and you pay for each PUT request in addition to the storage tier charge. S3 Cross-Region Replication also requires data transfer between AWS Regions.
Shared file systems
Using a fully managed cloud shared file system solution removes complexities, reduces costs, and simplifies management. To learn more about shared file systems, select each hotspot in the image below.
Amazon Elastic File System (EFS)
Amazon EFS provides a scalable, elastic file system for Linux-based workloads for use with AWS Cloud services and on-premises resources.
You’re able to access your file system across Availability Zones, AWS Regions, and VPCs while sharing files between thousands of EC2 instances and on-premises servers through AWS Direct Connect or AWS VPN.
You can create a file system, mount the file system on an Amazon EC2 instance, and then read and write data to and from your file system.
Amazon EFS provides a shared, persistent layer that allows stateful applications to elastically scale up and down. Examples include DevOps, web serving, web content systems, media processing, machine learning, analytics, search index, and stateful microservices applications. Amazon EFS can support a petabyte-scale file system, and the throughput of the file system also scales with the capacity of the file system.
Because Amazon EFS is serverless, you don’t need to provision or manage the infrastructure or capacity. Amazon EFS file systems can be shared with up to tens of thousands of concurrent clients, no matter the type. These could be traditional EC2 instances, containers running in one of your self-managed clusters or in one of the AWS container services, Amazon ECS, Amazon EKS, and Fargate, or in a serverless function running in Lambda.
Use Amazon EFS to lower your total cost of ownership for shared file storage. Choose Amazon EFS One Zone for data that does not require replication across multiple Availability Zones and save on storage costs. Amazon EFS Standard-Infrequent Access (EFS Standard-IA) and Amazon EFS One Zone-Infrequent Access (EFS One Zone-IA) are storage classes that provide price/performance that is cost-optimized for files not accessed every day.
Use Amazon EFS scaling and automation to save on management costs, and pay only for what you use.
Amazon FSx
With Amazon FSx, you can quickly launch and run feature-rich and high-performing file systems. The service provides you with four file systems to choose from. This choice is based on your familiarity with a given file system or by matching the feature sets, performance profiles, and data management capabilities to your needs.
Amazon FSx for Windows File Server
FSx for Windows File Server provides fully managed Microsoft Windows file servers that are backed by a native Windows file system. Built on Windows Server, Amazon FSx delivers a wide range of administrative features such as data deduplication, end-user file restore, and Microsoft Active Directory.
Amazon FSx for Lustre (FSx for Lustre)
FSx for Lustre is a fully managed service that provides high-performance, cost-effective storage. FSx for Lustre is compatible with the most popular Linux-based AMIs, including Amazon Linux, Amazon Linux 2, Red Hat Enterprise Linux (RHEL), CentOS, SUSE Linux, and Ubuntu.
Amazon FSx for NETapp ONTAP
FSx for NETapp ONTAP provides fully managed shared storage in the AWS Cloud with the popular data access and management capabilities of ONTAP.
Amazon FSx for OpenZFS
Where the road leads, I will go. Along the stark desert, across the wide plains, into the deep forests I will follow the call of the world and embrace its ferocious beauty.
In this post, I will share a Terraform script I developed and uploaded to my GitHub repository, aimed at simplifying and automating the creation of IAM users in AWS. This tool is not just about saving time; it’s about enhancing security, ensuring consistency, and enabling scalability in managing user access to AWS services.
For those who may be new to Terraform, it’s a powerful tool that allows you to build, change, and version infrastructure safely and efficiently. Terraform can manage existing service providers as well as custom in-house solutions. The code I’m about to share represents a practical application of Terraform’s capabilities in the AWS ecosystem.
Whether you are an experienced DevOps professional, a system administrator, or just someone interested in cloud infrastructure management, this post is designed to provide you with valuable insights into automating IAM user creation. Let’s dive into how this Terraform script can streamline your AWS IAM processes, ensuring a more secure and efficient cloud environment.
Welcome to our deep dive into the world of containerization and cloud orchestration! In this blog post, we’re going to explore the innovative realm of AWS ECS Fargate, a game-changer in the world of container management and deployment. AWS ECS Fargate simplifies the process of running containers by eliminating the need to manage servers or clusters, offering a more streamlined and efficient way to deploy your applications.
But that’s not all. We understand the importance of infrastructure as code (IaC) in today’s fast-paced tech environment. That’s why we’re also providing you with a powerful resource – a GitHub repository containing Terraform code, meticulously crafted to help you deploy AWS ECS Fargate services with ease. Terraform, an open-source infrastructure as code software tool, enables you to define and provision a datacenter infrastructure using a declarative configuration language. This integration with Terraform not only automates your deployments but also ensures consistency and reliability in your infrastructure setup.
Whether you’re new to AWS ECS Fargate or looking to enhance your existing knowledge, this post aims to provide you with actionable insights and practical know-how. From setting up your first Fargate service to scaling and managing it effectively, we’ve got you covered. So, gear up as we embark on this journey to harness the full potential of AWS ECS Fargate, supplemented by the power of Terraform automation.
Stay tuned, and don’t forget to check out our GitHub repository linked at the end of this post for the Terraform code that will be your ally in deploying and managing your Fargate services efficiently.
AWS edge computing services provide infrastructure and software that move data processing and analysis as close to the endpoint as necessary. This includes deploying AWS managed hardware and software to locations outside AWS data centers, and even onto customer-owned devices.
You can extend the cloud for a consistent hybrid experience using these AWS edge services related to locations:
AWS edge locations – Edge locations are connected to the AWS Regions through the AWS network backbone. Amazon CloudFront, AWS WAF, and AWS Shield are services you use here.
AWS Local Zones – Local Zones are an extension of the AWS Cloud located close to large population and industry centers. You learned about Local Zones in Module 1: Architecting Fundamentals.
AWS Outposts – With AWS Outposts, you can run some AWS services on premises or at your own data center.
AWS Snow Family – The Snow Family of products provides offline storage at the edge, which is used to deliver data back to AWS Regions.
Edge services architecture
Review the edge services architecture. A user sends a request to an application partly hosted on premises. The user’s request interacts with Amazon Route 53, AWS WAF, Amazon CloudFront and AWS Outposts. The AWS services hosted in the cloud are protected with AWS Shield.
Amazon Route 53
Amazon Route 53 provides a DNS, domain name registration, and health-checks. Route 53 was designed to give developers and businesses a reliable and cost-effective way to route end users to internet applications. It translates names like example.com into the numeric IP addresses that computers use to connect to each other.
Route 53 effectively connects user requests to infrastructure running in AWS—such as EC2 instances, ELB load balancers, or Amazon S3 buckets—and can also be used to route users to infrastructure outside of AWS.
You can configure a Amazon CloudWatch alarm to check on the state of your endpoints. Combine your DNS with Health Check Metrics to monitor and route traffic to healthy endpoints.
Amazon Route 53 public and private DNS
A hosted zone is a container for records. Records contain information about how you want to route traffic for a specific domain, such as example.com, and its subdomains such as dev.example.com or mail.example.com. A hosted zone and the corresponding domain have the same name.
PUBLIC HOSTED ZONE
Public hosted zones contain records that specify how you want to route traffic on the internet.
For internet name resolution
Delegation set – for authoritative name servers to be provided to the registrar or parent domain
Route to internet-facing resources
Resolve from the internet
Global routing policies
PRIVATE HOSTED ZONE
Private hosted zones contain records that specify how you want to route traffic in your Amazon VPC.
For name resolution inside a VPC
Can be associated with multiple VPCs and across accounts
Route to VPC resources
Resolve from inside the VPC
Integrate with on-premises private zones using forwarding rules and endpoints
Routing policies
When you create a record, you choose a routing policy, which determines how Amazon Route 53 responds to queries.
Failover routing
Amazon Route 53 health checks monitor the health and performance of your web applications, web servers, and other resources.
Each health check that you create can monitor one of the following:
The health of a specified resource, such as a web server
The status of other health checks
The status of an Amazon CloudWatch alarm
After you create a health check, you can get the status of the health check, get notifications when the status changes, and configure DNS failover.
Geolocation routing
Geolocation routing lets you choose the resources that serve your traffic based on the geographic location of your users, meaning the location that DNS queries originate from. For example, you might want all queries from Europe to be routed to an ELB load balancer in the Frankfurt Region.
Geoproximity routing
Geoproximity routing lets Amazon Route 53 route traffic to your resources based on the geographic location of your users and your resources. You can also optionally choose to route more traffic or less to a given resource by specifying a value, known as a bias. A bias expands or shrinks the size of the geographic Region from which traffic is routed to a resource.
Latency-based routing
If your application is hosted in multiple AWS Regions, you can improve performance for your users by serving their requests from the AWS Region that provides the lowest latency.
Data about the latency between users and your resources is based entirely on traffic between users and AWS data centers. If you aren’t using resources in an AWS Region, the actual latency between your users and your resources can vary significantly from AWS latency data. This is true even if your resources are located in the same city as an AWS Region.
Multivalue answer routing
Multivalue answer routing lets you configure Route 53 to return multiple values, such as IP addresses for your web servers, in response to DNS queries. You can specify multiple values for almost any record, but multivalue answer routing also lets you check the health of each resource. Route 53 returns only values for healthy resources.
The ability to return multiple health-checkable IP addresses is a way for you to use DNS to improve availability and load balancing. However, it is not a substitute for a load balancer.
Weighted routing
Weighted routing enables you to assign weights to a resource record set to specify the frequency with which different responses are served.
In this example of a blue/green deployment, a weighted routing policy is used to send a small amount of traffic to a new production environment. If the new environment is operating as intended, the amount of weighted traffic can be increased to confirm it can handle the increased load. If the test is successful, all traffic can be sent to the new environment.
Amazon CloudFront
Content delivery networks
It’s not always possible to replicate your entire infrastructure across the globe when your web traffic is geo-dispersed. It is also not cost effective. With a content delivery network (CDN), you can use its global network of edge locations to deliver a cached copy of your web content to your customers.
To reduce response time, the CDN uses the nearest edge location to the customer or the originating request location. Using the nearest edge location dramatically increases throughput because the web assets are delivered from cache. For dynamic data, you can configure many CDNs to retrieve data from the origin servers.
Use Regional edge caches when you have content that is not accessed frequently enough to remain in an edge location. Regional edge caches absorb this content and provide an alternative to having to retrieve that content from the origin server.
Edge caching
Edge caching helps applications perform dramatically faster and cost significantly less at scale. Review the content below to learn the benefits of edge caching.
WITHOUT EDGE CACHING
As an example, let’s say you are serving an image from a traditional web server, not from Amazon CloudFront. You might serve an image named sunsetphoto.png using the URL:
Your users can easily navigate to this URL and see the image. They don’t realize that their request was routed from one network to another (through the complex collection of interconnected networks that comprise the internet) until the image was found.
WITH EDGE CACHING
Amazon CloudFront speeds up the distribution of your content by routing each user request through the AWS backbone network to the edge location that can best serve your content. Typically, this is a CloudFront edge server that provides the fastest delivery to the viewer.
Using the AWS network can dramatically reduce the number of networks your users’ requests must pass through, which improves performance. Users get lower latency (the time it takes to load the first byte of the file) and higher data transfer rates.
You also get increased reliability and availability because copies of your files (also called objects) are now held (or cached) in multiple edge locations around the world.
Amazon CloudFront
Amazon CloudFront is a global CDN service that accelerates delivery of your websites, APIs, video content, or other web assets. It integrates with other AWS products to give developers and businesses a straightforward way to accelerate content to end users. There are no minimum usage commitments.
Amazon CloudFront provides extensive flexibility for optimizing cache behavior, coupled with network-layer optimizations for latency and throughput. The CDN offers a multi-tier cache by default, with regional edge caches that improve latency and lower the load on your origin servers when the object is not already cached at the edge.
Amazon CloudFront supports real-time, bidirectional communication over the WebSocket protocol. This persistent connection permits clients and servers to send real-time data to one another without the overhead of repeatedly opening connections. This is especially useful for communications applications such as chat, collaboration, gaming, and financial trading.
Support for WebSockets in Amazon CloudFront makes it possible for customers to manage WebSocket traffic through the same avenues as any other dynamic and static content. With CloudFront, customers can take advantage of distributed denial of service (DDoS) protection using the built-in CloudFront integrations with Shield and AWS WAF.
Amazon CloudFront caching
When a user requests content that you are serving with Amazon CloudFront, the user is routed to the edge location that provides the lowest latency. Content is delivered with the best possible performance. To review the steps for CloudFront caching, select each hotspot in the image below.
Improving CloudFront performance
WHAT AWS DOES
AWS provides features that improve the performance of your content delivery:
TCP optimization – CloudFront uses TCP optimization to observe how fast a network is already delivering your traffic and the latency of your current round trips. It then uses that data as input to automatically improve performance.
TLS 1.3 support – CloudFront supports TLS 1.3, which provides better performance with a simpler handshake process that requires fewer round trips. It also adds improved security features.
Dynamic content placement – Serve dynamic content, such as web applications or APIs from ELB load balancers or Amazon EC2 instances, by using CloudFront. You can improve the performance, availability, and security of your content.
You can also adjust the configuration of your CloudFront distribution to accommodate for better performance:
Define your caching strategy – Choosing an appropriate TTL is important. In addition, consider caching based on things like query string parameters, cookies, or request headers.
Improve your cache hit ratio – You can view the percentage of viewer requests that are hits, misses, and errors in the CloudFront console. Make changes to your distribution based on statistics collected in the CloudFront cache statistics report.
Use Origin Shield – Get an additional layer of caching between the regional edge caches and your origin. It is not always a best fit for your use case, but it can be beneficial for viewers that are spread across geographic regions or on-premises origins with capacity or bandwidth constraints.
DDoS Protection
A DDoS attack is an attack in which multiple compromised systems attempt to flood a target, such as a network or web application, with traffic. A DDoS attack can prevent legitimate users from accessing a service and can cause the system to crash due to the overwhelming traffic volume.
OSI layer attacks
In general, DDoS attacks can be segregated by which layer of the OSI model they attack. They are most common at the Network (layer 3), Transport (Layer 4), Presentation (Layer 6) and Application (Layer 7) Layers.
Infrastructure Layer Attacks – Attacks at Layer 3 and 4, are typically categorized as Infrastructure layer attacks. These are also the most common type of DDoS attack and include vectors like synchronized (SYN) floods and other reflection attacks like User Datagram Packet (UDP) floods. These attacks are usually large in volume and aim to overload the capacity of the network or the application servers. But fortunately, these are also the type of attacks that have clear signatures and are easier to detect.
Application Layer Attacks – An attacker may target the application itself by using a layer 7 or application layer attack. In these attacks, similar to SYN flood infrastructure attacks, the attacker attempts to overload specific functions of an application to make the application unavailable or extremely unresponsive to legitimate users.
AWS Solutions
AWS Shield Standard, AWS Web Application Firewall (WAF), and AWS Firewall Manager are AWS services that protect architectures against web-based attacks. Review the section below to learn more about each of these AWS services.
AWS Shield
AWS Shield is a managed DDoS protection service that safeguards your applications running on AWS. It provides you with dynamic detection and automatic inline mitigations that minimize application downtime and latency. There are two tiers of AWS Shield: Shield Standard and Shield Advanced.
AWS Shield Standard provides you protection against some of the most common and frequently occurring infrastructure (Layer 3 and 4) attacks. This includes SYN/UDP floods and reflection attacks. Shield Standard improves availability of your applications on AWS. The service applies a combination of traffic signatures, anomaly algorithms, and other analysis techniques. Shield Standard detects malicious traffic and it provides real-time issue mitigation. You are protected by Shield Standard at no additional charge.
If you need even more protection from DDoS attacks on your applications, consider using Shield Advanced. You get additional detection and mitigation against large and sophisticated DDoS attacks, near real-time visibility, and integration with AWS WAF, a web application firewall.
AWS Web Application Firewall (WAF)
AWS WAF is a web application firewall that helps protect your web applications or APIs against common web exploits and bots. AWS WAF gives you control over how traffic reaches your applications. Create security rules that control bot traffic and block common attack patterns, such as SQL injection (SQLi) or cross-site scripting (XSS). You can also monitor HTTP(S) requests that are forwarded to your compatible AWS services.
AWS WAF: Components of access control
Before configuring AWS WAF, you should understand the components used to control access to your AWS resources.
Web ACLs – You use a web ACL to protect a set of AWS resources. You create a web ACL and define its protection strategy by adding rules.
Rules – Each rule contains a statement that defines the inspection criteria and an action to take if a web request meets the criteria.
Rules groups – You can use rules individually or in reusable rule groups.
Rule statements – This is the part of a rule that tells AWS WAF how to inspect a web request.
IP set – This is a collection of IP addresses and IP address ranges that you want to use together in a rule statement.
Regex pattern set – This is a collection of regular expressions that you want to use together in a rule statement.
AWS Firewall Manager
AWS Firewall Manager simplifies your AWS WAF and Amazon VPC security groups administration and maintenance tasks. Set up your AWS WAF firewall rules, Shield protections, and Amazon VPC security groups once.
The service automatically applies the rules and protections across your accounts and resources, even as you add new resources. Firewall Manager helps you to:
Simplify management of rules across accounts and application.
Automatically discover new accounts and remediate noncompliant events.
Deploy AWS WAF rules from AWS Marketplace.
Enable rapid response to attacks across all accounts.
As new applications are created, Firewall Manager also facilitates bringing new applications and resources into compliance with a common set of security rules from day one. Now you have a single service to build firewall rules, create security policies, and enforce them in a consistent, hierarchical manner across your entire AWS infrastructure.
AWS Outposts solutions
These applications might need to generate near-real-time responses to end-user applications, or they might need to communicate with other on-premises systems or control on-site equipment. Examples include workloads running on factory floors for automated operations in manufacturing, real-time patient diagnosis or medical imaging, and content and media streaming.
You need a solution to securely store and process customer data that must remain on premises or in countries outside an AWS Region. You need to run data-intensive workloads and process data locally, or when you want closer controls on data analysis, backup, and restore.
With Outposts, you can extend the AWS Cloud to an on-premises data center. Outposts come in different form factors, each with separate requirements. Verify that your site meets the requirements for the form factor that you’re ordering.
The AWS Outposts family is made up of two types of Outposts: Outposts racks and Outposts servers. Choose each tab to learn more about the Outposts family products.
OUTPOSTS RACKS
When you order an Outposts rack, you can choose from a variety of Outposts configurations. Each configuration provides a mix of EC2 instance types and Amazon Elastic Block Store (Amazon EBS) volumes.
The benefits of Outposts racks include the following:
Scale up to 96 42U–standard racks.
Pool compute and storage capacity between multiple Outposts racks.
Get more service options than Outposts servers.
To fulfill the Outposts rack order, AWS will schedule a date and time with you. You will also receive a checklist of items to verify or provide before the installation. The team will roll the rack to the identified position, and your electrician can power the rack. The team will establish network connectivity for the rack over the uplink that you provide, and they will configure the rack’s capacity.
The installation is complete when you confirm that the Amazon EC2 and Amazon EBS capacity for your AWS Outpost is available from your AWS account.
OUTPOSTS SERVERS
With Outposts servers, you can order hardware at a smaller scale while still providing you AWS services on premises. You can choose from Arm-based or Intel-based options. Not all services available in Outposts racks are supported in Outposts servers.
Outposts servers are delivered directly to you and installed by either your own onsite personnel or a third-party vendor. Once connected to your network, AWS will remotely provision compute and storage resources.
Benefits of Outposts servers include the following:
Place in your own rack
Choose from:
1U Graviton-based processor
2U Intel Xeon Scalable processor
Outposts extend your VPC
A virtual private cloud (VPC) spans all Availability Zones in its AWS Region. You can extend any VPC in the Region to your Outpost by adding an Outpost subnet.
Outposts support multiple subnets. You choose the EC2 instance subnet when you launch the EC2 instance in your Outpost. You cannot choose the underlying hardware where the instance is deployed, because the Outpost is a pool of AWS compute and storage capacity.
Each Outpost can support multiple VPCs that can have one or more Outpost subnets.
You create Outpost subnets from the VPC CIDR range where you created the Outpost. You can use the Outpost address ranges for resources, such as EC2 instances that reside in the Outpost subnet. AWS does not directly advertise the VPC CIDR, or the Outpost subnet range to your on-premises location.
It’s common for modern cloud applications to be composed of many services and components. As applications grow, an increasing amount of code needs to be written to coordinate the interaction of all components. With AWS Step Functions, you can focus on defining the component interactions, rather than writing all the software to make the interactions work.
AWS Step Functions integrates with the AWS services listed below. You can directly call API actions from the Amazon States Language in AWS Step Functions and pass parameters to the APIs of these services:
Data processing and analytics services (Amazon Athena, AWS Batch, AWS Glue, Amazon EMR, and AWS Glue DataBrew)
Machine learning services (Amazon SageMaker)
APIs created by API Gateway
You can configure your AWS Step Functions workflow to call other AWS services using AWS Step Functions service tasks.
Step Functions: State machine
A state machine is an object that has a set number of operating conditions that depend on its previous condition to determine output.
A common example of a state machine is the soda vending machine. The machine starts in the operating state (waiting for a transaction), and then moves to soda selection when money is added. After that, it enters a vending state, where the soda is deployed to the customer. After completion, the state returns back to operating.
Build workflows using state types
States are elements in your state machine. A state is referred to by its name, which can be any string, but must be unique within the scope of the entire state machine.
States can perform a variety of functions in your state machine:
Do some work in your state machine (a Task state)
Make a choice between different branches to run (a Choice state)
Stop with a failure or success (a Fail or Succeed state)
Pass its input to its output or inject some fixed data (a Pass state)
Provide a delay for a certain amount of time or until a specified time or date (a Wait state)
Begin parallel branches (a Parallel state)
Dynamically iterate steps (a Map state)
Orchestration of complex distributed workflows
Express Workflows are ideal for high-volume, event-processing workloads such as IoT data ingestion, streaming data processing and transformation, and mobile application backends. They can run for up to 5 minutes. Express Workflows employ an at-least-once model, where there is a possibility that a code might be run more than once. This makes them ideal for orchestrating idempotent actions such as transforming input data and storing using PUT in DynamoDB. Express Workflow executions are billed by the number of executions, the duration of execution, and the memory consumed.
Collect, process, and analyze data streams in real time. Kinesis has the capacity to process streaming data at any scale. It provides you the flexibility to choose the tools that best suit the requirements of your application in a cost-effective way.
Ingest real-time data such as video, audio, application logs, website clickstreams, and Internet of Things (IoT) telemetry data. The ingested data can be used for machine learning, analytics, and other applications.
Can process and analyze data as it arrives, and respond instantly. You don’t have to wait until all data is collected before the processing begins.
Amazon Kinesis Data Streams
To get started using Amazon Kinesis Data Streams, create a stream and specify the number of shards. Each shard is a unit of read and write capacity. Each shard can read up to 1 MB of data per second and write at a rate of 2 MB per second. The total capacity of a stream is the sum of the capacities of its shards. Increase or decrease the number of shards in a stream as needed. Data being written is in the form of a record, which can be up to 1 MB in size.
Producers write data into the stream. A producer might be an Amazon EC2 instance, a mobile client, an on-premises server, or an IoT device.
Consumers receive the streaming data that the producers generate. A consumer might be an application running on an EC2 instance or AWS Lambda. If it’s on an Amazon EC2 instance, the application will need to scale as the amount of streaming data increases. If this is the case, run it in an Auto Scaling group.
Each consumer reads from a particular shard. There might be more than one application processing the same data.
Another way to write a consumer application is to use AWS Lambda, which lets you run code without having to provision or manage servers.
The results of the consumer applications can be stored by AWS services such as Amazon S3, Amazon DynamoDB, and Amazon RedShift.
Amazon Kinesis Data Firehose
Amazon Kinesis Data Firehose starts to process data in near-real time. Kinesis Data Firehose can send records to Amazon S3, Amazon Redshift, Amazon Elasticsearch Service (ES), and any HTTP endpoint owned by you. It can also send records to any of your third-party service providers, including Datadog, New Relic, and Splunk.
Amazon Simple Queue Service (SQS) is a fully managed message queuing service that use use to you to decouple and scale microservices, distributed systems, and serverless applications The service works on a massive scale, processing billions of messages per day. It stores all message queues and messages within a single, highly available AWS Region with multiple redundant Availability Zones. This ensures that no single computer, network, or Availability Zone failure can make messages inaccessible. Messages can be sent and read simultaneously.
A loosely coupled workload involves processing a large number of smaller jobs. The loss of one node or job in a loosely coupled workload usually doesn’t delay the entire calculation. The lost work can be picked up later or omitted altogether.
With Amazon SQS, you can decouple pre-processing steps from compute steps and post-processing steps. Building applications from individual components that perform discrete functions improves scalability and reliability. Decoupling components is a best practice for designing modern applications. Amazon SQS frequently lies at the heart of cloud-native loosely coupled solutions.
SQS queue types
Amazon SQS offers two types of message queues
STANDARD QUEUES
Standard queues support at-least-once message delivery and provide best-effort ordering. Messages are generally delivered in the same order in which they are sent. However, because of the highly distributed architecture, more than one copy of a message might be delivered out of order. Standard queues can handle a nearly unlimited number of API calls per second. You can use standard message queues if your application can process messages that arrive repetitively and out of order.
FIFO QUEUES
FIFO (First-In-First-Out) queues are designed to enhance messaging between applications when the order of operations and events is critical or where duplicates can’t be tolerated. FIFO queues also provide exactly-once processing but have a limited number of API calls per second. FIFO queues are designed to enhance messaging between applications when the order of operations and events is critical.
Optimizing your Amazon SQS queue configurations
When creating an Amazon SQS queue, you need to consider how your application interacts with the queue. This information will help you optimize the configuration of your queue to control costs and increase performance.
TUNE YOUR VISIBILITY TIMEOUT
When a consumer receives an SQS message, that message remains in the queue until the consumer deletes it. You can configure the SQS queue’s visibility timeout setting to make that message invisible to other consumers for a period of time. This helps to prevent another consumer from processing the same message. The default visibility timeout is 30 seconds. The consumer deletes the message once it completes processing the message. If the consumer fails to delete the message before the visibility timeout expires, it becomes visible to other consumers and can be processed again.
Typically, you should set the visibility timeout to the maximum time that it takes your application to process and delete a message from the queue. Setting too short of a timeout increases the possibility of your application processing a message twice. Too long of a visibility timeout delays subsequent attempts at processing a message.
CHOOSE THE RIGHT POLLING TYPE
You can configure an Amazon SQS queue to use either short polling or long polling. Queues with short polling:
Send a response to the consumer immediately after receiving a request providing a faster response
Increases the number of responses and therefore costs.
SQS queues with long polling:
Do not return a response until at least one message arrives or the poll times out.
Less frequent responses but decreases costs.
Depending on the frequency of messages arriving in your queue, many of the responses from a queue using short polling could just be reporting an empty queue. Unless your application requires an immediate response to its poll requests, long polling is the preferable option.
Amazon SNS
Amazon SNS is a web service that makes it easy to set up, operate, and send notifications from the cloud. The service follows the publish-subscribe (pub-sub) messaging paradigm, with notifications being delivered to clients using a push mechanism.
Amazon SNS publisher to multiple SQS queues
Using highly available services, such as Amazon SNS, to perform basic message routing is an effective way of distributing messages to microservices. The two main forms of communications between microservices are request-response, and observer. In the example, an observer type is used to fan out orders to two different SQS queues based on the order type.
To deliver Amazon SNS notifications to an SQS queue, you subscribe to a topic specifying Amazon SQS as the transport and a valid SQS queue as the endpoint. To permit the SQS queue to receive notifications from Amazon SNS, the SQS queue owner must subscribe the SQS queue to the topic for Amazon SNS. If the user owns the Amazon SNS topic being subscribed to and the SQS queue receiving the notifications, nothing else is required. Any message published to the topic will automatically be delivered to the specified SQS queue. If the owner of the SQS queue is not the owner of the topic, Amazon SNS requires an explicit confirmation to the subscription request.
When your business or architecture becomes large enough, you will find the need to separate logical elements for security or architectural needs, or just for simplicity’s sake.
A VPC peering connection is a one-to-one relationship between two VPCs. There can only be one peering resource between any two VPCs. You can create multiple VPC peering connections for each VPC that you own, but transitive peering relationships are not supported. You will not have any peering relationship with VPCs that your VPC is not directly peered with. You can create a VPC peering connection between your own VPCs, or with a VPC in another AWS account within a single Region.
To establish a VPC peering connection, the owner of the requester VPC (or local VPC) sends a request to the owner of the peer VPC. You or another AWS account can own the peer VPC. It cannot have a Classless Inter-Domain Routing (CIDR) block that overlaps with your requester VPC’s CIDR block. The owner of the peer VPC has to accept the VPC peering connection request to activate the VPC peering connection.
To permit the flow of traffic between the peer VPCs using private IP addresses, add a route to one or more of your VPC’s route tables that points to the IP address range of the peer VPC. The owner of the peer VPC adds a route to one of their VPC’s route tables that points to the IP address range of your VPC. You might also need to update the security group rules that are associated with your instance to ensure that traffic to and from the peer VPC is not restricted.
Benefits of VPC peering
Review some of the benefits of using VPC peering to connect multiple VPCs together.
bulletBypass the internet gateway or virtual private gateway. Use VPC peering to quickly connect two or more of your networks without needing other virtual appliances in your environment.
bulletUse highly available connections. VPC peering connections are redundant by default. AWS manages your connection.
bulletAvoid bandwidth bottlenecks. All inter-Region traffic is encrypted with no single point of failure or bandwidth bottlenecks. Traffic always stays on the global AWS backbone, and never traverses the public internet, which reduces threats, such as common exploits, and distributed denial of service (DDoS) attacks.
bulletUse private IP addresses to direct traffic. The VPC peering traffic remains in the private IP space.
VPC peering for shared services
your security team provides you with a shared services VPC that each department can peer with. This VPC allows your resources to connect to a shared directory service, security scanning tools, monitoring or logging tools, and other services.
A VPC peering connection with a VPC in a different Region is present. Inter-Region VPC peering allows VPC resources that run in different AWS Regions to communicate with each other using private IP addresses. You won’t be required to use gateways, virtual private network (VPN) connections, or separate physical hardware to send traffic between your Regions.
full mesh VPC peering
each VPC must have a one-to-one connection with each VPC with which it is approved to communicate. This is because each VPC peering connection is nontransitive in nature and does not permit network traffic to pass from one peering connection to another.
The number of connections required has a direct impact on the number of potential points of failure and the requirement for monitoring. The fewer connections you need, the fewer you need to monitor and the fewer potential points of failure.
A VPC endpoint enables private connections between your VPC and supported AWS services without requiring an internet gateway, NAT device, VPN connection, or Direct Connect connection. Instances in your VPC do not require public IP addresses to communicate with resources in the service. Traffic between your VPC and the other service does not leave the AWS network.
Endpoints are virtual devices. They are horizontally scaled, redundant, and highly available VPC components. They permit communication between instances in your VPC and services without imposing availability risks or bandwidth constraints on your network traffic.
Types of VPC endpoints
GATEWAY ENDPOINT
Specify a gateway endpoint as a route target in your route table. A gateway endpoint is meant for traffic destined to Amazon S3, or Amazon DynamoDB and remains inside the AWS network.
instance A in the public subnet communicates with Amazon S3 via an internet gateway. Instance A has a route to local destinations in the VPC. Instance B communicates with an Amazon S3 bucket and an Amazon DynamoDB table using unique gateway endpoints. The diagram shows an example of a private route table. The private route table directs your Amazon S3 and DynamoDB requests through each gateway endpoint using routes. The route table uses a prefix list to target the specific Region for each service.
INTERFACE ENDPOINT
With an interface VPC endpoint (interface endpoint), you can privately connect your VPC to services as if they were in your VPC. When the interface endpoint is created, traffic is directed to the new endpoint without changes to any route tables in your VPC.
For example, a Region is shown with Systems Manager outside of the example VPC. The example VPC has a public and private subnet with an Amazon Elastic Compute Cloud (Amazon EC2) instance in each. Systems Manager traffic sent to ssm.region.amazonaws.com is sent to an elastic network interface in the private subnet.
Gateway VPC endpoints and interface VPC endpoints help you access services over the AWS backbone.
A gateway VPC endpoint (gateway endpoint) is a gateway that you specify as a target for a route in your route table for traffic destined for a supported AWS service. The following AWS services are supported: Amazon S3 and Amazon DynamoDB.
An interface VPC endpoint (interface endpoint) is an elastic network interface with a private IP address from the IP address range of your subnet. The network interface serves as an entry point for traffic destined to a supported service. AWS PrivateLink powers interface endpoints and it avoids exposing traffic to the public internet.
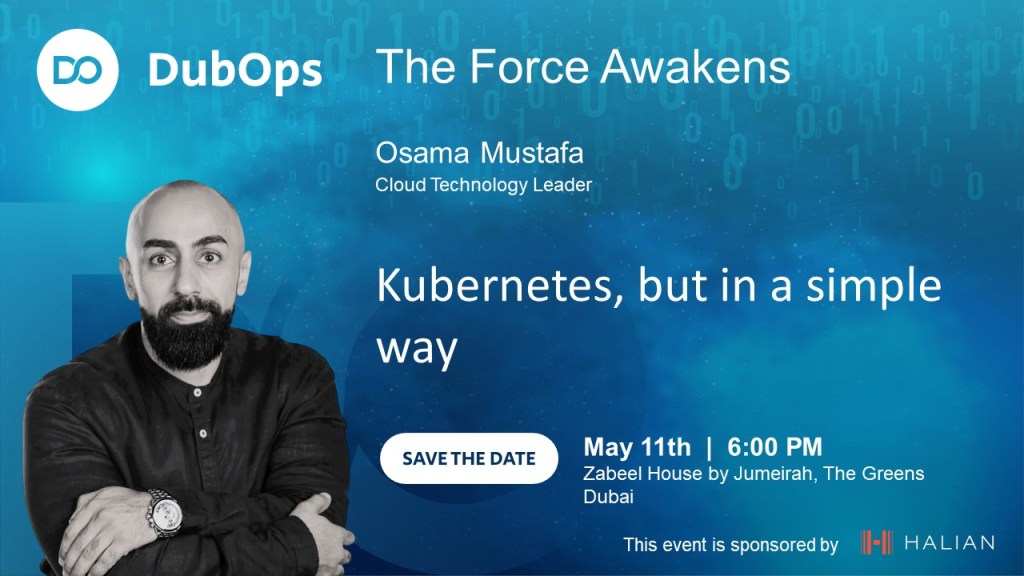
DubOps is a unique event that brings together DevOps, IT operations, and software development experts to share their knowledge and insights with the community. This event provides a platform for attendees to learn about the latest trends and best practices in the industry, as well as network with peers and thought leaders.
Registration for the Dubops event is now open, and we encourage anyone interested in attending to sign up early, as space is limited. Don’t miss this chance to expand your knowledge, connect with peers, and stay ahead of the curve in the ever-changing world of DevOps and IT operations.
Date: May 11th, 2023 Time: 18:00 – 21:00 Location: Zabeel House, Dubai, UAE Registration link: https://lnkd.in/dCd7V-vv We look forward to seeing you there!


