Oracle Database 12c Backup and Recovery Survival Guide

Oracle 12c Released in July 2013, and with every release for new oracle database version we expect huge amount of book to be released also, Books Talking about new Features, Administration, RAC, Data Guard,and finally Backup and Recovery.

When I am looking  for Oracle book it should have three Main things at least :

  • Description ( Table Of Content )
  • Examples for the new features.
  • Cover The specific topic and cover it so well.
Recently i received an email from Packt Publishing WebSite Here to review A book for Oracle 12c Related to Backup and Recovery, the Book Title

            ” Oracle Database 12c Backup and Recovery Survival Guide”

The above book written  by two oracle experts

  • Francisco Munoz ( Oracle ACE Director )
  • Aman Sharma ( Oracle ACE )
And Trust me when i am saying i need another post to talk about these two author. the books contain an amazing information for every DBA, it’s not necessary to be an expert to buy this book because they already covered everything from beginning with Examples or should i say with Lot of examples, what i would say here i recommended this book because it’s contain best practice for Backup and Recovery Covered by two Oracle Experts.
Description for Table Of Content :

Chapter 1: Understanding the Basics of Backup and Recovery 
First Chapter describe the Backup basic, why the backup is very important and what is the most common issue 

Chapter 2: NOLOGGING Operations
I have to say this chapter give me new idea about Nologging, and describe Best Solution for Nologging and Logging Operating in Database. 
Chapter 3: What is New in 12
Discuss 12c New Feature Related to Backup and Recovery ( RMAN,Datapump .. ) and simple description about multitenant Features and Architecture. 
Chapter 4: User-managed Backup and Recovery
Describe All kind of backup,Offline,cold and hot with Examples and Description for these example.

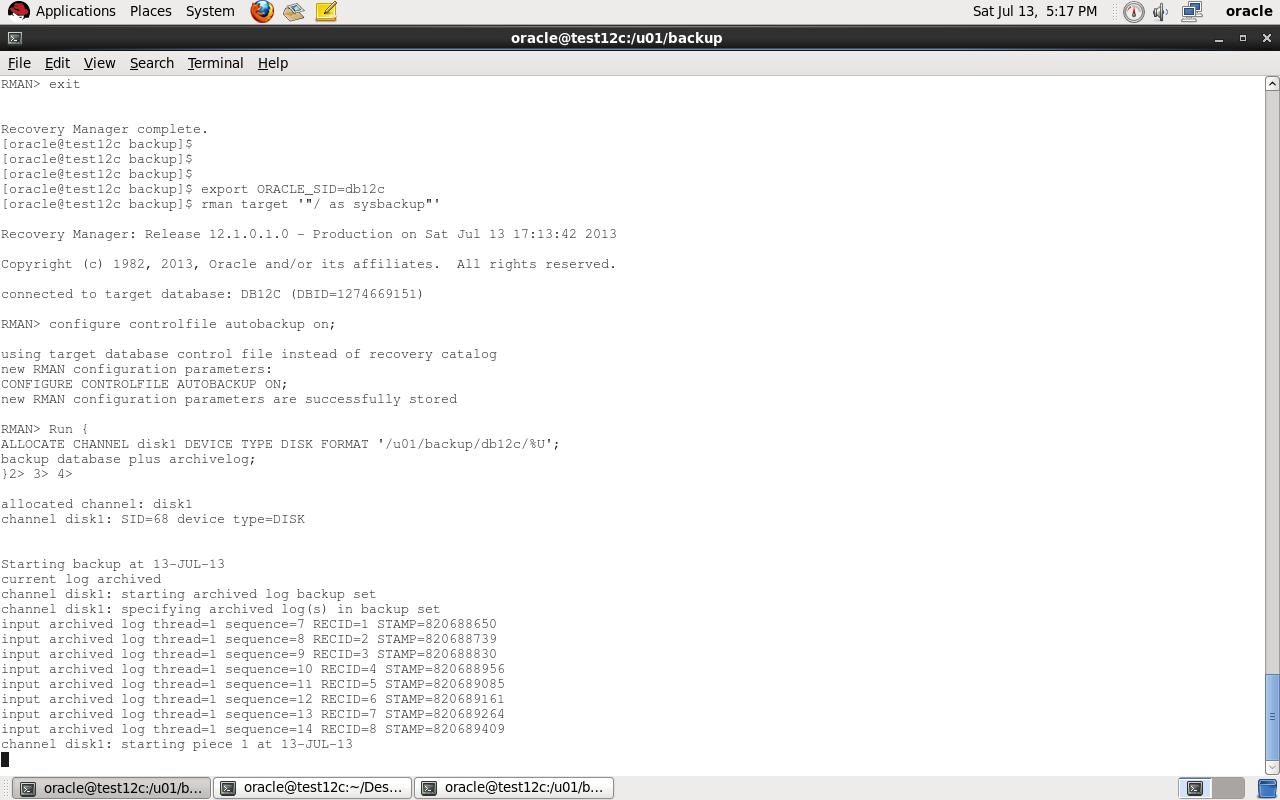
Chapter 5: Understanding RMAN and Simple Backups
This Chapter Describe RMAN Architecture & RMAN Concept Backup and how to use RMAN with oracle 12c,how to backup Controlfile, Spfile and Archive log,how to use Fast Incremental Backup. 
Chapter 6: Configuring and Recovering with RMAN
This Chapter Covered how to configure database for backup and recovery and how to configure RMAN for Backup, All the configuration covered by Examples and Lot Of scenarios.Configuration for Compression backup,snapshot and authentication for RMAN.

Chapter 7: RMAN Reporting and Catalog Management
From the Name of this chapter it’s covered RMAN Catalog and Report command and List command to get query and check backup.

Chapter 8: RMAN Troubleshooting and Tuning

This is Excellent Chapter for All DBA it’s Contains information how to troubleshoot RMAN,Tune RMAN, and how to monitor RMAN Session , Useful for Every DBA.
Chapter 9: Understanding Data Pump
This Chapter talking about Data Pump Architecture and Examples how to move data use data pump.
Chapter 10: Advanced Data Pump
If you want to move to next level and Increase your knowledge about Data pump , this chapter contains topics every DBA needs such as create small copies of production, create database in different file Structure, Moving Object from one table space to another and other excellent topics.

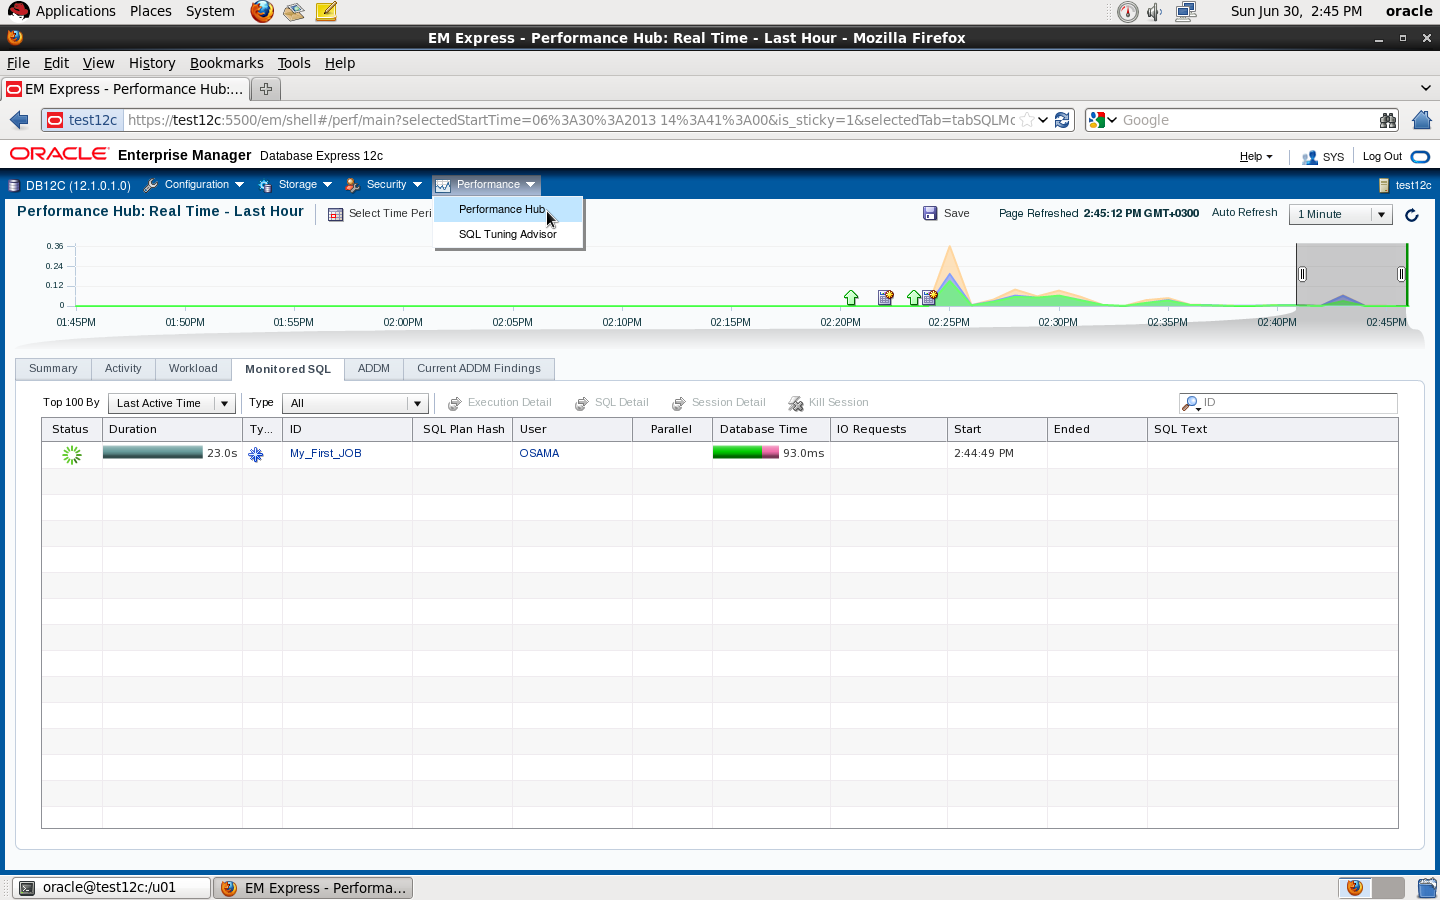
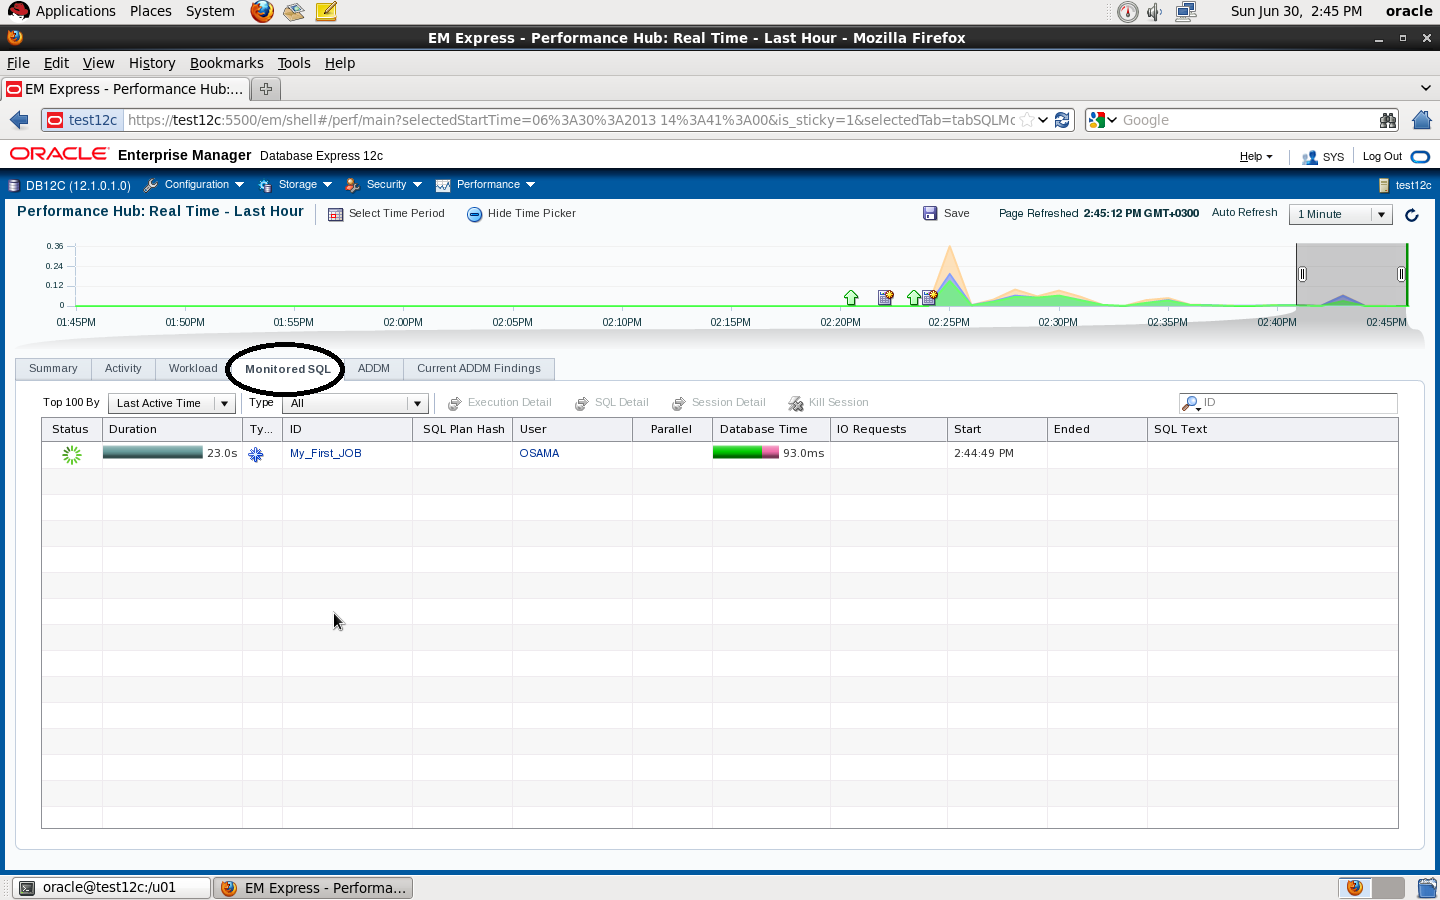
Chapter 11: OEM12c and SQL Developer
Enterprise manager 12c and Sql Developer friends for DBA, and Have been used started to used by DBA’s  All the above chapter using the command Line, but this one describe how to use these Two Tools to Configure backup and monitor backup, using export/import with EM12c.

About the Author :

has over two decades of experience in consulting, analysis, support, implementation, and migration of Oracle products. He is also an expert in most phases of a database life cycle, for example, development, stabilization, security, backup and recovery, tuning, installations, and data warehouse (ETL) with excellent implementation and support methodologies. He is a popular speaker at many Oracle conferences around the world.

is an Oracle Database consultant and instructor. He holds a Master’s degree in Computer Applications and has been working with Oracle Database for over a decade. His main focus is to understand how Oracle Database works internally. Besides the core database, he has a very strong knowledge of Linux, Solaris, Oracle RAC, Data Guard, RMAN, Oracle Exadata and Oracle Enterprise Manager.


You can Order the Book Now :

Finally i would thank Francisco & Aman for this amazing Book.

Thank you 
Osama Mustafa


Clone Pluggable Database

If you want to Clone One Of Pluggable database , How can you do that :

SQL> select name from v$pdbs ;

NAME
——————————
PDB$SEED
TEST_1
TEST_2

Let’s Clone Test_1 , Create folder on os level to move test_1 data. 

[oracle@test12c u01]$ mkdir clone
[oracle@test12c u01]$ cd clone/
[oracle@test12c clone]$ pwd
/u01/clone

Open Test_1 Read Only : 

SQL> alter pluggable database test_1 close immediate;Pluggable database altered.

SQL> alter pluggable database test_1 open read only ;Pluggable database altered.

Set this parameter to our created directory above : 

SQL> show parameter db_create_file_dest ;

NAME     TYPE VALUE
———————————— ———–
db_create_file_dest     string

SQL> alter system set db_create_file_dest=’/u01/clone’;             System altered.

SQL> show parameter db_create_file_dest ;

NAME     TYPE VALUE
———————————— ———–
db_create_file_dest     string /u01/clone

SQL> create pluggable database clone from test_1 ;Pluggable database created.

SQL> alter pluggable database clone open ;Pluggable database altered.

Test Clone Pluggable database 

[oracle@test12c ~]$ sqlplus sys/sys@test12c:1521/clone as sysdba

SQL*Plus: Release 12.1.0.1.0 Production on Sat Jul 13 20:20:24 2013
Copyright (c) 1982, 2013, Oracle.  All rights reserved.

Connected to:
Oracle Database 12c Enterprise Edition Release 12.1.0.1.0 – 64bit Production
With the Partitioning, OLAP, Advanced Analytics, Real Application Testing
and Unified Auditing options

SQL> show con_name ;CON_NAME
——————————
CLONE

SQL> select name from v$pdbs ;

NAME
——————————
PDB$SEED
TEST_1
TEST_2
CLONE

You can drop Clone Database using the below command

SQL > Alter Pluggable database Clone Including Datafiles ;

Thank you 
Osama mustafa

Point-In-Time Recovery for a Pluggable Database

Check Pluggable database that you have :

SQL> select name from v$pdbs ;

NAME
——————————
PDB$SEED
TEST_1
TEST_2
TEST_3

Shutdown database , to configure database archivelog

SQL> shutdown immediate ;

Database closed.
Database dismounted.
ORACLE instance shut down.
SQL> startup mount ;

 ORACLE instance started.

Total System Global Area 1252663296 bytes
Fixed Size    2287864 bytes
Variable Size  838862600 bytes
Database Buffers  402653184 bytes
Redo Buffers    8859648 bytes
Database mounted.

SQL> alter database archivelog ;

Database altered.

SQL> alter database open 

Database altered.

SQL> alter pluggable database all open; 

Pluggable database altered.

SQL> alter system set db_recovery_file_dest_size = 2G scope=both; 

System altered.

SQL> alter pluggable database all open; 

Pluggable database altered.

Export ORACLE_SID for container database and enter rman to backup  like below

[oracle@test12c backup]$ export ORACLE_SID=db12c
[oracle@test12c backup]$ rman target ‘”/ as sysbackup”‘

Recovery Manager: Release 12.1.0.1.0 – Production on Sat Jul 13 17:13:42 2013
Copyright (c) 1982, 2013, Oracle and/or its affiliates.  All rights reserved.
connected to target database: DB12C (DBID=1274669151)

Auto Backup controlfile :

RMAN> configure controlfile autobackup on;

using target database control file instead of recovery catalog
new RMAN configuration parameters:
CONFIGURE CONTROLFILE AUTOBACKUP ON;
new RMAN configuration parameters are successfully stored

Backup Script that we need :

Run {
ALLOCATE CHANNEL disk1 DEVICE TYPE DISK FORMAT ‘/u01/backup/db12c/%U’;
backup database plus archivelog;
}

 Where 
Format ‘/u01..’:  Location for backup

now move to our pluggable database

SQL>alter session set container=test_1 ;

SQL>create tablespace test_1  datafile ‘/u01/app/oracle/oradata/db12c/test_1/test_1.dbf’ size 10m;

SQL>create user test identified by test temporary tablespace temp default tablespace test_1;

SQL>grant create session, create table, unlimited tablespace to test ;

SQL>create table data (id varchar2(100)) tablespace test_1;

Enter Data using The Below code in above table :

begin
 for i in 1.. 10000 loop
    insert into data values (‘osama’);
 end loop;
 commit;
end;

After you insert data close pluggable database to start restore.

alter pluggable database test_1 CLOSE ;

Restore script :

run {
set until SCN = 1832026 ;
restore pluggable database test_1;
recover pluggable database Test_1 auxiliary destination=’/u01/backup/db12c’;
alter pluggable database TEST_1 open resetlogs;
}

Note :  To get SCN for database before insert use the query below :

SQL > select timestamp_to_scn(sysdate) from v$database;

After Restore :

sqlplus sys/sys@test12c:1521/test_1 ;
SQL> select count(*) from data ;
select count(*) from data
                     *
ERROR at line 1:
ORA-00942: table or view does not exist

Thank you
Osama Mustafa

Adopting NON-CDB to CBD

This article describe steps to Adopt non-container database 12c to container 12c 

[oracle@test12c Desktop]$ ps -ef | grep pmon

oracle    3230     1  0 04:04 ?        00:00:09 ora_pmon_db12c
oracle   12112     1  0 08:20 ?        00:00:07 ora_pmon_NonCDB
oracle   29621  3203  0 18:47 pts/1    00:00:00 grep pmon

Where :
db12c : Container database
NonCDB : Non Container Database
Let Start

[oracle@test12c Desktop]$ export ORACLE_SID=NonCDB

SQL> select instance_name from v$instance ;
INSTANCE_NAME
—————-
NonCDB

SQL> shutdown immediate ;
Database closed.
Database dismounted.
ORACLE instance shut down.

SQL> startup mount exclusive
ORACLE instance started.
Total System Global Area  939495424 bytes
Fixed Size    2295080 bytes
Variable Size  348130008 bytes
Database Buffers  583008256 bytes
Redo Buffers    6062080 bytes
Database mounted.

SQL> alter database open read only;

Database altered.

Run the below procedure to generate the manifest file. 

SQL> exec dbms_pdb.describe(pdb_descr_file=>’/u01/noncdb.xml’);

PL/SQL procedure successfully completed.

SQL> shutdown immediate ;
Database closed.
Database dismounted.
ORACLE instance shut down.

 I already working on the same host so no need to copy datafiles,if you are not working on same host copy datafiles to same location.

Let’s Work On Container Database .

after copy datafiles to folder, On Os Level , Create directory to use file_name_convert.

[oracle@test12c oradata]$ mkdir newnoncdb
[oracle@test12c newnoncdb]$ pwd
/u01/app/oracle/oradata/newnoncdb

[oracle@test12c Desktop]$ export ORACLE_SID=db12c
[oracle@test12c Desktop]$ sqlplus / as sysdba


SQL> create pluggable database non_cdb as clone
  2  using ‘/u01/noncdb.xml’
  3  file_name_convert=(‘/u01/app/oracle/oradata/NonCDB’,’/u01/app/oracle/oradata/newnoncdb’) copy;

Pluggable database created.

 Where

  1.  using ‘/u01/noncdb.xml’ : file that should be generated using dbms_pdb.describe
  2. ‘/u01/app/oracle/oradata/NonCDB’ : location for Copied Non_CDB datafile
  3. ,’/u01/app/oracle/oradata/newnoncdb’ : location for created directory.

SQL> alter pluggable database non_cdb open ;        
Pluggable database altered.

SQL> alter pluggable database non_cdb close ;
Pluggable database altered.

SQL> alter pluggable database non_cdb open ;
Pluggable database altered.

NAME       OPEN_MODE
—————————— ———-
PDB$SEED       READ ONLY
NEWDB_PLUG MOUNTED
NEW_PLUG_COPY MOUNTED
NEW_PLUG_MOVE MOUNTED
NON_CDB       READ WRITE

Now you plugged NON-CDB to Container Database successfully without any problems and it will works fine.
the below step is optional but recommanded for production to move all thing from non-cdb to cdb. ( specially for upgrade 12c later ) 

SQL> alter session set container=Non_cdb;
Session altered.

OR 

[oracle@test12c newnoncdb2]$ sqlplus sys/sys@test12c:1521/Non_cdb as sysdba  ;

SQL> @$ORACLE_HOME/rdbms/admin/noncdb_to_pdb.sql   

Thank you
Osama Mustafa

Pluggable Database Part (3)

Since Pluggable Database is New Topic to post about , I Cannot post Everything in One Post so i decide to do it as tutorial and this one part (3) , every Topics uploaded Here on my blog or on my Account on Shareslide here.

In This topic :

  • How to unplug database.
  • Plugging Database to another Container Database.
Let’s Start :

SQL> select name, con_id from v$active_services ;

NAME          CON_ID
——————————— ———-
new2   4
new   3

db12cXDB   1
db12c   1
SYS$BACKGROUND   1
SYS$USERS   1

as you see i already create two pluggable database new,new2 and now :

SQL> alter pluggable database new close immediate ;

Pluggable database altered.

SQL> alter pluggable database new2 close immediate ;

Pluggable database altered.

Unplug database included with xml file :

SQL> alter pluggable database new unplug into ‘/u01/app/oracle/oradata/new.xml’;Pluggable database altered.

SQL> alter pluggable database new2 unplug into ‘/u01/app/oracle/oradata/new_2.xml’;Pluggable database altered.

Drop Database :

SQL> drop pluggable database new keep datafiles ;Pluggable database dropped.

SQL> drop pluggable database new2 keep datafiles ;Pluggable database dropped.

make sure you drop database :

SQL> select pdb_name, status from cdb_pdbs ;

PDB_NAME STATUS
———– ————-
PDB$SEED NORMAL

 Before Plug Database to any Container you need to make sure from compatibility , there’s PL/SQL code written by Oracle to check compatibility.

SQL > DECLARE
   compatible BOOLEAN := FALSE;
BEGIN
   compatible := DBMS_PDB.CHECK_PLUG_COMPATIBILITY(
        pdb_descr_file => ‘/u01/app/oracle/oradata/new.xml’);
   if compatible then
      DBMS_OUTPUT.PUT_LINE(‘Is pluggable PDB1 compatible? YES’);
   else DBMS_OUTPUT.PUT_LINE(‘Is pluggable PDB1 compatible? NO’);
   end if;
END;
/
Is pluggable PDB1 compatible? YES
PL/SQL procedure successfully completed.

 The Same will be for new2.xml

Now Let’s Create Database Using With Two Way :

SQL> create pluggable database newdb_plug using ‘/u01/app/oracle/oradata/new.xml’ nocopy tempfile reuse ;

Pluggable database created.

SQL> select pdb_name, status from cdb_pdbs; 

PDB_NAME STATUS
—————— ————-
NEWDB_PLUG NEW
PDB$SEED NORMAL 

 Another method to plug database :

SQL> create pluggable database new_plug_copy using ‘/u01/app/oracle/oradata/new_2.xml’
  2  copy
  3  FILE_NAME_CONVERT=(‘/u01/app/oracle/oradata/New2′,’/u01/app/oracle/oradata/new_plug_copy’);

Pluggable database created.

SQL> select name,open_mode from v$pdbs;

NAME       OPEN_MODE
—————————— ———-
PDB$SEED       READ ONLY
NEWDB_PLUG         MOUNTED
NEW_PLUG_COPY MOUNTED

 Therefore 

  • Copy Clause : 
    • if you want the files listed in the XML file to be copied to the new location and used for the new PDB.
  • Nocopy Clause
    • if you want the files for the PDB to remain in their current locations.
But what if i want to move all datafiles and create new pluggable database,oracle 12c provide you with new clause to do this which is “move” check below :
SQL> create pluggable database new_plug_move using ‘/u01/app/oracle/oradata/new_2.xml’
  2  move
  3  FILE_NAME_CONVERT=(‘/u01/app/oracle/oradata/New2′,’/u01/app/oracle/oradata/move’);
create pluggable database new_plug_move using ‘/u01/app/oracle/oradata/new_2.xml’
*
ERROR at line 1:
ORA-65122: Pluggable database GUID conflicts with the GUID of an existing container.

The above error is normal because i already create  pluggable database using new_2.xml to solve it

SQL> create pluggable database new_plug_move as clone using ‘/u01/app/oracle/oradata/new_2.xml’
  2  move
  3  FILE_NAME_CONVERT=(‘/u01/app/oracle/oradata/New2′,’/u01/app/oracle/oradata/move’);

Pluggable database created.

SQL> select pdb_name, status from cdb_pdbs;

PDB_NAME STATUS
——————- ————-
NEWDB_PLUG NEW
PDB$SEED NORMAL
NEW_PLUG_COPY NEW
NEW_PLUG_MOVE NEW

You can open any database now and work on them.
This article uploaded to Slide Share here.

Reference
1-Oracle Documentation here

Thank you
Osama Mustafa

Pluggable Database Tutorial Part 1 (12c)

[oracle@test12c Desktop]$ sqlplus / as sysdba
SQL*Plus: Release 12.1.0.1.0 Production on Wed Jul 3 19:05:10 2013
Copyright (c) 1982, 2013, Oracle.  All rights reserved.

Connected to:
Oracle Database 12c Enterprise Edition Release 12.1.0.1.0 – 64bit Production
With the Partitioning, OLAP, Advanced Analytics, Real Application Testing
and Unified Auditing options

SQL> show con_name

CON_NAME
——————-
CDB$ROOT

Where 
CON_NAME : Displays the name of the Container to which you are connected when connected to a Consolidated Database. For non-consolidated database, it will return “Non Consolidated”.

SQL> show con_id

CON_ID
————
1

Where 
CON_ID : Displays the id of the Container to which you are connected when connected to a Consolidated Database. If issued when connected to a non-Consolidated Database, this command returns 0.

Now I want to check how Name for my my pluggable database , while installation i chosen five container with prefix db_

SQL> select name, con_id from v$active_services order by 1;

NAME     CON_ID
—————————————————————- ———-
SYS$BACKGROUND  1
SYS$USERS  1
db12c  1
db12cXDB  1
db_1  3
db_2  4
db_3  5
db_4  6
db_5  7
9 rows selected.

 Listener will look like the below :

Example how to connect Container , In my case i didn’t create service in tnsnames.ora i am using easy connect :

SQL> conn sys/sys@localhost:1521/db_1 as sysdba
Connected.

SQL> show con_name

CON_NAME
—————-
DB_1

SQL> show con_id

CON_ID
————
3

Work On Pluggable Database  :

After create Container and enable pluggable database , we need to add new one since container empty.
Under /u01/app/oracle/oradata ,create new folder 

[oracle@test12c db12c]$ mkdir test
[oracle@test12c db12c]$ chmod -R 775 test

Sqlplus / as sysdba

SQL > create pluggable database TEST admin user admin identified by admin
 file_name_convert= (‘/u01/app/oracle/oradata/db12c/pdbseed/’,’/u01/app/oracle/oradata/db12c/test/’);

Pluggable database created.

SQL> select pdb_name, status from cdb_pdbs;

PDB_NAME                    Status
———————–    ————
PDB$SEED                      NORMAL
TEST                                NEW

SQL> select name, open_mode from v$pdbs;

NAME       OPEN_MODE
—————————— ———-
PDB$SEED       READ ONLY
TEST                             MOUNTED

SQL> select name, con_id from v$active_services order by 1;

NAME     CON_ID
—————————————————————- ———-
SYS$BACKGROUND   1
SYS$USERS  1
db12c  1
db12cXDB  1
TEST                                                                         3

Now Con_id=3 , Most of Oracle Data Dictionary contains new_column called con_id  , to check datafile related to new pluaggable database :

SQL> select name from v$datafile where con_id=3 ;

NAME
——————————————————————————–
/u01/app/oracle/oradata/db12c/gls/system01.dbf
/u01/app/oracle/oradata/db12c/gls/sysaux01.dbf

Manage Oracle Container and Pluggable Database :
If you need to shutdown container, it will not be different as before :

SQL> show con_name
CON_NAME
——————————
CDB$ROOT

SQL> shutdown ;
Database closed.
Database dismounted.
ORACLE instance shut down.
SQL>
SQL> startup ;
ORACLE instance started.
Total System Global Area 1252663296 bytes
Fixed Size    2287864 bytes
Variable Size  788530952 bytes
Database Buffers  452984832 bytes
Redo Buffers    8859648 bytes
Database mounted.
Database opened.

Check status for PDB :

SQL>select name, open_mode from v$pdbs;

NAME       OPEN_MODE
—————————— ———-
PDB$SEED       READ ONLY
TEST                  MOUNTED

If you the above Status for Test Database you will see it as mounted state which mean we cannot create anything yet on database, Let’s Open it 
SQL> alter pluggable database TEST open ;
Pluggable database altered.

SQL> select name,open_mode from v$pdbs ;NAME       OPEN_MODE
—————————— ———-
PDB$SEED       READ ONLY
TEST                READ WRITE

The Same for close Option 

SQL> alter pluggable database TEST close immediate ;
Pluggable database altered.

SQL> select name,open_mode from v$pdbs ;NAME       OPEN_MODE
—————————— ———-
PDB$SEED       READ ONLY
TEST                               MOUNTED

Now you can open/close all pluggable database :

SQL > Alter pluggable database  all Open;
SQL > Alter pluggable database  all close ;

SQL> select tablespace_name, con_id from cdb_tablespaces where con_id=3 ;

TABLESPACE_NAME   CON_ID
—————————— ———-
SYSTEM 3
SYSAUX 3
TEMP 3

to get data file 

SQL> select file_name, con_id from cdb_data_files where con_id=3 ;NAME
——————————————————————————–
/u01/app/oracle/oradata/db12c/gls/system01.dbf
/u01/app/oracle/oradata/db12c/gls/sysaux01.dbf

SQL> select file_name, con_id from cdb_temp_files where con_id=3;

FILE_NAME                  CON_ID
——————————————
/u01/app/oracle/oradata/db12c/gls/pdbseed_temp01.dbf       3

 If you do the below query to create tablespace, it will not be created under TEST database, therefore it will be created on root :

SQL > create tablespace cdata datafile ‘/u01/app/oracle/oradata/db12c/gls/test.dbf’ SIZE 30M;

 SQL> select tablespace_name, con_id from cdb_tablespaces order by con_id;TABLESPACE_NAME   CON_ID
—————————— ———-
SYSTEM 1
CDATA 1
SYSAUX 1
TEMP 1
UNDOTBS1 1
USERS 1
SYSTEM 2
TEMP 2
SYSAUX 2
SYSTEM 3
SYSAUX 3
TEMP 3
12 rows selected.

Same for temp tablespace :

SQL> create temporary tablespace root_temp tempfile ‘/u01/app/oracle/oradata/db12c/temp_01.dbf’ SIZE 30M;

 If you need to create Tablespace in pluggable database follow the below , you have to options

  • connect to pluggable database in our case test using tnsnames.ora or easy connect
    • connect sys/sys@localhost:1521/test
  • alter session command line 
    •  alter session set container=

SQL> alter session set container=TEST;Session altered.

SQL> create tablespace pdb_test datafile ‘/u01/app/oracle/oradata/db12c/TEST/test_pdb.dbf’ SIZE 20M;
Tablespace created.

SQL> select tablespace_name, con_id from cdb_tablespaces order by con_id;TABLESPACE_NAME   CON_ID
—————————— ———-
SYSTEM 3
SYSAUX 3
TEMP 3
PDB_TEST 3

Same for temporary tablespace, next post i will provide another manage for pluggable database.
Also I Upload this tutorial On SlideShare Here
Thank you 
Osama mustafa

Reference :
1- oracle Documentation Here
2- Oracle Documentation Here

Enterprise manager Performance Hub (Real Time) 12c

Enterprise manager express is 

SQL> drop user osama cascade ;
User dropped.

SQL> create user osama identified by osama;
User created.

SQL> grant select any table to osama;
Grant succeeded.

SQL> grant select any dictionary to osama ;
Grant succeeded.

SQL> grant create session to osama;
Grant succeeded.

SQL> conn osama/osama ;
Connected.

SQL> EXEC  DBMS_SQL_MONITOR.BEGIN_OPERATION (‘My_First_JOB’, forced_tracking => ‘Y’);
BEGIN DBMS_SQL_MONITOR.BEGIN_OPERATION (‘My_First_JOB’, forced_tracking => ‘Y’); END;
      *
ERROR at line 1:
ORA-06550: line 1, column 7:
PLS-00221: ‘BEGIN_OPERATION’ is not a procedure or is undefined
ORA-06550: line 1, column 7:
PL/SQL: Statement ignored

to avoid this error :

SQL> VAR myjob_id NUMBER;

SQL> EXEC :myjob_id := DBMS_SQL_MONITOR.BEGIN_OPERATION (‘My_First_JOB’, forced_tracking => ‘Y’)

PL/SQL procedure successfully completed.

Where 
myjob_id : variable
My_first_Job : Job name.

Now Check Enterprise manager express Page : 

if you check the second picture you will see if you don’t stop the sql_monitor the Job will still running

SQL> EXEC DBMS_SQL_MONITOR.END_OPERATION(‘My_First_JOB’, :myjob_id) ;
PL/SQL procedure successfully completed.

Thank you 
Osama Mustafa

12c Auditing Tutorial

SQL*Plus: Release 12.1.0.1.0 Production on Fri Jun 28 17:07:52 2013
Copyright (c) 1982, 2013, Oracle.  All rights reserved.

Connected to:
Oracle Database 12c Enterprise Edition Release 12.1.0.1.0 – 64bit Production
With the Partitioning, OLAP, Advanced Analytics, Real Application Testing
and Unified Auditing options

New Auditing came with oracle 12c called Unified Auditing which is ” enables selective and effective auditing inside the Oracle database using policies and conditions. The new policy based syntax simplifies management of auditing within the database and provides the ability to accelerate auditing based on conditions. For example, audit policies can be configured to audit based on specific IP addresses, programs, time periods, or connection types such as proxy authentication. In addition, specific schemas can be easily exempted from auditing when the audit policy is enabled.”

You can check here.

regarding to oracle Documentation with this kind of new audit you can capture :

  • Audit records (including SYS audit records) from unified audit policies and AUDIT settings

  • Fine-grained audit records from the DBMS_FGA PL/SQL package
  • Oracle Database Real Application Security audit records
  • Oracle Recovery Manager audit records
  • Oracle Database Vault audit records
  • Oracle Label Security audit records
  • Oracle Data Mining records
  • Oracle Data Pump
  • Oracle SQL*Loader Direct Load

For More Information Read Oracle Documentation Here

With Show parameter auditing you will not see value for unified auditing

SQL> show parameter audit ;
NAME     TYPE VALUE
———————————— ———– ——————————
audit_file_dest              string          /u01/app/oracle/admin/db12c/adump
audit_sys_operations     boolean FALSE
audit_syslog_level     string
audit_trail               string          DB
unified_audit_sga_queue_siz    integer 1048576

To check Value you need to see v$option table 

select value from v$option where PARAMETER = ‘Unified Auditing’;
PARAMETER VALUE
—————————————————————-
Unified Auditing FALSE

if you set this parameter to OS level, check $ORACLE_BASE/audit which the new folder to save all the information , when you create database , oracle uses new feature for auditing called Mixed mode from the name you can see there’s more than one auditing in this mode , One : old mode that we already know in oracle 10g,11g  and new mode that called unified auditing.
Auditing Traditional way can be control using AUDIT_TRAIL parameter , the new Way can be determine using Audit Policy called  ORA_SECURECONFIG ( Policy create already in database ) and to enable Unified audit you have to enable at least one policy. Only sysdba can do that or someone have two role AUDIT_ADMIN,AUDIT_VIEWER. i mention before on my blog for 12c new feature how to use audit policy and enable,disable and drop them.
This is only small section for what ORA_SECURECONFIG contain and what can audit :

select POLICY_NAME, AUDIT_OPTION from   AUDIT_UNIFIED_POLICIES where  policy_name =  ‘ORA_SECURECONFIG’  order by 2 ;

POLICY_NAME     AUDIT_OPTION
——————– —————————————-
ORA_SECURECONFIG     ADMINISTER KEY MANAGEMENT
ORA_SECURECONFIG     ALTER ANY PROCEDURE
ORA_SECURECONFIG     ALTER ANY SQL TRANSLATION PROFILE
ORA_SECURECONFIG     ALTER ANY TABLE
ORA_SECURECONFIG     ALTER DATABASE
ORA_SECURECONFIG     ALTER DATABASE LINK
ORA_SECURECONFIG     ALTER PLUGGABLE DATABASE
ORA_SECURECONFIG     ALTER PROFILE
ORA_SECURECONFIG     ALTER ROLE
ORA_SECURECONFIG     ALTER SYSTEM
ORA_SECURECONFIG     ALTER USER
ORA_SECURECONFIG     AUDIT SYSTEM
ORA_SECURECONFIG     CREATE ANY JOB
ORA_SECURECONFIG     CREATE ANY LIBRARY
ORA_SECURECONFIG     CREATE ANY PROCEDURE
ORA_SECURECONFIG     CREATE ANY SQL TRANSLATION PROFILE
ORA_SECURECONFIG     CREATE ANY TABLE
ORA_SECURECONFIG     CREATE DATABASE LINK
ORA_SECURECONFIG     CREATE DIRECTORY
ORA_SECURECONFIG     CREATE EXTERNAL JOB
ORA_SECURECONFIG     CREATE PLUGGABLE DATABASE
ORA_SECURECONFIG     CREATE PROFILE
ORA_SECURECONFIG     CREATE PUBLIC SYNONYM
ORA_SECURECONFIG     CREATE ROLE
ORA_SECURECONFIG     CREATE SQL TRANSLATION PROFIL

Check if this Audit Policy set as default for Database :

SQL> select POLICY_NAME from   AUDIT_UNIFIED_ENABLED_POLICIES where  policy_name = ‘ORA_SECURECONFIG’;

POLICY_NAME
——————–
ORA_SECURECONFIG

Check this to see by default oracle 12c enable audit which is very useful :

select action_name, dbusername from unified_audit_trail where dbusername=’OSAMA’

ACTION_NAME     DBUSERNAME
——————– ——————–
SELECT     OSAMA
SELECT     OSAMA
SELECT     OSAMA
SELECT     OSAMA
SELECT     OSAMA
SELECT     OSAMA
SELECT     OSAMA
SELECT     OSAMA
UPDATE     OSAMA
LOGON     OSAMA
LOGON     OSAMA
LOGON     OSAMA
LOGON     OSAMA
LOGOFF     OSAMA
LOGOFF     OSAMA
LOGOFF     OSAMA
LOGOFF     OSAMA
LOGOFF     OSAMA
LOGOFF     OSAMA

Unified Contain new features to monitor RMAN command , Expdp,impdp and other new features but to enable it ( set value to true ) you have to relink oracle lib after shutdown all services using the below command , cd $ORACLE_HOME/rdbms/lib and fire :

make -f ins_rdbms.mk uniaud_on ioracle

SQL> select value from v$option where PARAMETER = ‘Unified Auditing’;

VALUE
———-
TRUE

Let’s Test Some New Features and Audit RMAN :

SQL> create audit policy expdp_aduit actions component=datapump export;
Audit policy created.

SQL> audit policy expdp_aduit;
Audit succeeded.

Check if our audit policy is enabled :

select * from AUDIT_UNIFIED_ENABLED_POLICIES where POLICY_NAME like ‘%EXPDP%’;

USER_NAME  POLICY_NAM ENABLED_ SUC FAI
———- ———- ——– — —
ALL USERS  EXPDP_AUDIT     BY       YES YES

 Make sure you create directory , Grant privileges on this directory and run expdp command ( system user )

[oracle@test12c dump]$ expdp directory=dump logfile=audit.log dumpfile=osama_schema schemas=osama

this transaction will exists on memory until background process flash it to disks , so before check the tables i will execute package that ensure to do this immediately ( no waiting )

SQL> EXEC SYS.DBMS_AUDIT_MGMT.FLUSH_UNIFIED_AUDIT_TRAIL;
PL/SQL procedure successfully completed.

check the user who make expdp

SQL> select DBUSERNAME, DP_TEXT_PARAMETERS1, DP_BOOLEAN_PARAMETERS1
from   UNIFIED_AUDIT_TRAIL
where  DP_TEXT_PARAMETERS1 is not null;  

SYSTEM
MASTER TABLE:  “SYSTEM”.”SYS_EXPORT_SCHEMA_01″ , JOB_TYPE: EXPORT, METADATA_JOB_
MODE: SCHEMA_EXPORT, JOB VERSION: 12.1.0.0.0, ACCESS METHOD: AUTOMATIC, DATA OPT
IONS: 0, DUMPER DIRECTORY: NULL  REMOTE LINK: NULL, TABLE EXISTS: NULL, PARTITIO
N OPTIONS: NONE
MASTER_ONLY: FALSE, DATA_ONLY: FALSE, METADATA_ONLY: FALSE, DUMPFILE_PRESENT: TR
UE, JOB_RESTARTED: FALSE

For test case , i remove users tablespace from os after take backup using rman ( database should be in archive mode ) , by default Audit For RMAN is enable no need to do anything ,like the following :

RMAN > backup tablespace users ;

On OS Level :

rm /u01/app/oracle/oradata/db12c/users01.dbf

Back to RMAN :

RMAN> alter tablespace users offline immediate;
using target database control file instead of recovery catalog
Statement processed

RMAN> restore tablespace USERS;
RMAN> alter tablespace users online;

Now Check Audit : 

SQL> select  DBUSERNAME, RMAN_OPERATION from    UNIFIED_AUDIT_TRAIL where   RMAN_OPERATION is not null; 

DBUSERNAME       RMAN_OPERATION
—————————— ——————–
SYS       Recover
SYS       Restore
SYS       Backup
SYS       Backup

Note : if nothing appear at audit table level re run 

exec SYS.DBMS_AUDIT_MGMT.FLUSH_UNIFIED_AUDIT_TRAIL

After finished test  :

SQL> noaudit POLICY EXPDP_AUDIT;
Noaudit succeeded.

SQL> select count(*) from unified_audit_trail;
  COUNT(*)
———-
      3334

You can clean your Audit Now Using Package Called : DBMS_AUDIT_MGMT.CLEAN_AUDIT_TRAIL
Thank you 
Osama mustafa