Deploy Agent In Enterprise Manager 12c

After I post about how to install Oracle Enterprise manager ( em12c ) today i will talk how to deploy em12c agent

there’s two method to do that

1) Configuring Automatic Discovery
2) Adding targets Manually

I will describe the both 🙂 each one separately

Before deploy you need to decide if you want to use Oracle user or root user the below steps you have to do before using oracle :

[root@em12c ~]# vi /etc/sudoers

and change and add the following lines :
Comment this line :

#Defaults    requiretty

add the below line

oracle  ALL=(ALL)       ALL

and remove ! from this line :

Defaults   visiblepw

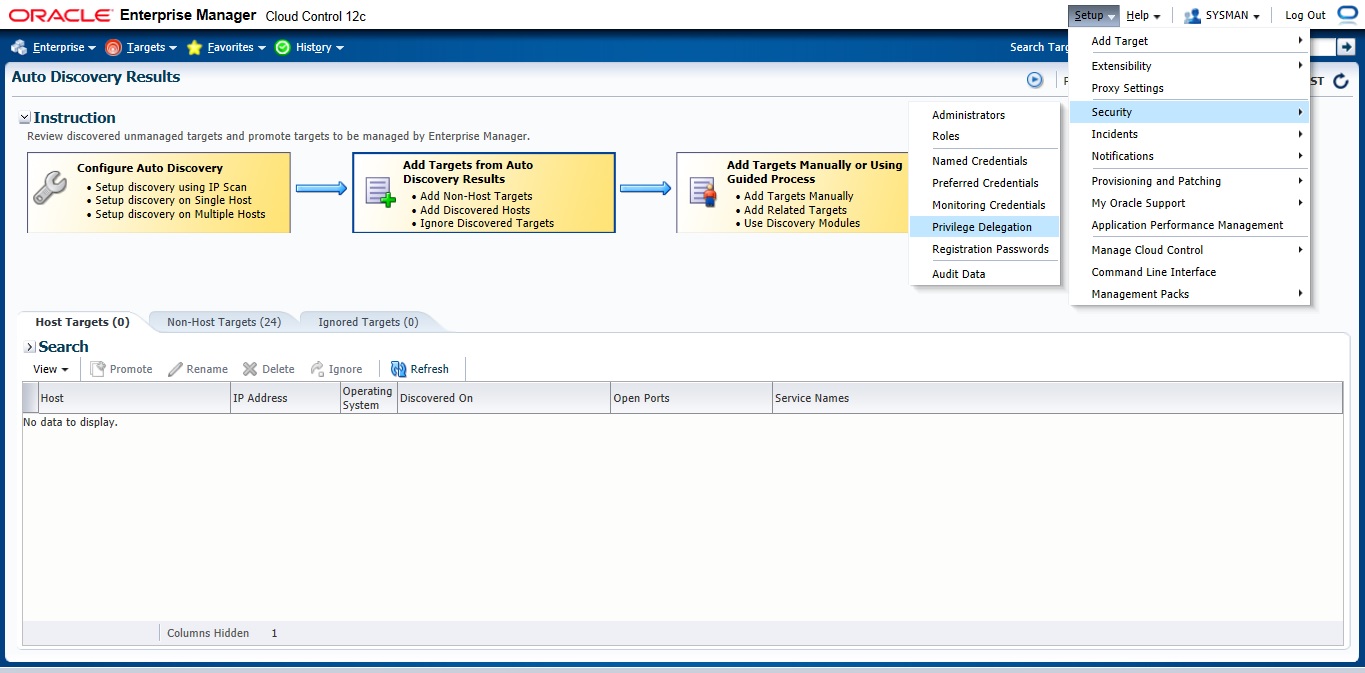
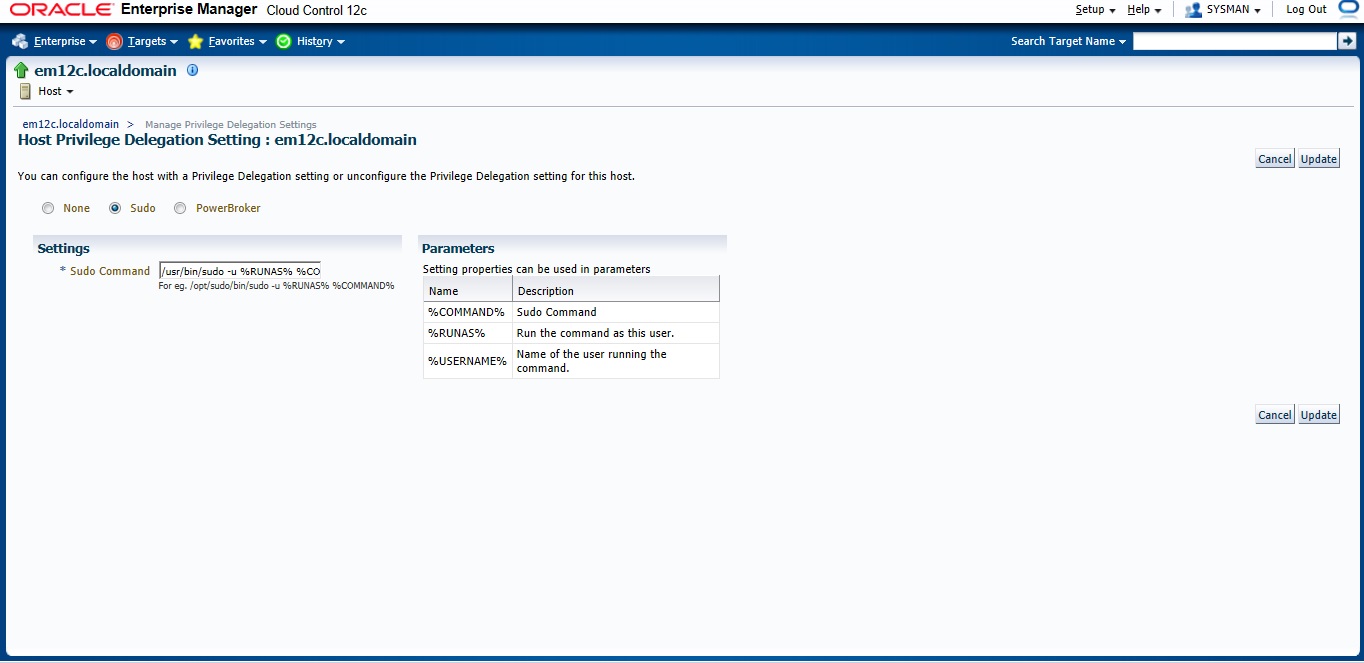
Now On em12c There’s something called privilege delegation

Privilege delegation allows a logged-in user to perform an activity with the privileges of another user. Sudo and PowerBroker are privilege delegation tools that allow a logged-in user to be assigned these privileges. These privilege delegation settings will be used for all provisioning and patching activities on these hosts.

Read more here.

in the screen below add these lines :
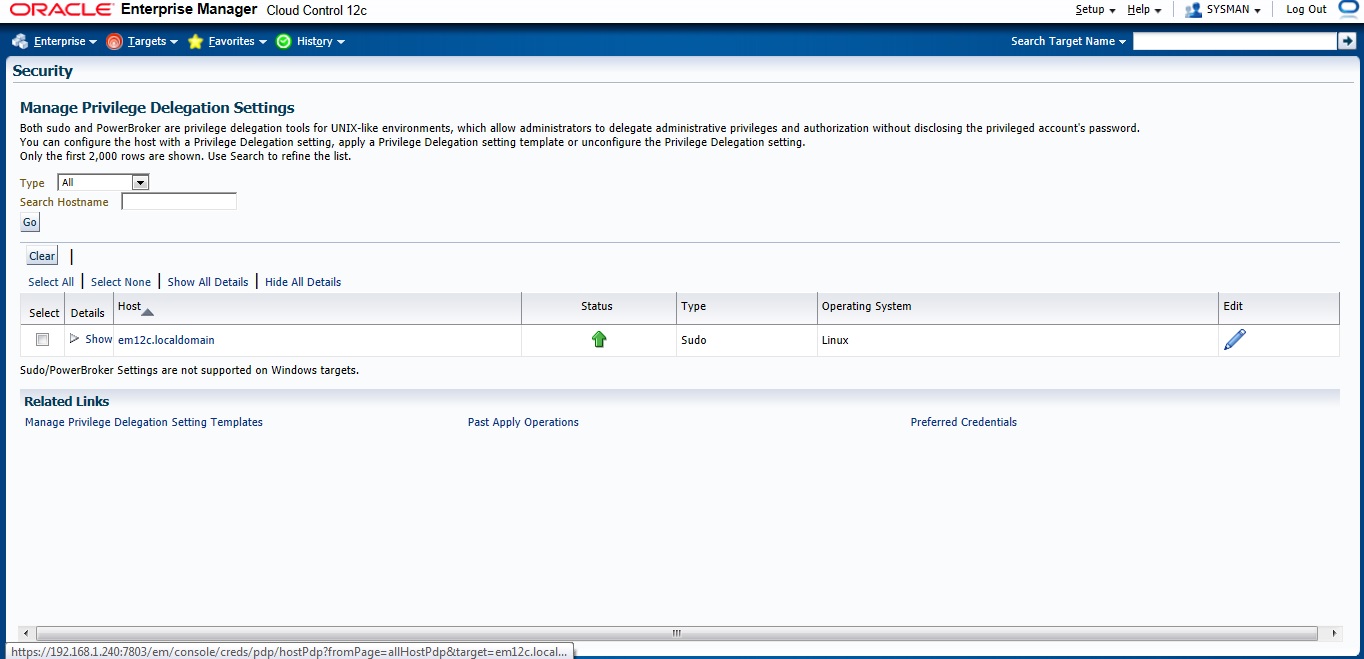
/usr/bin/sudo -u %RUNAS% %COMMAND%

/usr/bin/sudo —> location for sudo command.

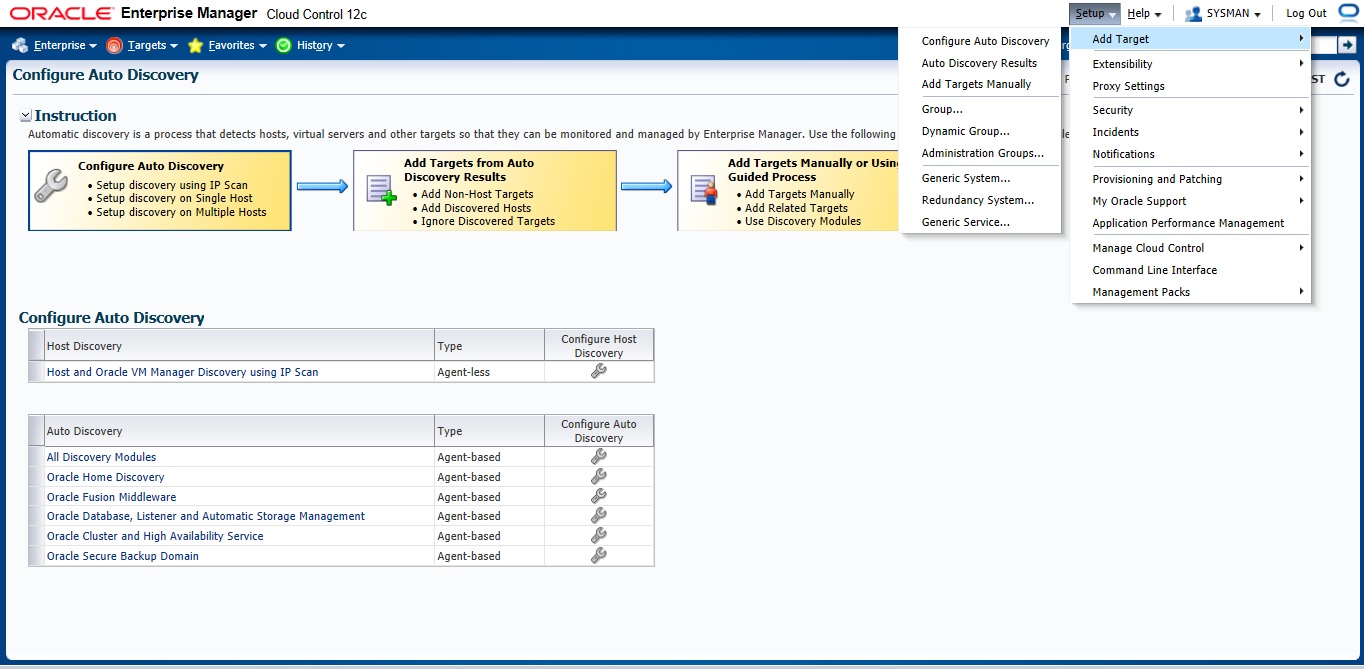
 after all the above steps are done let’s configure Auto Discovery

Setup –> add target –> configure auto discovery  the below screen will open, choose the first option “Host and oracle vm manager Discovery using Ip scan”
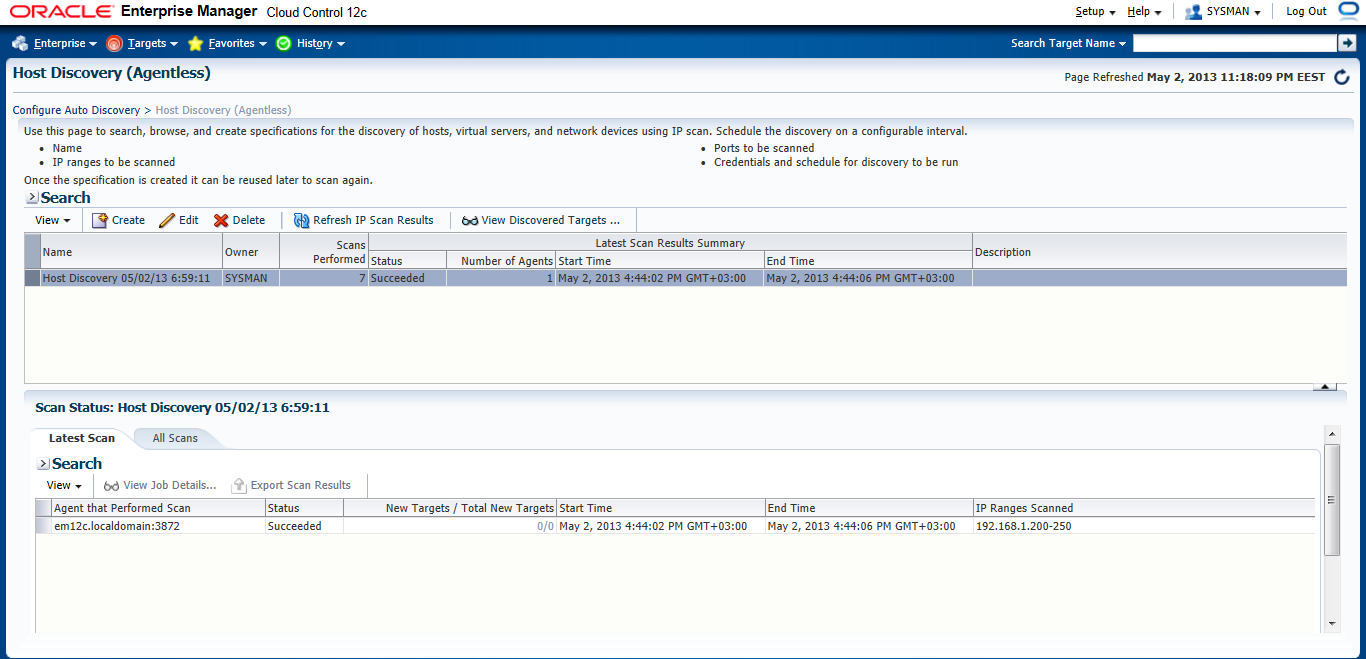
 Press create Button

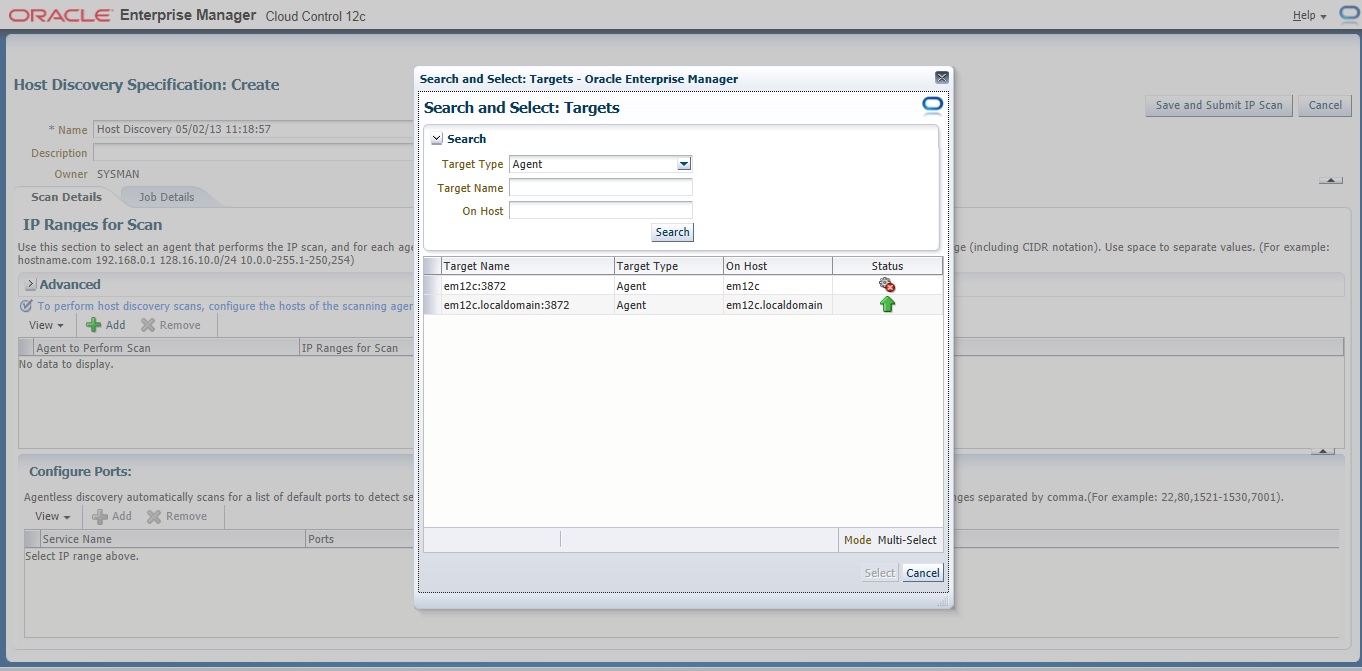
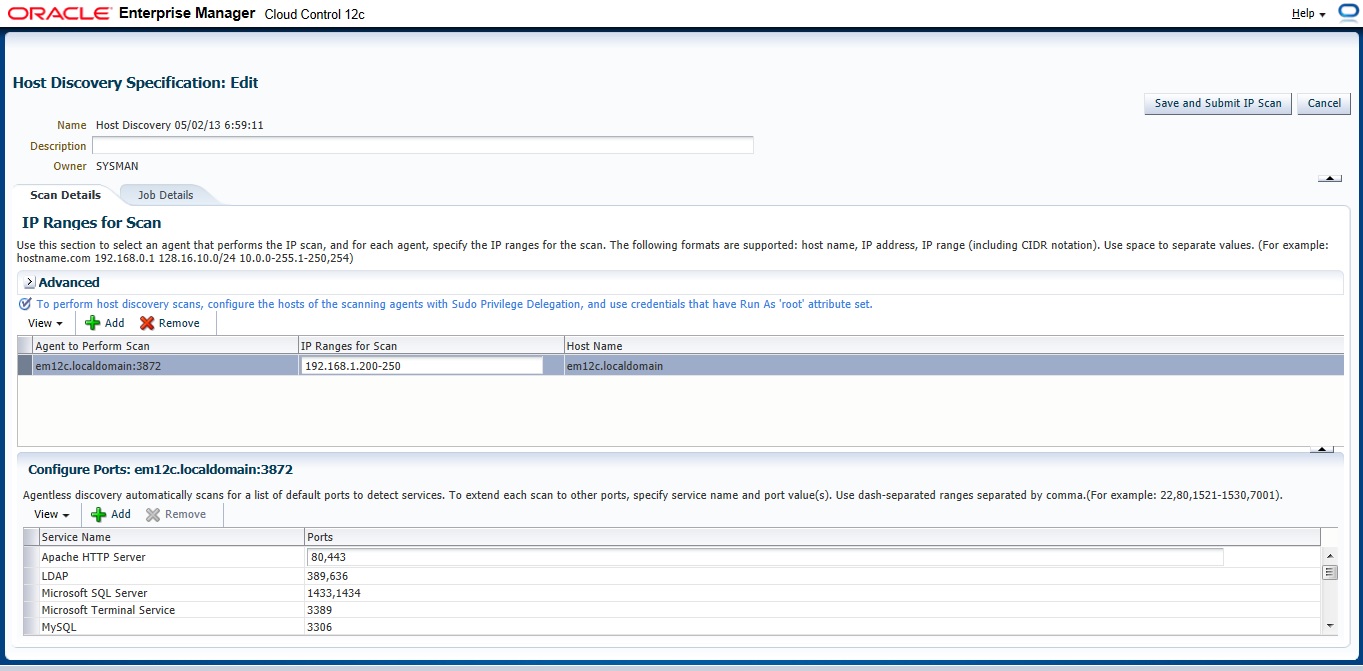
On add Button new Panel Will open , Choose your Host and Choose the Range Ip for scan The Format Mentioned above examples :

192.168.1.240-250
192.168.240/10
192.168.240,241

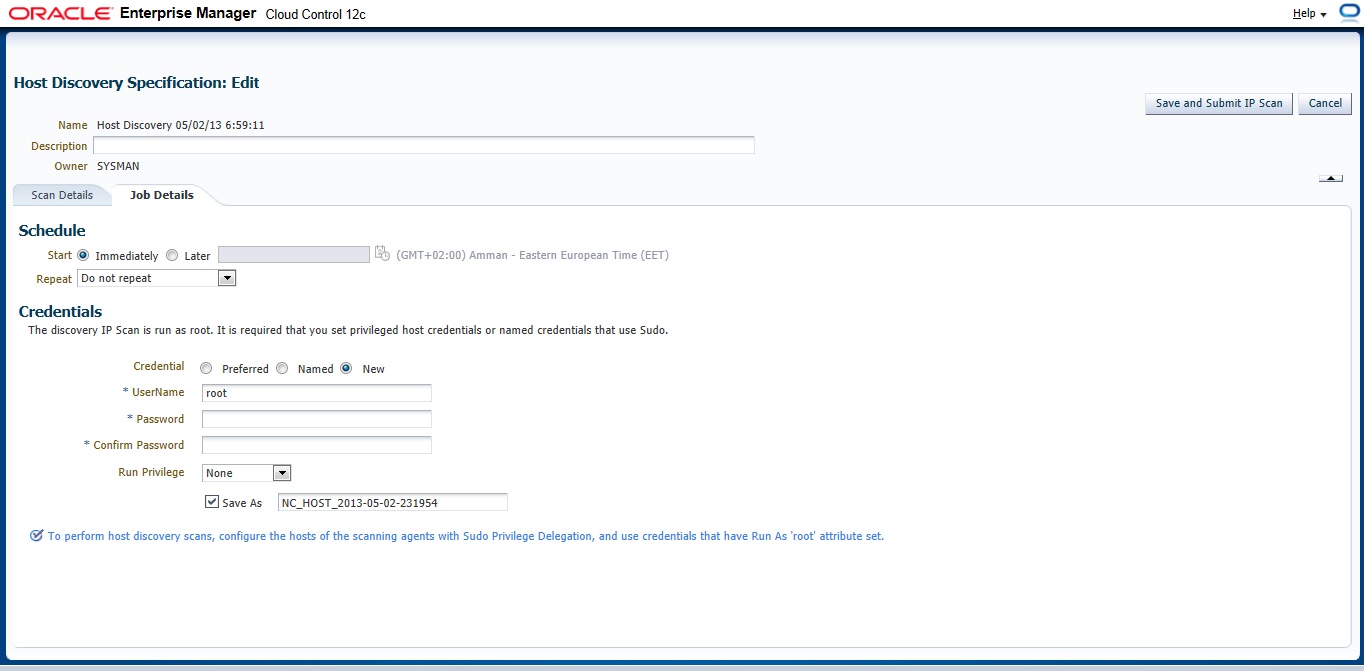
 Now you need to configure Job Summary
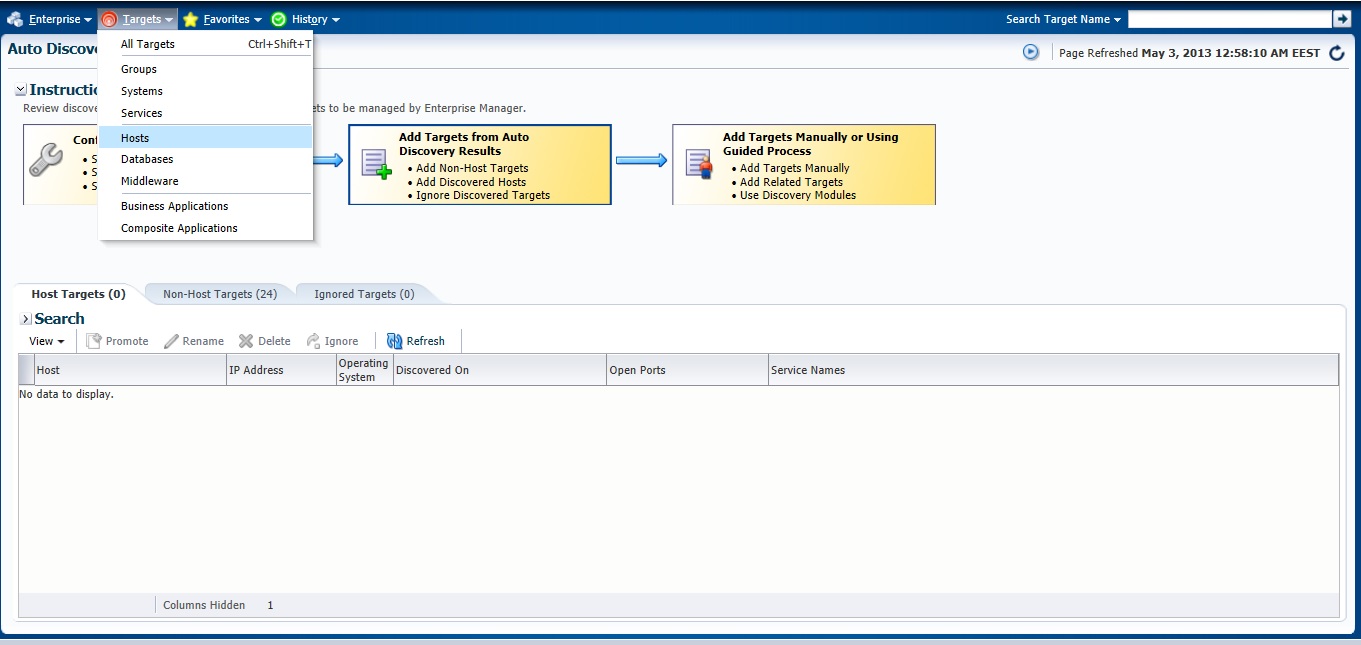
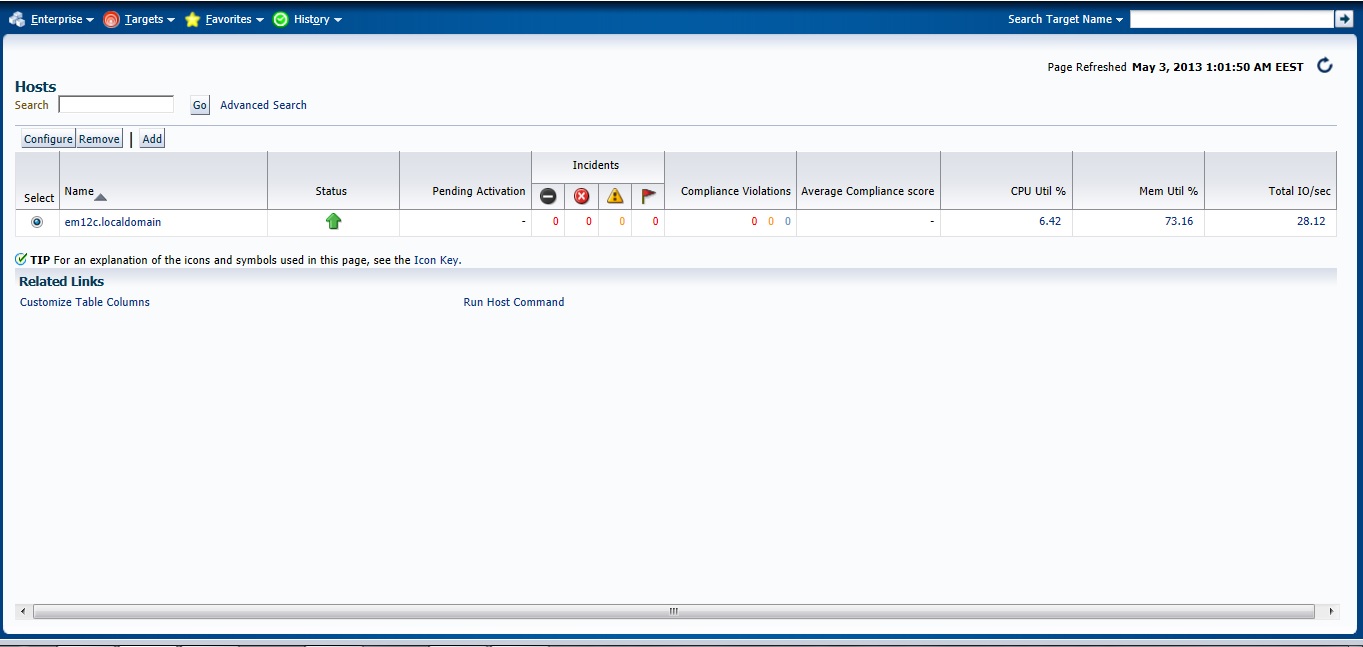
the job will start immeditaly as we choose press “Refresh Ip Scan Result” to check The result. you can check it also from here :

Check the Host

Next Post will be How to Add Agent Manually .

You can Download this Article From here.

Thank you
Osama Mustafa

3872 Actual Result: Port 3872 passed is busy Check complete

This error appear while trying to deploy agent for Enterprise manager 12c (em12c) and the cause for this error that port 3872 is already in use :

solution

[root@em12c Middleware]# netstat -anp | grep 3872

tcp        0      0 :::3872                     :::*                        LISTEN      2391/java    
     
[root@em12c Middleware]# kill -9 2391

[root@em12c Middleware]# netstat -anp | grep 3872

Deploy Again

Thank you
Osama Mustafa

Start/Stop Oracle Enterprise Manager 12c

To Start enterprise manager 12c you need to follow the below steps :

export ORACLE_HOME=/u01/app/oracle/product/11.2.0/dbhome_1
export OMS_HOME=/u03/app/oracle/Middleware/om12c/oms/
export AGENT_HOME=/u03/app/oracle/Middleware/agent12c/agent_inst/

  • ensure database and listener is running
  • Run the below command from $OMS_HOME

emctl start oms

  • Run the below command from $AGENT_HOME

emctl start agent 

to Stop all the services you need to do the below :

 export ORACLE_HOME=/u01/app/oracle/product/11.2.0/dbhome_1
export OMS_HOME=/u03/app/oracle/Middleware/om12c/oms/
export AGENT_HOME=/u03/app/oracle/Middleware/agent12c/agent_inst/

  • Run the below command from $OMS_HOME

emctl stop oms -all

  • Run the below command from $AGENT_HOME

emctl stop agent 

  • Now you can shutdown database and listener.

Thank you
Osama mustafa


Step By Step to Install Enterprise Manager 12c on Redhat 6.1

in this article you will have a look how to install Oracle Enterprise manager 12c ( em12c ) on Redhat 6 update 1 Operating system.

First Step is select supported OS and Database to install repository. and you can check about certification and to do that :

1.Log in to My Oracle Support, which is accessible at the following URL: https://support.oracle.com
2. Click the Certifications tab.
3. In the Certification Search region, select Enterprise Manager Cloud Control from the Product list.
4. From the Release list, select 12.1.0.2.0, then click Search.
5. Expand the Databases node.

after checking the certification you need to install the following :

  • Enterprise manager 12c from here.
  • Redhat 6 from here
  • if you install on Linux 64bit you need to apply Patch 10404530 Download from here.

Enterprise manager needs the following Requirement :

Hardware
Minimum: 6 GB of RAM.
Disk Space Requirements 30Gb to 50Gb for installation of the software.
Software

OMS Package

make-3.81
binutils-2.17.50.0.6
gcc -4.1.1
libaio-0.3.106
glibc-common-2.3.4
libstdc++ -4.1.1
sysstat-5.0.5
glibc-2.5.12
glibc-devel-2.5-49

agent Package

make-3.81
binutils-2.17.50.0.6
gcc -4.1.1
libstdc++ -4.1.1

I will not mention the prerequisites since in 11gr2 and 12c while installation it will give what missing in OS, Database configuration and fix it thru installation, and if missing package found ,  the package name will appear and all you need is install it from media ( OS CD/DvD).

you need to configure database also before start install em12c :

  • Remove Dbconsole from database with the below command :

emca -deconfig dbcontrol db -repos drop

  • Change the below database parameters :

ALTER SYSTEM SET processes=300 SCOPE=SPFILE;
ALTER SYSTEM SET session_cached_cursors=200 SCOPE=SPFILE;
ALTER SYSTEM SET sga_target=2G SCOPE=SPFILE;
ALTER SYSTEM SET shared_pool_size=600M SCOPE=SPFILE;
ALTER SYSTEM SET pga_aggregate_target=1G SCOPE=SPFILE;
ALTER SYSTEM SET job_queue_processes=20 SCOPE=SPFILE;
ALTER SYSTEM SET open_cursors=300 SCOPE=SPFILE;

  • Restart Database.
  • create new folder to install em12c 

mkdir -p /u02/app/oracle/middleware/
cd /u02/app/oracle/middleware
mkdir om12c
mkdir agent12c 

  • you suppose to finish download unzip and start install (./runInstaller).
I will Provide you with Screenshot for the installation :
Asking for MOS account
Asking for Updates 

 Check prerequisites

Sometimes you will receive warning related to glibc error Press Yes:

Now you need to choose installation type

Choose location where you want to install
Middleware location : /u02/app/oracle/middleware/oms12c
Agent Location : /u02/app/oracle/middleware/agent12c

Next Screen you need to choose password and create connection with database

On the first warning dialog, click the “Yes” button to disable the stats gathering job.

review :

During the installation :

Done

also you can download this article from here

Thank you
Osama mustafa