Oracle 23c Is out

Oracle Database 23c Free Version Now Available to Developers.

The new Oracle Database 23c Free – Developer Release is a free version of the trusted Oracle Database used by businesses of all sizes around the globe. Obtaining the only converged database that works with any data model and any task type is as easy as downloading it from the internet with no oracle.com user account or license click-through requirements.

If you’re looking for a free database to use for developing data-driven applications, look no further than Oracle Database 23c Free – Developer Release. Users can upgrade to other Oracle Database products at any moment because of its backwards compatibility with Oracle Database Enterprise Edition and Oracle Database cloud services.

Documentation here

Download:

Regards

Osama

AWS Infrastructure

The AWS Global Cloud Infrastructure is the most secure, extensive, and reliable cloud platform, offering over 200 fully featured services from data centers globally.
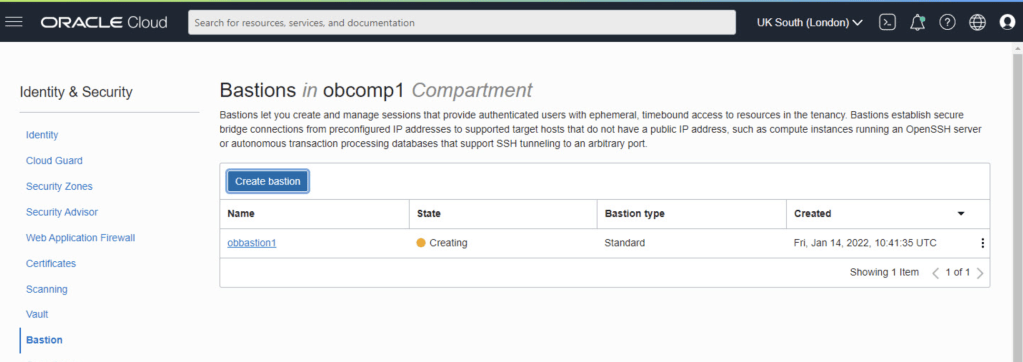
AWS Data Center

AWS pioneered cloud computing in 2006 to provide rapid and secure infrastructure. AWS continuously innovates on the design and systems of data centers to protect them from man-made and natural risks. Today, AWS provides data centers at a large, global scale. AWS implements controls, builds automated systems, and conducts third-party audits to confirm security and compliance. As a result, the most highly-regulated organizations in the world trust AWS every day.

Availability Zone – AZ

An Availability Zone (AZ) is one or more discrete data centers with redundant power, networking, and connectivity in an AWS Region. Availability Zones are multiple, isolated areas within a particular geographic location. When you launch an instance, you can select an Availability Zone or let AWS choose one for you. If you distribute your instances across multiple Availability Zones and one instance fails, you can design your application so that an instance in another Availability Zone can handle requests.

Region

Each AWS Region consists of multiple, isolated, and physically separate Availability Zones within a geographic area. This achieves the greatest possible fault tolerance and stability. In your account, you determine which Regions you need. You can run applications and workloads from a Region to reduce latency to end users. You can do this while avoiding the upfront expenses, long-term commitments, and scaling challenges associated with maintaining and operating a global infrastructure.

AWS Local Zone

AWS Local Zones can be used for highly demanding applications that require single-digit millisecond latency to end users. Media and entertainment content creation, real-time multiplayer gaming, and Machine learning hosting and training are some use cases for AWS Local Zones.

CloudFront – Edge Location

An edge location is the nearest point to a requester of an AWS service. Edge locations are located in major cities around the world. They receive requests and cache copies of your content for faster delivery.

Regards

Osama

AWS Snow Family memberS

The AWS Snow Family is a collection of physical devices that help to physically transport up to exabytes of data into and out of AWS. 

AWS Snow Family is composed of AWS SnowconeAWS Snowball, and AWS Snowmobile.

These devices offer different capacity points, and most include built-in computing capabilities. AWS owns and manages the Snow Family devices and integrates with AWS security, monitoring, storage management, and computing capabilities.  

AWS Snowcone

AWS Snowcone is a small, rugged, and secure edge computing and data transfer device. 

It features 2 CPUs, 4 GB of memory, and 8 TB of usable storage.

AWS Snowball

AWS Snowball offers two types of devices:

  • Snowball Edge Storage Optimized devices are well suited for large-scale data migrations and recurring transfer workflows, in addition to local computing with higher capacity needs.
    • Storage: 80 TB of hard disk drive (HDD) capacity for block volumes and Amazon S3 compatible object storage, and 1 TB of SATA solid state drive (SSD) for block volumes. 
    • Compute: 40 vCPUs, and 80 GiB of memory to support Amazon EC2 sbe1 instances (equivalent to C5).
  • Snowball Edge Compute Optimized provides powerful computing resources for use cases such as machine learning, full motion video analysis, analytics, and local computing stacks.
    • Storage: 42-TB usable HDD capacity for Amazon S3 compatible object storage or Amazon EBS compatible block volumes and 7.68 TB of usable NVMe SSD capacity for Amazon EBS compatible block volumes. 
    • Compute: 52 vCPUs, 208 GiB of memory, and an optional NVIDIA Tesla V100 GPU. Devices run Amazon EC2 sbe-c and sbe-g instances, which are equivalent to C5, M5a, G3, and P3 instances.

AWS Snowmobile

AWS Snowmobile is an exabyte-scale data transfer service used to move large amounts of data to AWS. 

You can transfer up to 100 petabytes of data per Snowmobile, a 45-foot long ruggedized shipping container, pulled by a semi trailer truck.

Cheers

Osama

Create IAM Users – OCI

You have the ability to establish users for Oracle Cloud Infrastructure Identity and Access Management (IAM) for user situations that are not as common.

  • Open the navigation menu and click Identity & Security. Under Identity, click Users.
  • Click Create user and then select IAM User.
  • Fill the required fields, and click Create.
  • Add the user to an IAM group with specific access.
    • Under Identity, select Groups
    • From the groups list, click the group to which you want to add the user.
    • Click Add User to Group.
    • In the Add User to Group dialog, select the user you created from the drop-down list in the Users field, and click Add.
  • Create the user’s password.
    • From the Group Members table on the Group Details screen, select the user you added.
    • Click Create/Reset Password. The Create/Reset Password dialog is displayed with a one-time password listed.
    • Click Copy, then Close.
  • Welcome to OCI

Regards

Osama

Create a Bastion – OCI

What is a Bastion?

It’s essential to consider the security implications before allowing direct access to cloud services and resources, particularly as the latter expands. Some individuals get around this problem by setting up a virtual machine within the virtual cloud network and linking it to all the cloud services. This cuts down on publicly accessible services while facilitating connections for developers and system administrators. This virtual machine (VM) is like a manual bastion or leap box.

Create a Bastion

  • Connect to Oracle’s cloud service. To access the main menu, choose the hamburger icon in the upper left corner.
  • On the menu select “Identity & Security > Bastion”.
  • Select the compartment and click the “Create bastion” button.
  • Enter the bastion name and select the VCN and subnet for the bastion. We need to enter a CIDR block allowlist. In this case I’ve used the subnet for my IP address from my internet service provider. Click the “Create bastion” button.
  • Click on the “Create session” button.
  • Connect

Our previously copied connection information should look something like this at this point.

ssh -i  -N -L :ip-connection:22 -p 22 ocid1.bastionsession.oc1.uk-london-1.amaa...3acq@host.bastion.uk-london-1.oci.oraclecloud.com

Regards

Osama

Connect to AWS Directory Services using Apache directory studio

Apache Directory Studio is a complete directory tooling platform intended to be used with any LDAP server however it is particularly designed for use with the ApacheDS. It is an Eclipse RCP application, composed of several Eclipse (OSGi) plugins, that can be easily upgraded with additional ones.

Step 1: Create a New Connection in Apache Directory Studio

  1. Start up Apache Directory Studio.
  2. Click the LDAP icon to create a new connection.

Step 2: Enter your Connection Information

  1. Enter a name for your connection.
  2. Enter the ‘Network Parameter‘ information as follows:
HostnameThe domain name for your LDAP server. If the LDAP server is not on the same network as Crowd, you may need to use the FQDN or IP address of the LDAP server.
PortFor normal LDAP connectivity, use 389. For SSL connectivity, use 636.
Parameters for connection
  1. Click the ‘Check Network Parameter‘ button to ensure your connection is successful.

Click ‘Next‘.

Step 3: Enter your Authentication Information

  1. Choose the ‘Authentication Method‘ from the dropdown list.
  2. Enter the ‘Authentication Parameter‘ information as follows:
Bind DN or userEnter the full DN of the account that will be used to connect to the LDAP directory. This account should have the ability to browse the entire LDAP directory tree.
Bind passwordEnter the password for the Bind DN account.
Paramter for Auhentication

3. Click the ‘Check Authentication‘ button to ensure this account can authenticate.

4. If this authentication is successful, click ‘Finish‘.

Once the authentication done successfully, you can connect to the Directory services and start browsing the Base DNs for the users.

Cheers
Osama

Youtube Links To learn for free

1) Linux :
Basic Linux commands are necessary before jumping into shell scripting.

https://lnkd.in/dBTsJbhz
https://lnkd.in/dHQTiHBB
https://lnkd.in/dA9pAmHa

2. Shell Scripting:

https://lnkd.in/da_wHgQH
https://lnkd.in/d5CFPgga

3. Python: This will help you in automation

https://lnkd.in/dFtNz_9D
https://lnkd.in/d6cRpFrY
https://lnkd.in/d-EhshQz

4. Networking

https://lnkd.in/dqTx6jmN
https://lnkd.in/dRqCzbkn

5. Git & Github

https://lnkd.in/d9gw-9Ds
https://lnkd.in/dEp3KrTJ

6. YAML
https://lnkd.in/duvmhd5X
https://lnkd.in/dNqrXjmV

7. Containers — Docker:

https://lnkd.in/dY2ZswMZ
https://lnkd.in/d_EySpbh
https://lnkd.in/dPddbJTf

8. Continuous Integration & Continuous Deployment (CI/CD):

https://lnkd.in/dMHv9T8U

9. Container Orchestration — Kubernetes:
https://lnkd.in/duGZwHYX

10. Monitoring:

https://lnkd.in/dpXhmVqs
https://lnkd.in/dStQbpRX
https://lnkd.in/de4H5QVz
https://lnkd.in/dEtTSsbB

11. Infrastructure Provisioning & Configuration Management (IaC): Terraform, Ansible, Pulumi

https://lnkd.in/dvpzNT5M
https://lnkd.in/dNugwtVW
https://lnkd.in/dn5m2NKQ
https://lnkd.in/dhknHJXp
https://lnkd.in/ddNxd8vU

12. CI/CD Tools: Jenkins, GitHub Actions, GitLab CI, Travis CI, AWS CodePipeline + AWS CodeBuild, Azure DevOps, etc

https://lnkd.in/dTmSXNzv
https://lnkd.in/dAnxpVTe
https://lnkd.in/daMFG3Hq
https://lnkd.in/dqf-zzrx
https://lnkd.in/diWP7Tm7
https://lnkd.in/dYDCSiiC

13. AWS:

https://lnkd.in/dmi-TMv9
https://lnkd.in/de3-dAB6
https://lnkd.in/dh2zXZAB
https://lnkd.in/dQMyCBWy

14. Learn how to SSH
SSH using mobaxterm:

https://lnkd.in/gx-T_FU8

15. SSH using Putty :

https://lnkd.in/gGgW7Ns9

K8s Example

Create a Service Account

It’s super simple command

kubectl create sa webautomation -n web

Create a ClusterRole That Provides Read Access to Pods

  1. Define the ClusterRole
apiVersion: rbac.authorization.k8s.io/v1
kind: ClusterRole
metadata:
  name: pod-reader
rules:
- apiGroups: [""]
  resources: ["pods"]
  verbs: ["get", "watch", "list"]

Bind the ClusterRole to the Service Account to Only Read Pods in the web Namespace

apiVersion: rbac.authorization.k8s.io/v1
kind: RoleBinding
metadata:
  name: rb-pod-reader
  namespace: web
subjects:
- kind: ServiceAccount
  name: webautomation
roleRef:
  kind: ClusterRole
  name: pod-reader
  apiGroup: rbac.authorization.k8s.io

Cheers

Osama

OCI Basics – Putting Data into Object Storage OCI

The Object Storage service provides reliable, secure, and scalable object storage. Object storage is a storage architecture that stores and manages data as objects. Some typical use cases include data backup, file sharing, and storing unstructured data like logs and sensor-generated data.

Creating a Bucket

  1. Open the navigation menu and click Storage. Under Object Storage, click Buckets.A list of the buckets in the compartment you’re viewing is displayed.
  2. Select a compartment from the Compartment list on the left side of the page.A list of existing buckets is displayed.
  3. Click Create Bucket.
    • Bucket Name
    • Default Storage Tier: Select the default tier in which you want to store your data
      • Standard is the primary, default storage tier Use the Standard tier for storing frequently accessed data that requires fast and immediate access.
      • Archive is the default storage tier used for archive storage, Use the Archive tier for storing rarely accessed data that requires long retention periods. Access to data in the Archive tier is not immediate. Archived data must be restored before the data is accessible.
      • Object Events: Select Emit Object Events if you want to enable the bucket to emit events for object state changes. For more information about events.
      • Encryption: Buckets are encrypted with keys managed by Oracle by default, but you can optionally encrypt the data in this bucket using your own Vault encryption key. To use Vault for your encryption needs, select Encrypt Using Customer-Managed Keys

Uploading Files to a Bucket

To upload files to your bucket using the Console:

  1. From the Object Storage Buckets screen, click the bucket name to view its details.
  2. Click Upload.
  3. In the Object Name Prefix field, optionally specify a file name prefix for the files that you plan to upload.
  4. If the Storage Tier field displays Standard, you can optionally change the storage tier to upload objects to.

Cheers

Osama

Launching Windows Instance on OCI

In this post  I will show you how to launch and connect to a Windows instance.

  • Create a cloud network and subnet that enables internet access
  • Launch an instance
  • Connect to the instance
  • Add and attach a block volume

I already posted a post how to Launch Linux Instance on OCI here, in the post you will have to follow the first two steps which is creating

  • Choose a compartment for your resources.
  • Create a cloud network.

Once you are done, you can start with steps #3 which will allow you to launch a instance – windows one.

  1. Open the navigation menu and click Compute. Under Compute, click Instances.
  2. Click Create instance.
  3. In the Placement section, accept the default Availability domain.
  4. In the Image and shape section, do the following:
    • In the Image source list, select Platform images.
    • Select Windows. Then, in the OS version list, select Server 2019 Standard.
    • Review and accept the terms of use, and then click Select image.
  5. In the Shape section, click Change Shape. Then, do the following:
    • For Instance type, accept the default, Virtual machine.
    • For Shape series, select AMD, and then choose either the VM.Standard.E4.Flex shape or the VM.Standard.E3.Flex shape (it doesn’t matter which). Accept the default values for OCPUs and memory.
    • The shape defines the number of CPUs and amount of memory allocated to the instance.
  6. In the Networking section, configure the network details for the instance. Do not accept the defaults.
    • For Primary network, leave Select existing virtual cloud network selected.
    • Select the cloud network that you created. If necessary, click Change Compartment to switch to the compartment containing the cloud network that you created.
  7. In the Boot volume section, leave all the options cleared.

Your instance now is ready.

Connect to the windows instance done by using Remote desktop, enter the public ip, username which is (opc), and the password.

Cheers

Osama