I want to share the below picture , describe Database 12c Architecture


For the Better Resolution please follow This Link
Thank you
Osama mustafa
For the people who think differently Welcome aboard
Thank you
Osama mustafa
EM12c R2: How to Upgrade to EM 12c R2 – Two System Method [ID 1363162.1]
EM12c: How to install JVM Diagnostics (JVMD) in Cloud Control [ID 1493862.1]
EM12c: How To Upgrade Plugin On 12.1 Management Agent [ID 1490762.1]
How to Install 12c Agent on Virtual Host [ID 1469995.1]
EM12c Upgrade : Agents Are Not Listed in the Upgrade Console With Error Inventory Data Is Missing From the Repository [ID 1489109.1]
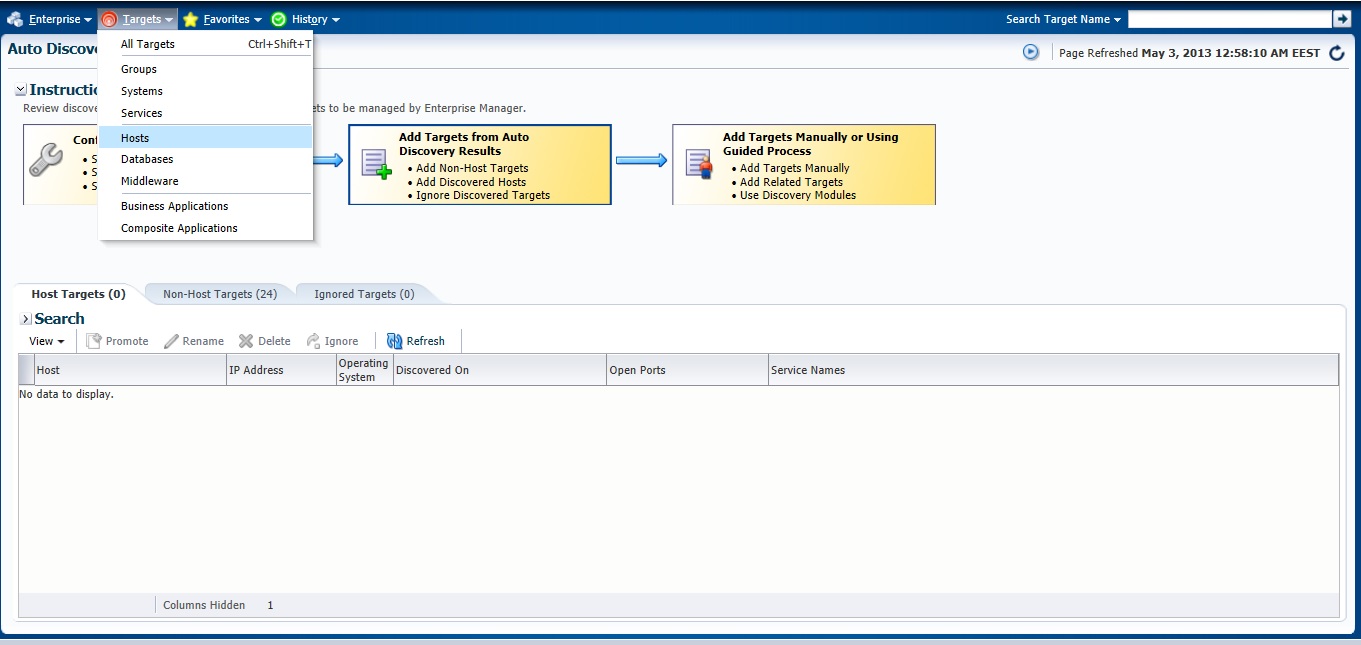
EM 12c : How to Discover All Targets On a Single Host After Agent Installation ? [ID 1386817.1]
EM 12c : Understanding Promote Target Functionality [ID 1386161.1]
EM12c How to Perform Automatic Host Discovery Using IP Scan Method ? [ID 1386811.1]
EM12c Agent status Fails With “Peer Not Authenticated” Error. [ID 1510706.1]
EM12C: Agent Installation Failed With Error: “OMS_HOST and EM_UPLOAD_PORT is not active” [ID 1371873.1]
How To Upgrade Java Diagnostics In Enterprise Manager 12c With the Latest Patches [ID 1534023.1]
EM12c Cloud Control: Required Patches for Discovery and Monitoring of Coherence Targets [ID 1526316.1]
EM12c : Patch Conflict While Applying Patch 14040891 [ID 1479092.1]
Unable To Add host targets with EM12c – Valid Host Name check fails [ID 1433843.1]
Release Schedule of Current Enterprise Manager Releases and Patch Sets (10g, 11g, 12c) [ID 793512.1]
EM 12c: How to Deploy a Plug-In from Enterprise Manager Cloud Control 12.1.0.1 [ID 1364030.1]
Thank you
Osama Mustafa
By default root login on solaris disabled and you cannot login as root. ( which is amazing for security ) but sometimes you need to enable this login and to do that follow the below steps :
#
# The system provided entries are stored in different files
# under “/etc/user_attr.d”. They should not be copied to this file.
#
# Only local changes should be stored in this file.
# This line should be kept in this file or it will be overwritten.
#
oracle::::type=normal;project=user.oracle;defaultpriv=basic,net_privaddr
type should be normal.
and to enable SSH for root user you have to do the following :
vi /etc/ssh/sshd_config
PermitRootLogin = yes
vi /etc/default/login
#CONSOLE =/dev/login|console
rolemod -K type=normal root
Thank you
Osama mustafa
Edit the files /etc/vsftpd.ftpusers and /etc/vsftpd.user_list looks like :
#
# List of users denied access to the FTP server, see ftpusers(4).
#
root
daemon
bin
sys
adm
lp
uucp
nuucp
dladm
netadm
netcfg
smmsp
xvm
mysql
openldap
webservd
nobody
noaccess
nobody4
unknown
zfssnap
aiuser
and remove root user from each file.
You can control ftp as services from
/etc/init.d/vsftpd
Thank you
Osama Mustafa
SQL> SELECT SESSION_ID
2 FROM DBA_DML_LOCKS
3 WHERE NAME = ‘EMP_INFORMATION’;
Where EMP_INFORMATION is Table_name
Output :
SID
___
424
Next step it’s talking about How to find Serial# :
SELECT SID,SERIAL#
FROM V$SESSION
WHERE SID IN (SELECT SESSION_ID
FROM DBA_DML_LOCKS
WHERE NAME = ‘EMP_INFORMATION’)
Output :
SID SERIAL#
—- ——-
424 1103
Use Alter system To kill this session :
ALTER SYSTEM KILL SESSION ‘SID,SERIALl#’;
Thank you
Osama mustafa
there’s two method to do that
1) Configuring Automatic Discovery
2) Adding targets Manually
I will describe the both 🙂 each one separately
Before deploy you need to decide if you want to use Oracle user or root user the below steps you have to do before using oracle :
[root@em12c ~]# vi /etc/sudoers
and change and add the following lines :
Comment this line :
#Defaults requiretty
add the below line
oracle ALL=(ALL) ALL
and remove ! from this line :
Defaults visiblepw
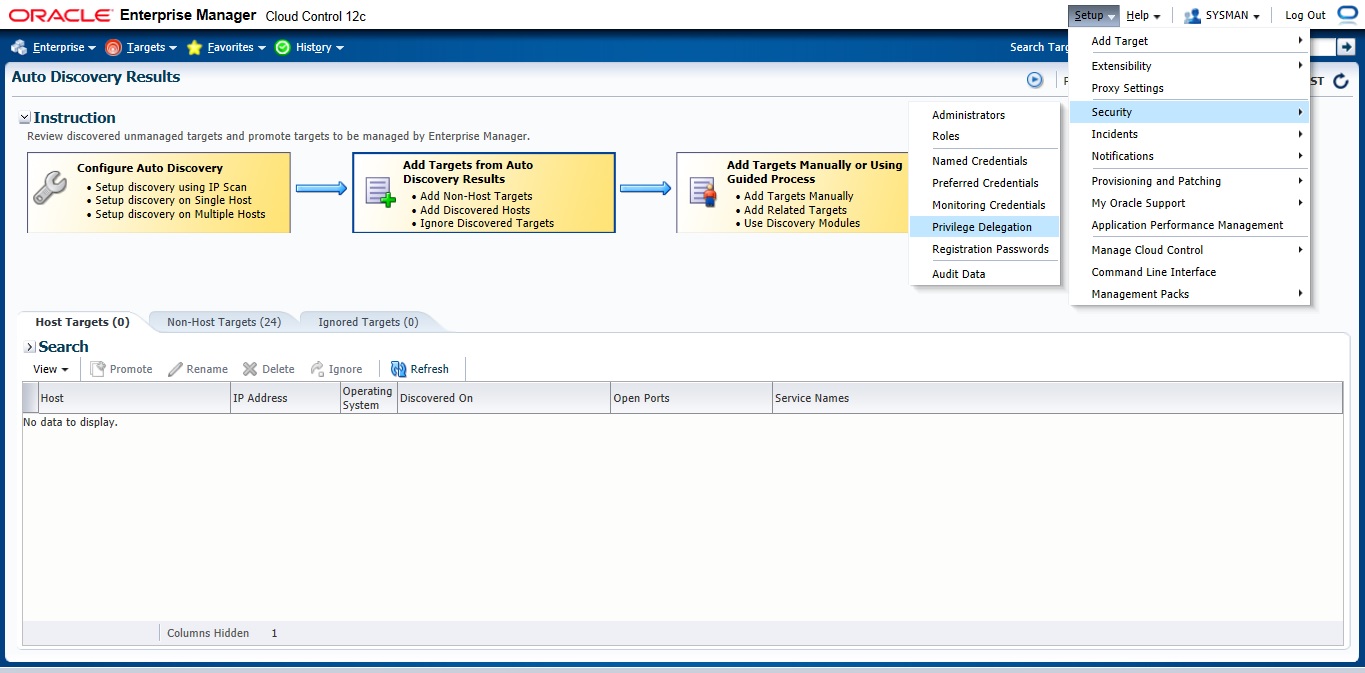
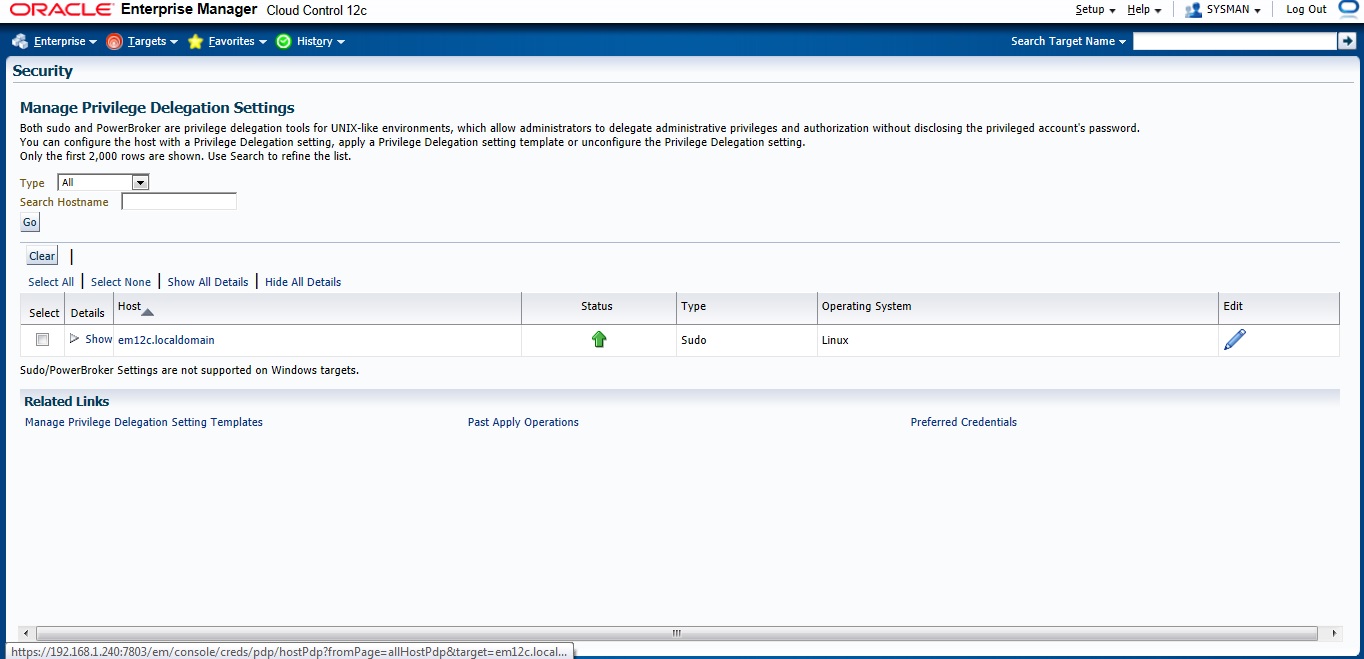
Now On em12c There’s something called privilege delegation
Privilege delegation allows a logged-in user to perform an activity with the privileges of another user. Sudo and PowerBroker are privilege delegation tools that allow a logged-in user to be assigned these privileges. These privilege delegation settings will be used for all provisioning and patching activities on these hosts.
Read more here.
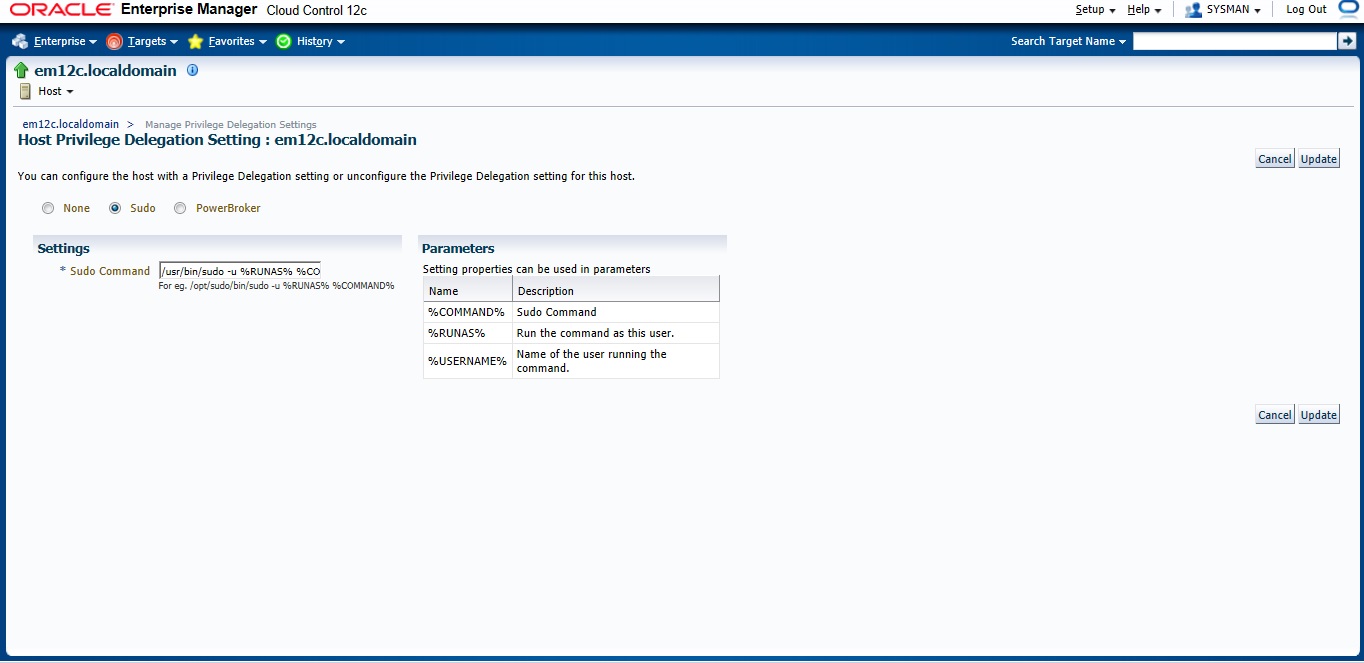
/usr/bin/sudo -u %RUNAS% %COMMAND%
/usr/bin/sudo —> location for sudo command.
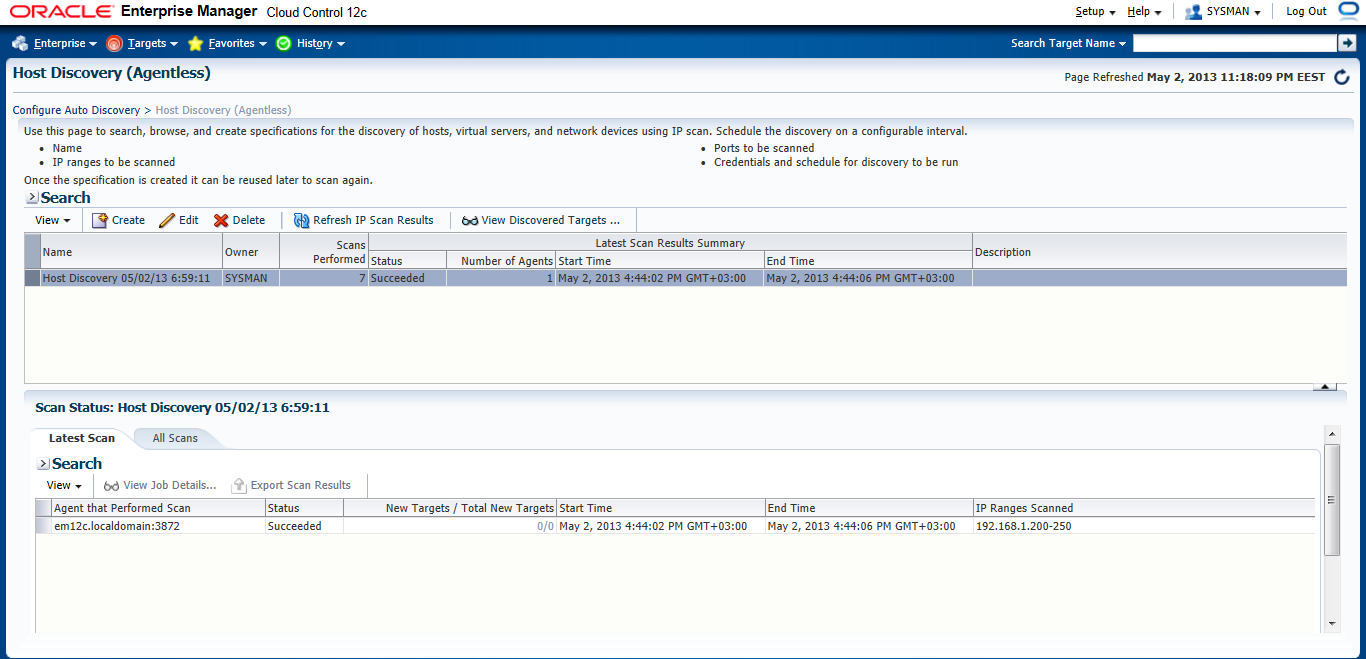
after all the above steps are done let’s configure Auto Discovery
Setup –> add target –> configure auto discovery the below screen will open, choose the first option “Host and oracle vm manager Discovery using Ip scan”
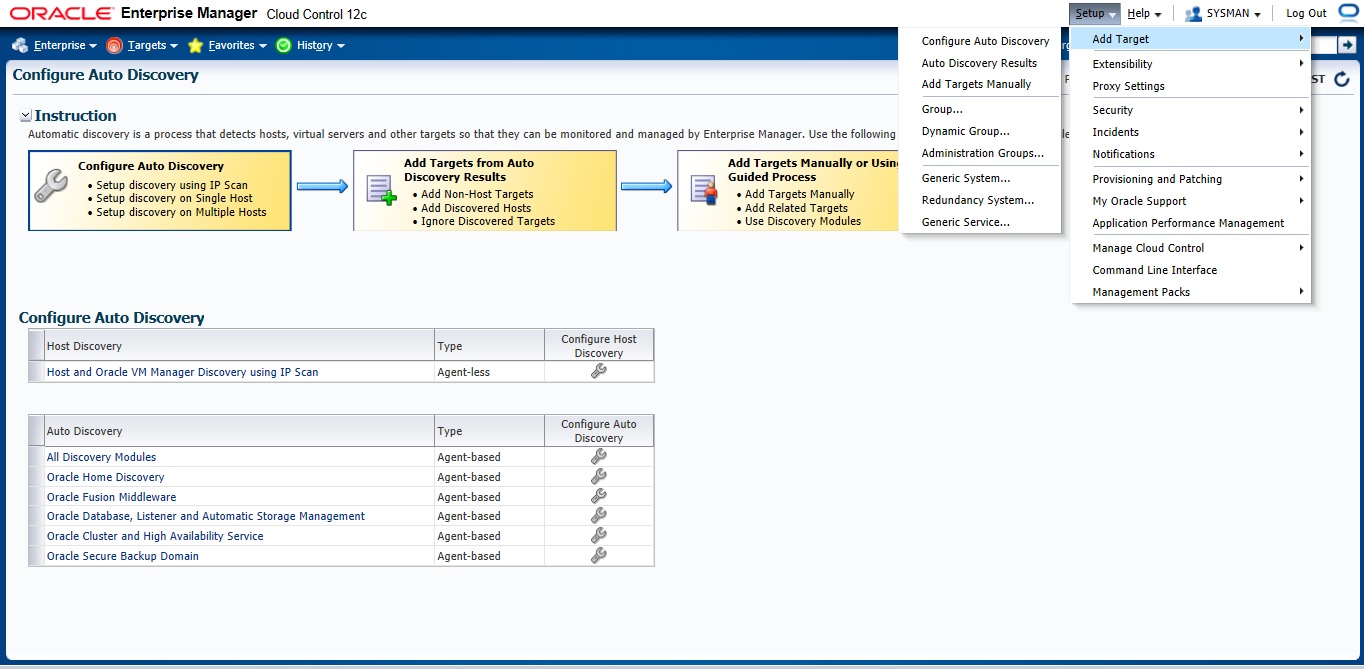
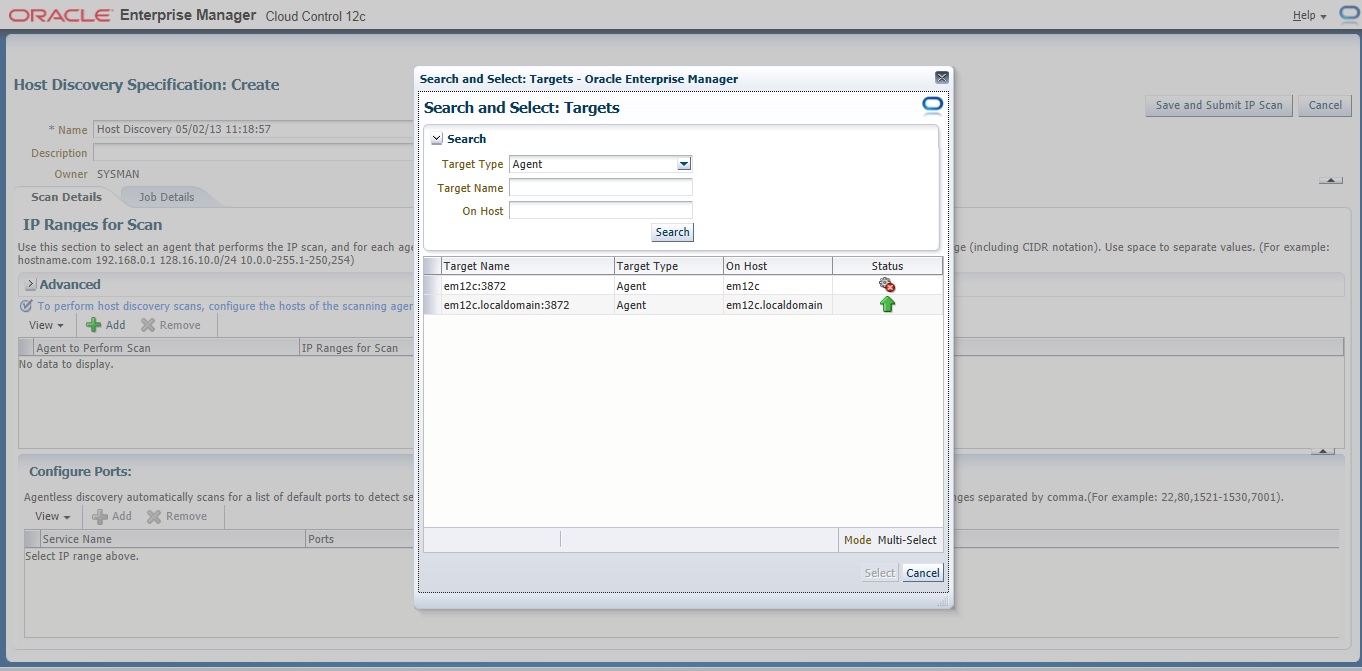
Press create Button
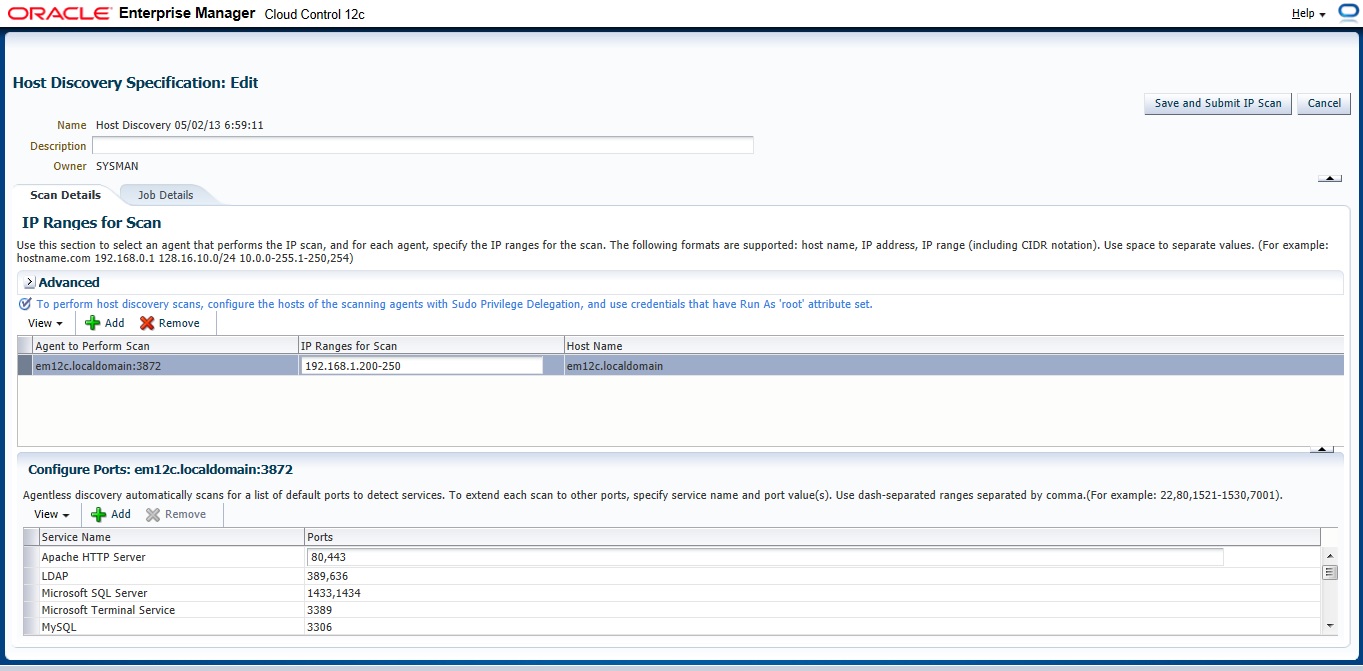
On add Button new Panel Will open , Choose your Host and Choose the Range Ip for scan The Format Mentioned above examples :
192.168.1.240-250
192.168.240/10
192.168.240,241
Now you need to configure Job Summary
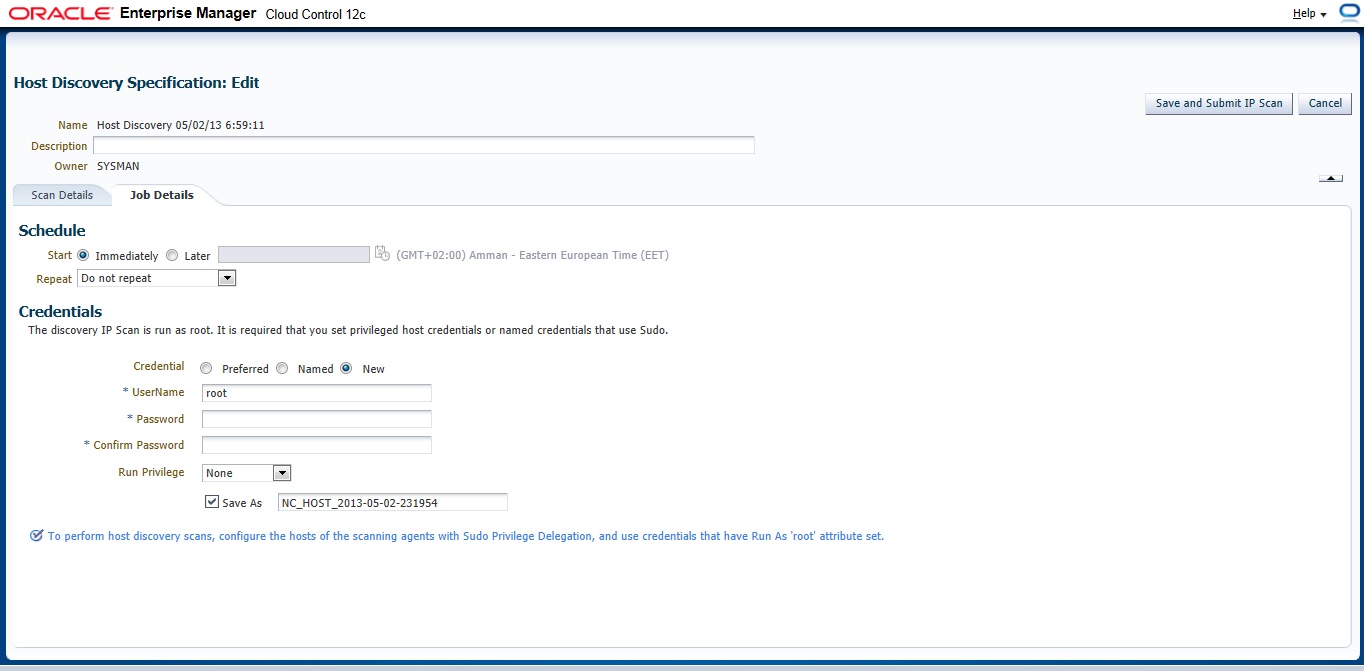

Check the Host
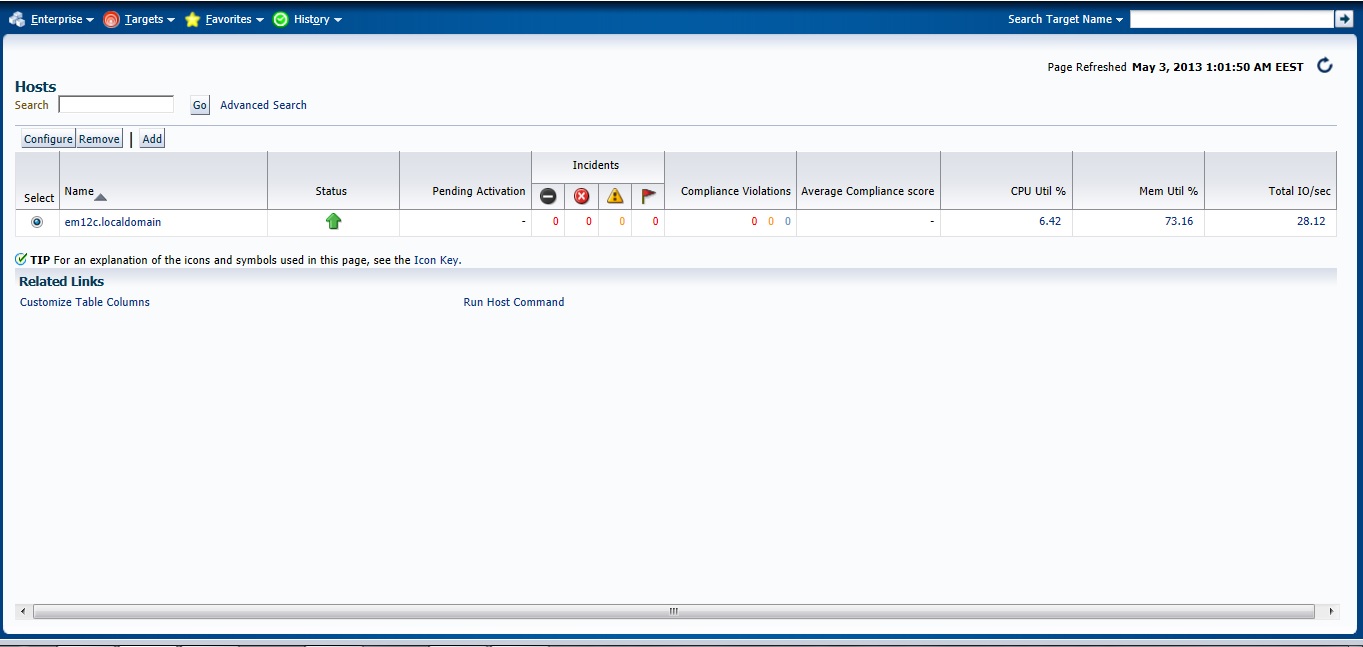
Next Post will be How to Add Agent Manually .
You can Download this Article From here.
Thank you
Osama Mustafa
solution
[root@em12c Middleware]# netstat -anp | grep 3872
tcp 0 0 :::3872 :::* LISTEN 2391/java
[root@em12c Middleware]# kill -9 2391
[root@em12c Middleware]# netstat -anp | grep 3872
Deploy Again
Thank you
Osama Mustafa
export ORACLE_HOME=/u01/app/oracle/product/11.2.0/dbhome_1
export OMS_HOME=/u03/app/oracle/Middleware/om12c/oms/
export AGENT_HOME=/u03/app/oracle/Middleware/agent12c/agent_inst/
emctl start oms
emctl start agent
to Stop all the services you need to do the below :
export ORACLE_HOME=/u01/app/oracle/product/11.2.0/dbhome_1
export OMS_HOME=/u03/app/oracle/Middleware/om12c/oms/
export AGENT_HOME=/u03/app/oracle/Middleware/agent12c/agent_inst/
emctl stop oms -all
emctl stop agent
Thank you
Osama mustafa
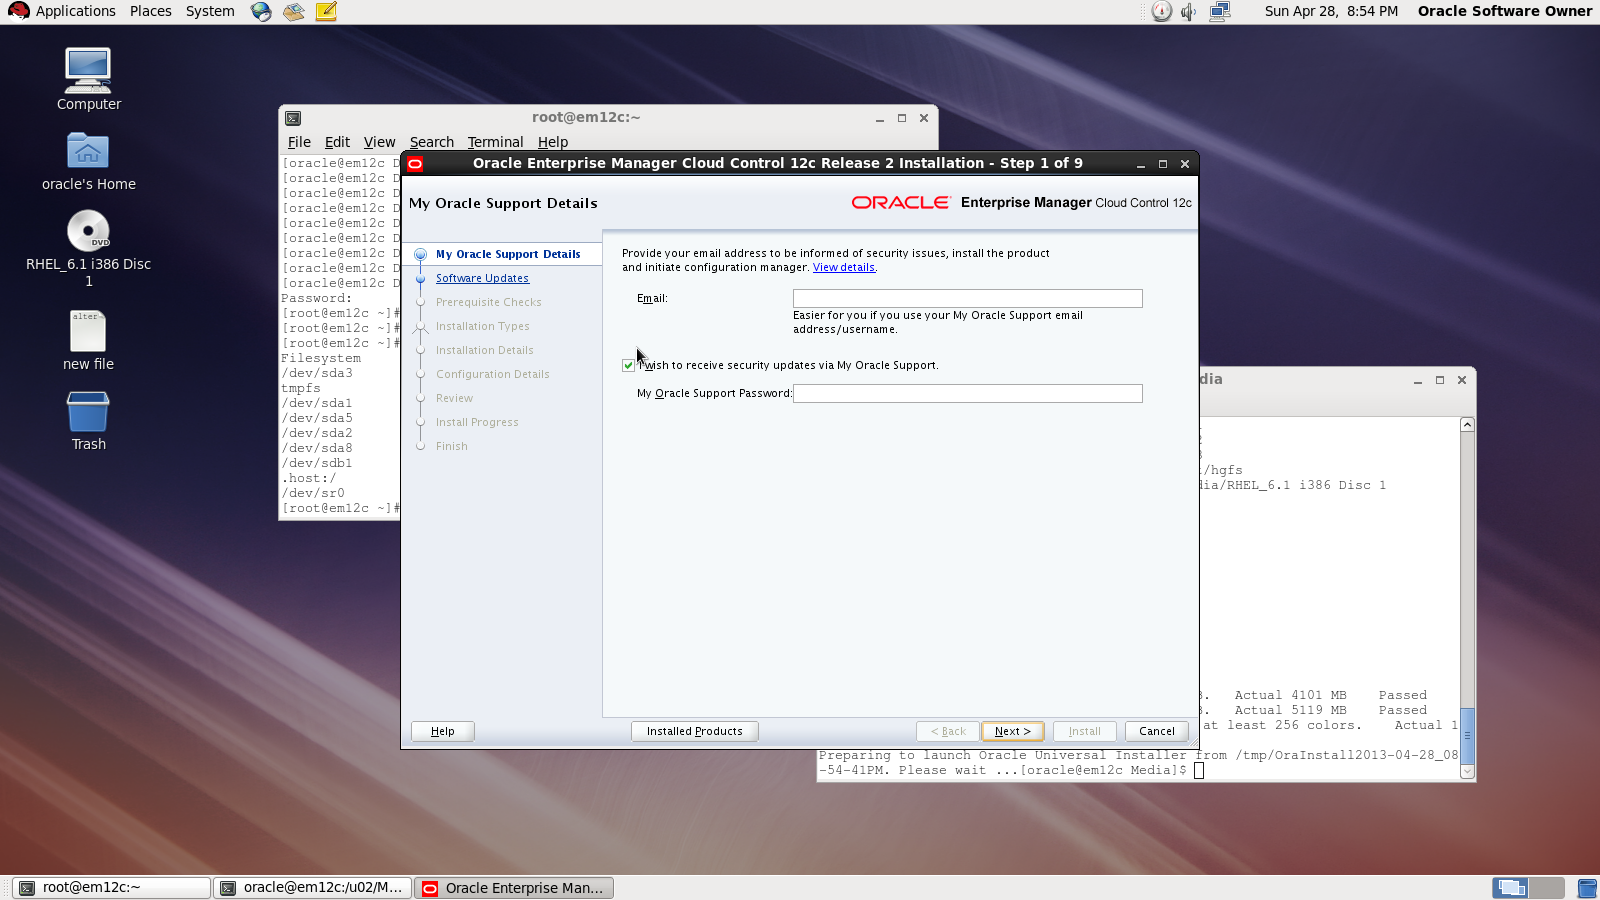
First Step is select supported OS and Database to install repository. and you can check about certification and to do that :
1.Log in to My Oracle Support, which is accessible at the following URL: https://support.oracle.com
2. Click the Certifications tab.
3. In the Certification Search region, select Enterprise Manager Cloud Control from the Product list.
4. From the Release list, select 12.1.0.2.0, then click Search.
5. Expand the Databases node.
after checking the certification you need to install the following :
Enterprise manager needs the following Requirement :
OMS Package
make-3.81
binutils-2.17.50.0.6
gcc -4.1.1
libaio-0.3.106
glibc-common-2.3.4
libstdc++ -4.1.1
sysstat-5.0.5
glibc-2.5.12
glibc-devel-2.5-49
agent Package
make-3.81
binutils-2.17.50.0.6
gcc -4.1.1
libstdc++ -4.1.1
I will not mention the prerequisites since in 11gr2 and 12c while installation it will give what missing in OS, Database configuration and fix it thru installation, and if missing package found , the package name will appear and all you need is install it from media ( OS CD/DvD).
you need to configure database also before start install em12c :
emca -deconfig dbcontrol db -repos drop
ALTER SYSTEM SET processes=300 SCOPE=SPFILE;
ALTER SYSTEM SET session_cached_cursors=200 SCOPE=SPFILE;
ALTER SYSTEM SET sga_target=2G SCOPE=SPFILE;
ALTER SYSTEM SET shared_pool_size=600M SCOPE=SPFILE;
ALTER SYSTEM SET pga_aggregate_target=1G SCOPE=SPFILE;
ALTER SYSTEM SET job_queue_processes=20 SCOPE=SPFILE;
ALTER SYSTEM SET open_cursors=300 SCOPE=SPFILE;
mkdir -p /u02/app/oracle/middleware/
cd /u02/app/oracle/middleware
mkdir om12c
mkdir agent12c
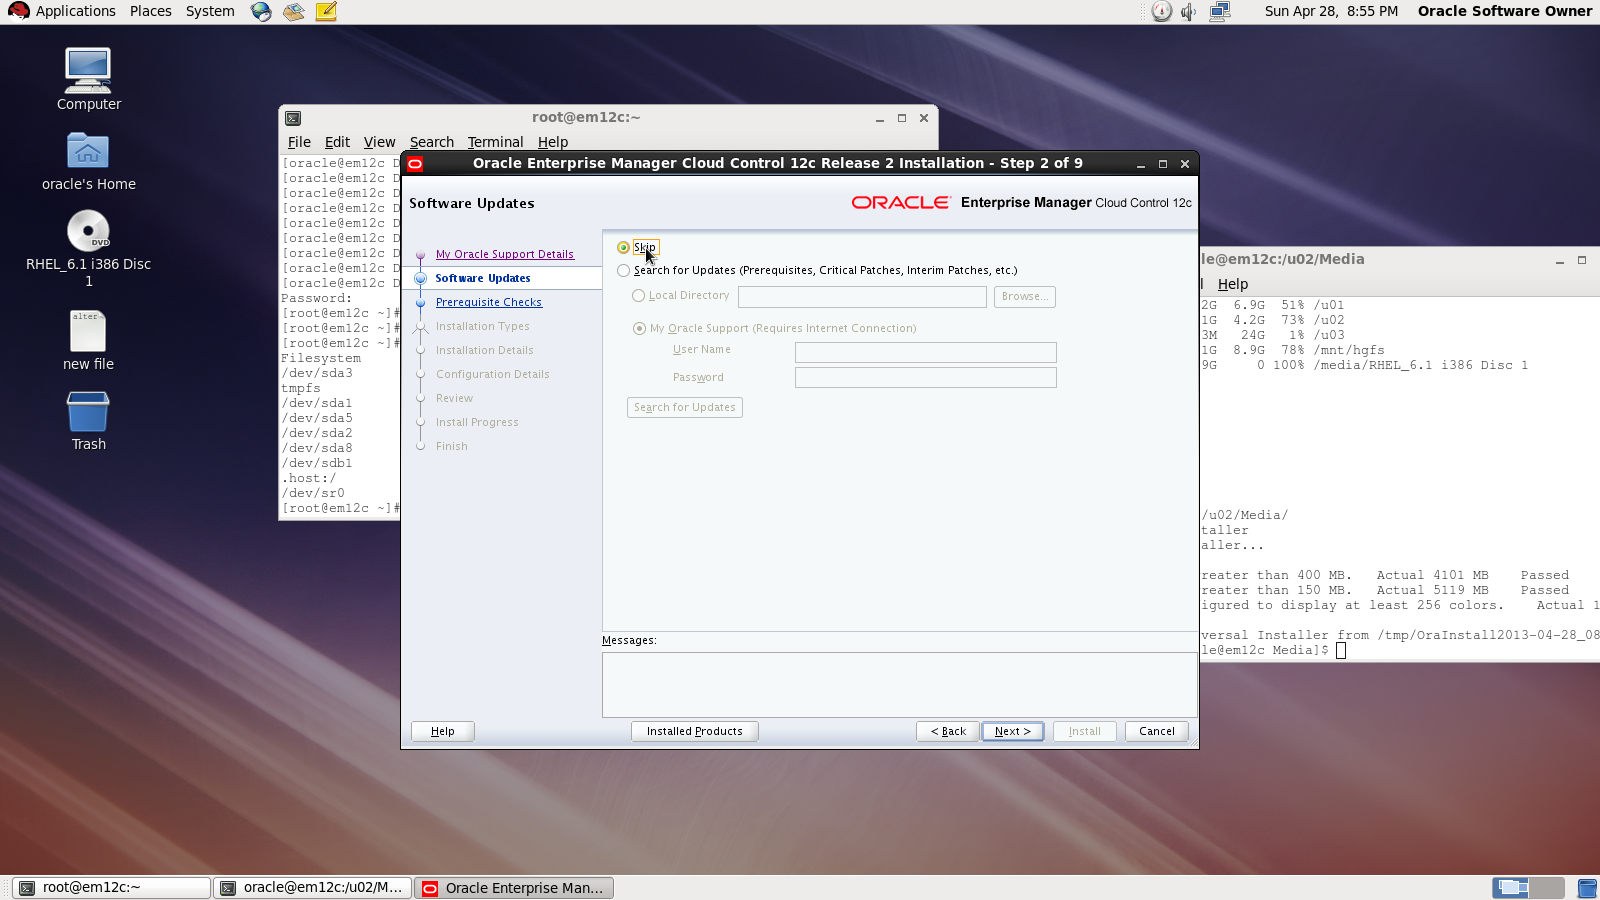
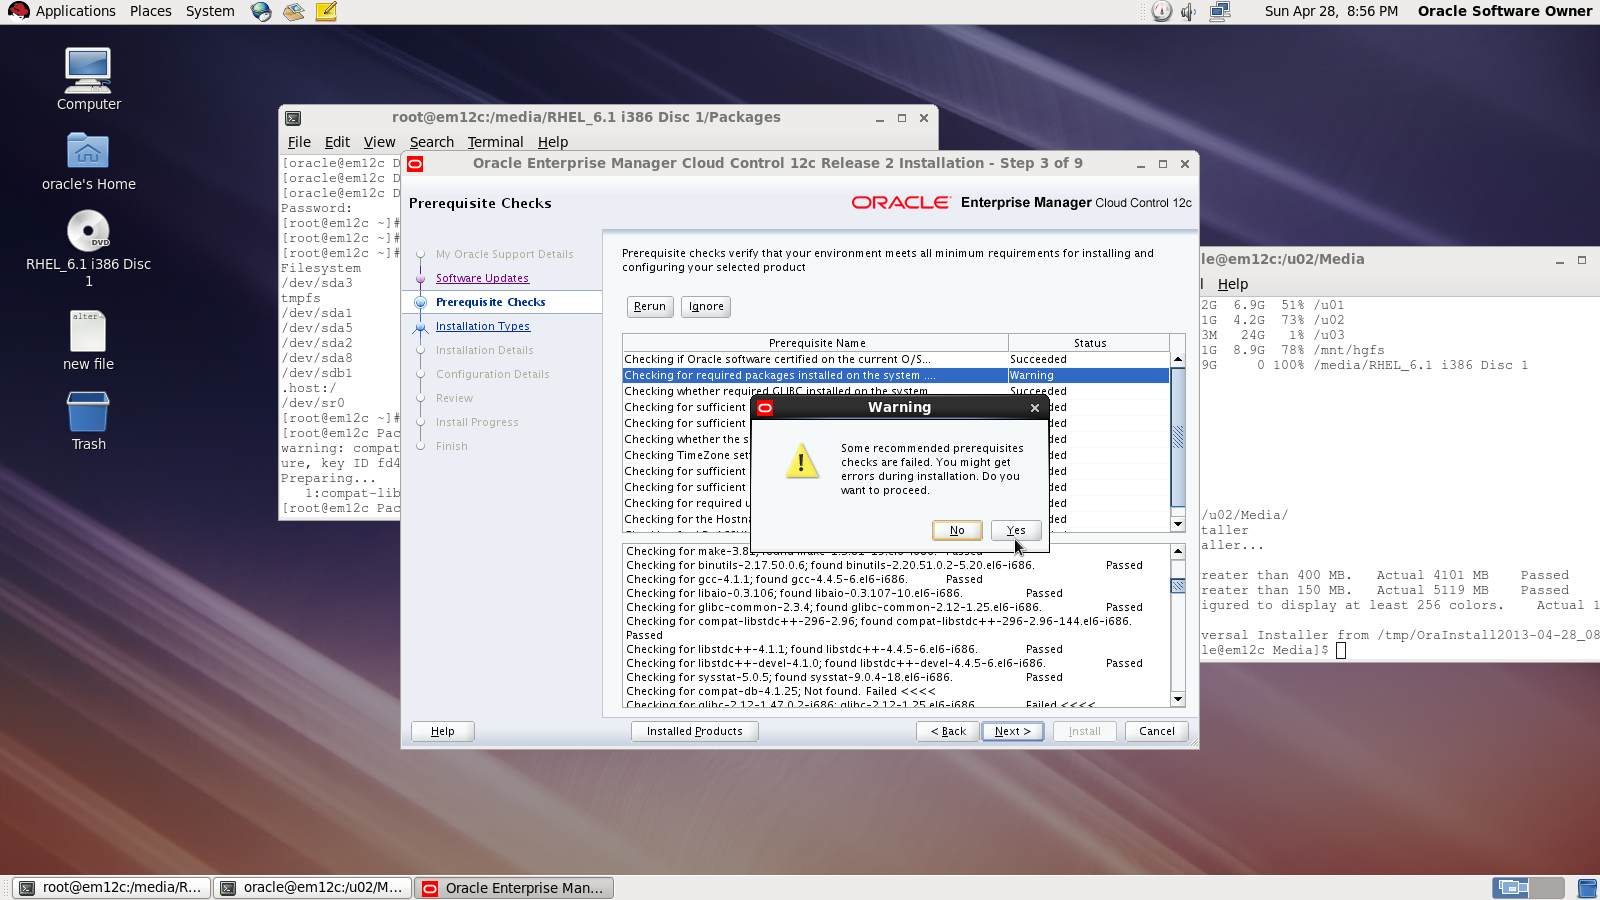
Check prerequisites
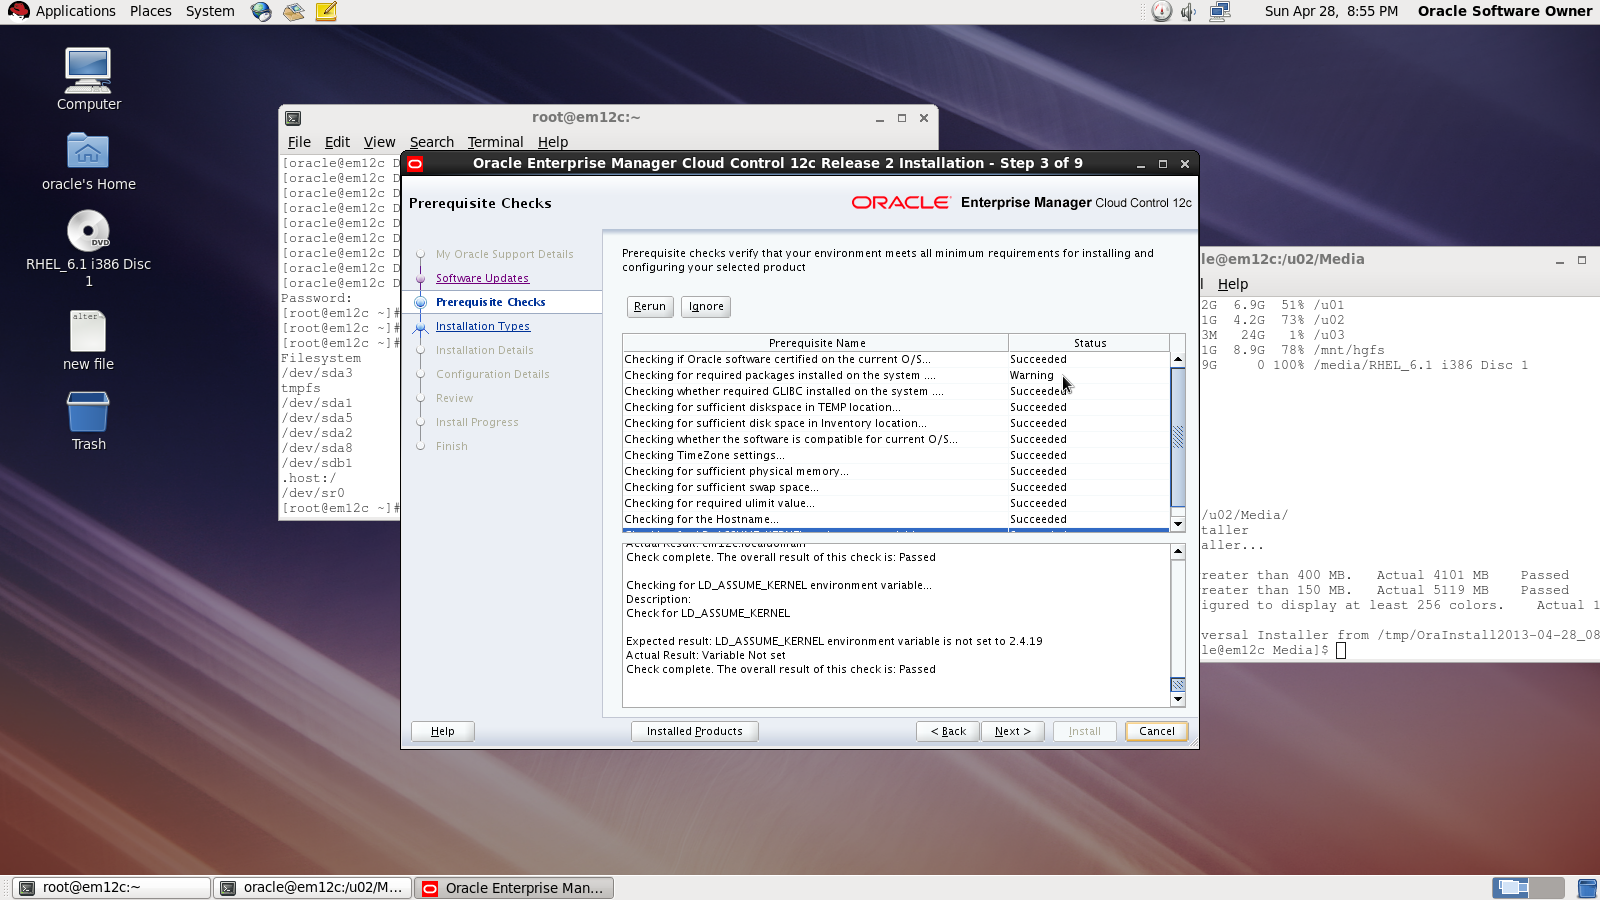
Sometimes you will receive warning related to glibc error Press Yes:
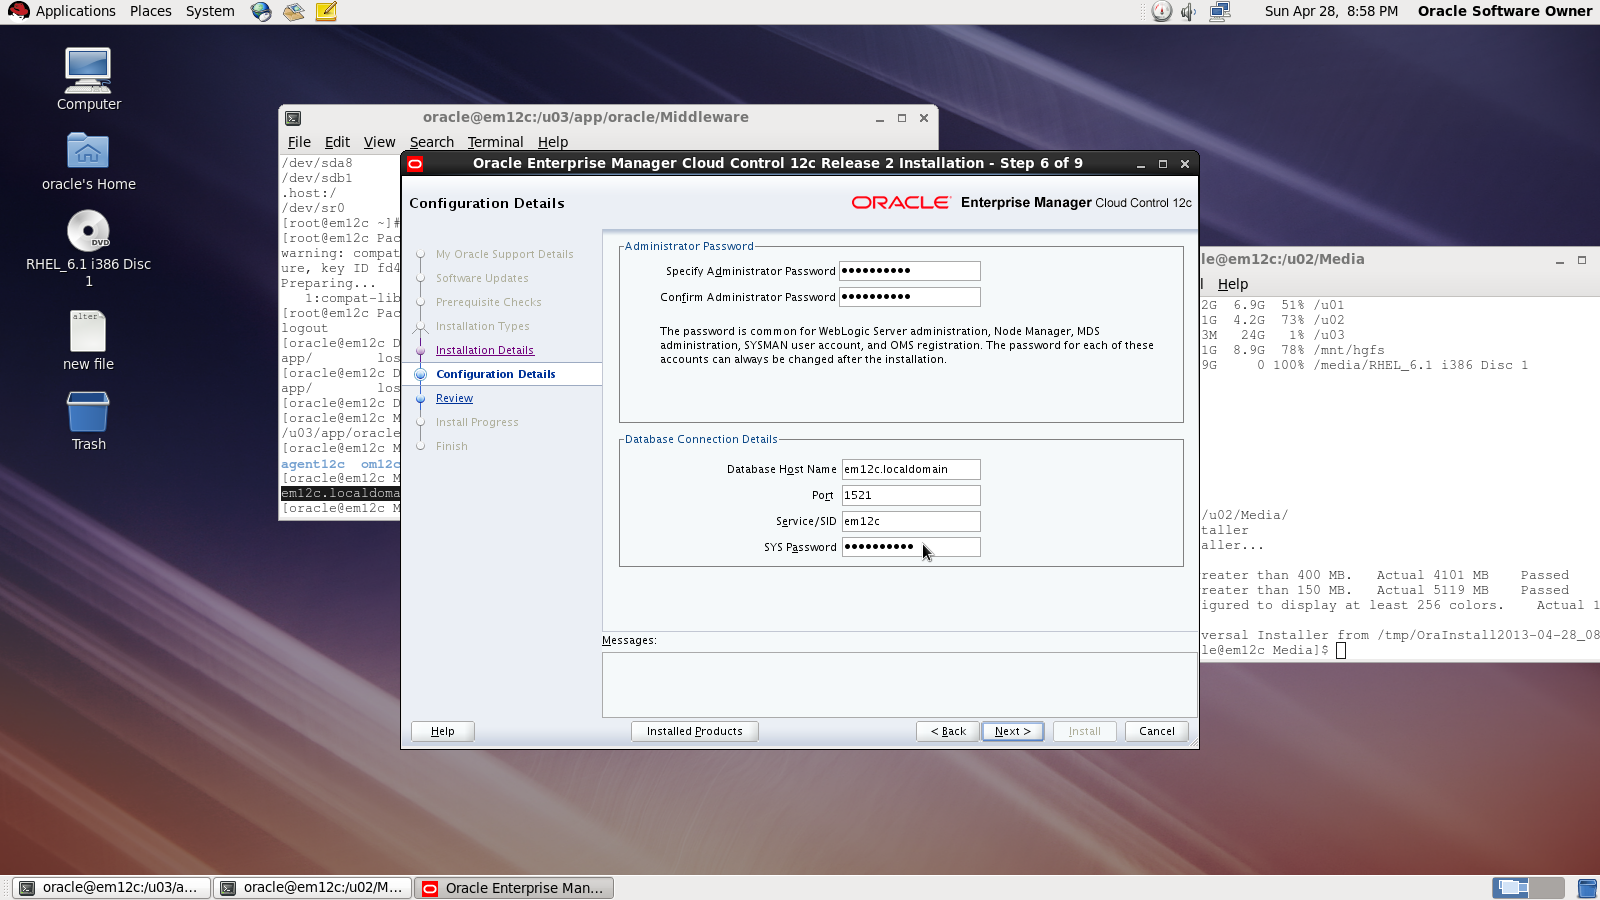
Now you need to choose installation type


Next Screen you need to choose password and create connection with database
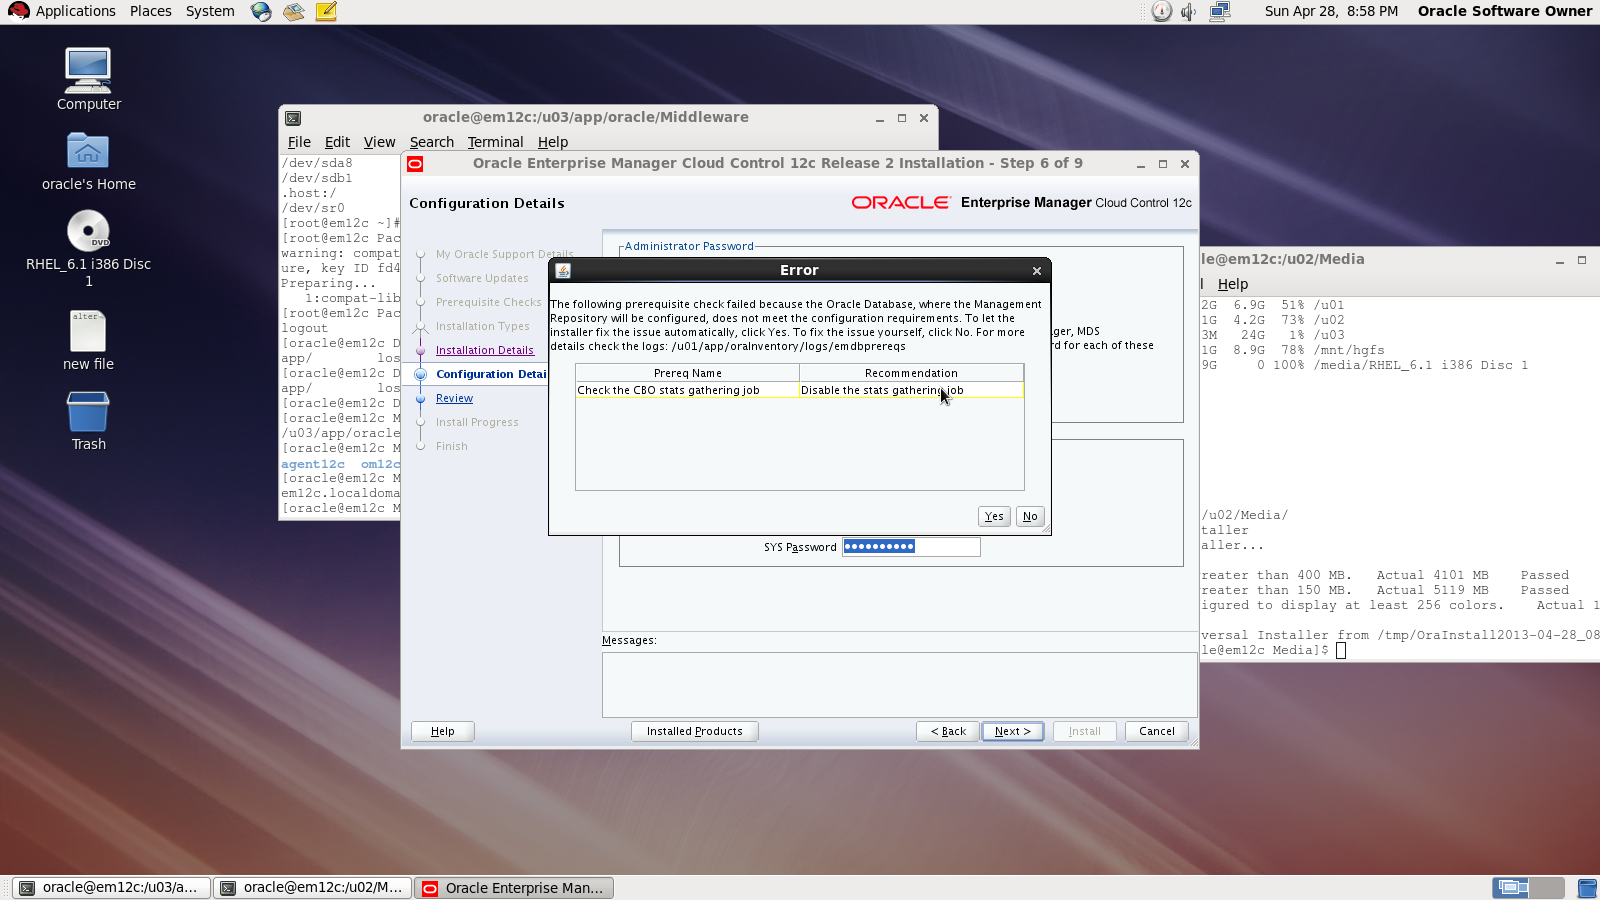
On the first warning dialog, click the “Yes” button to disable the stats gathering job.
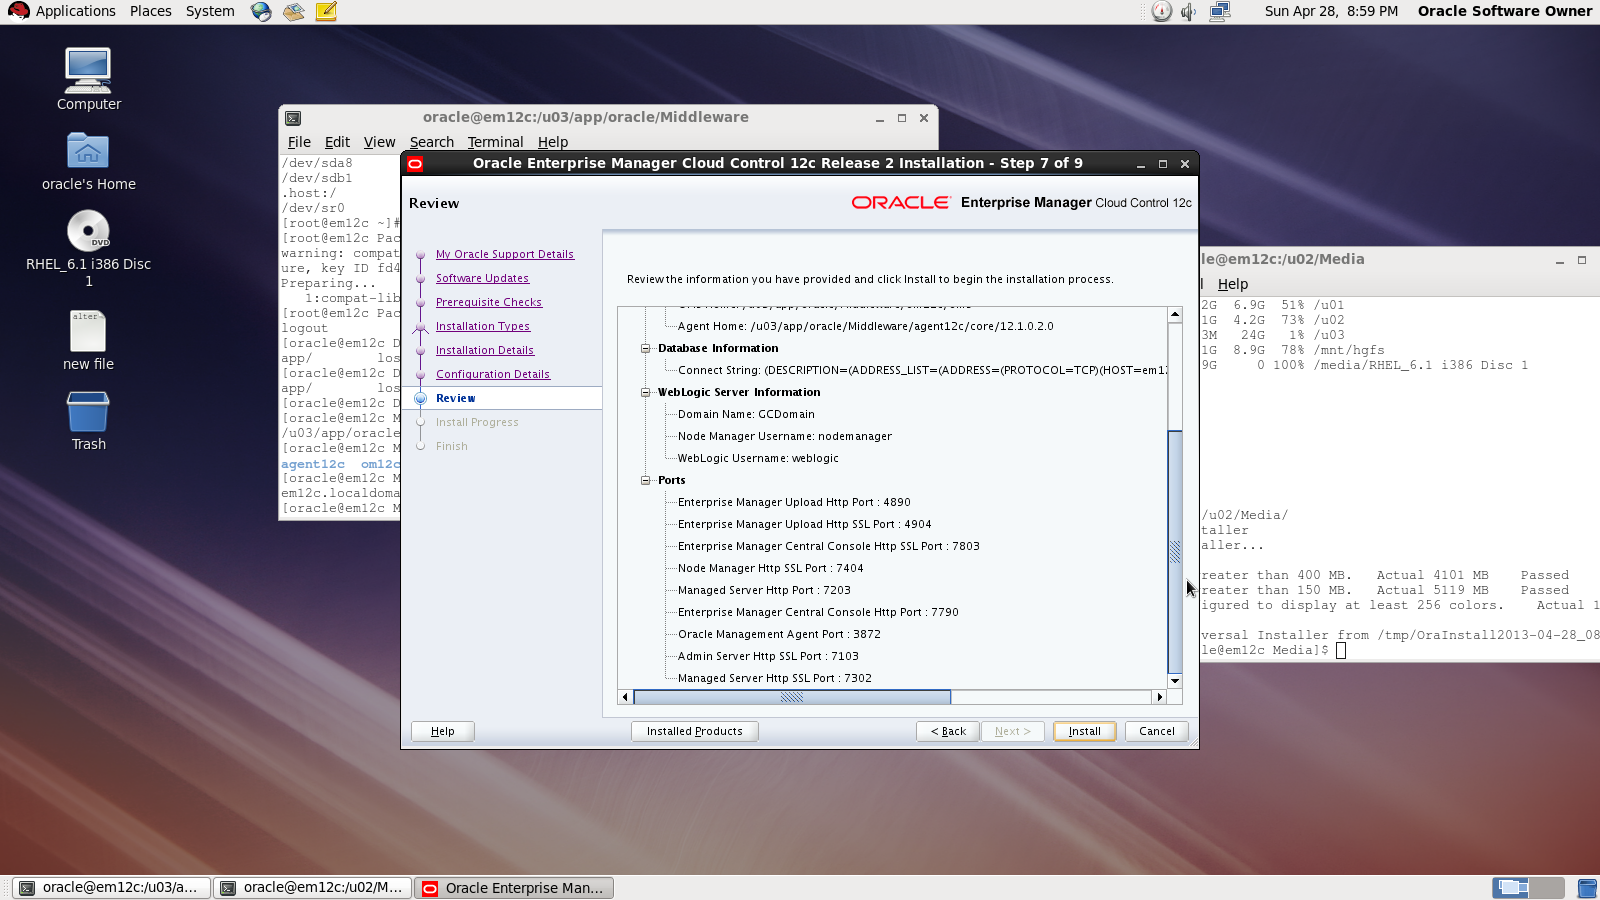
review :
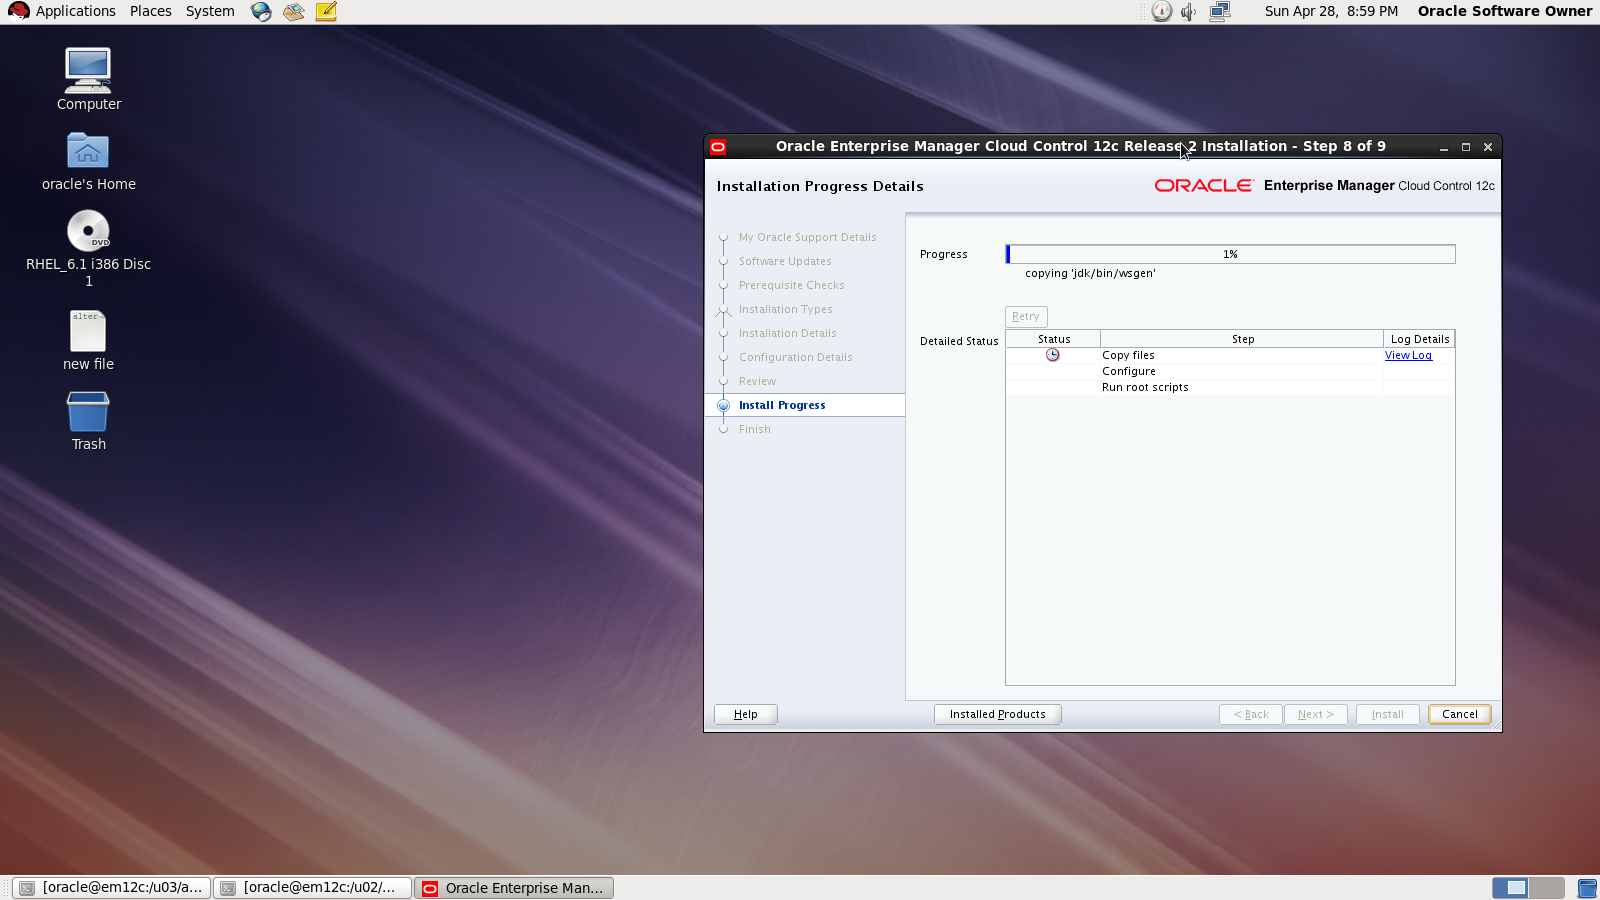
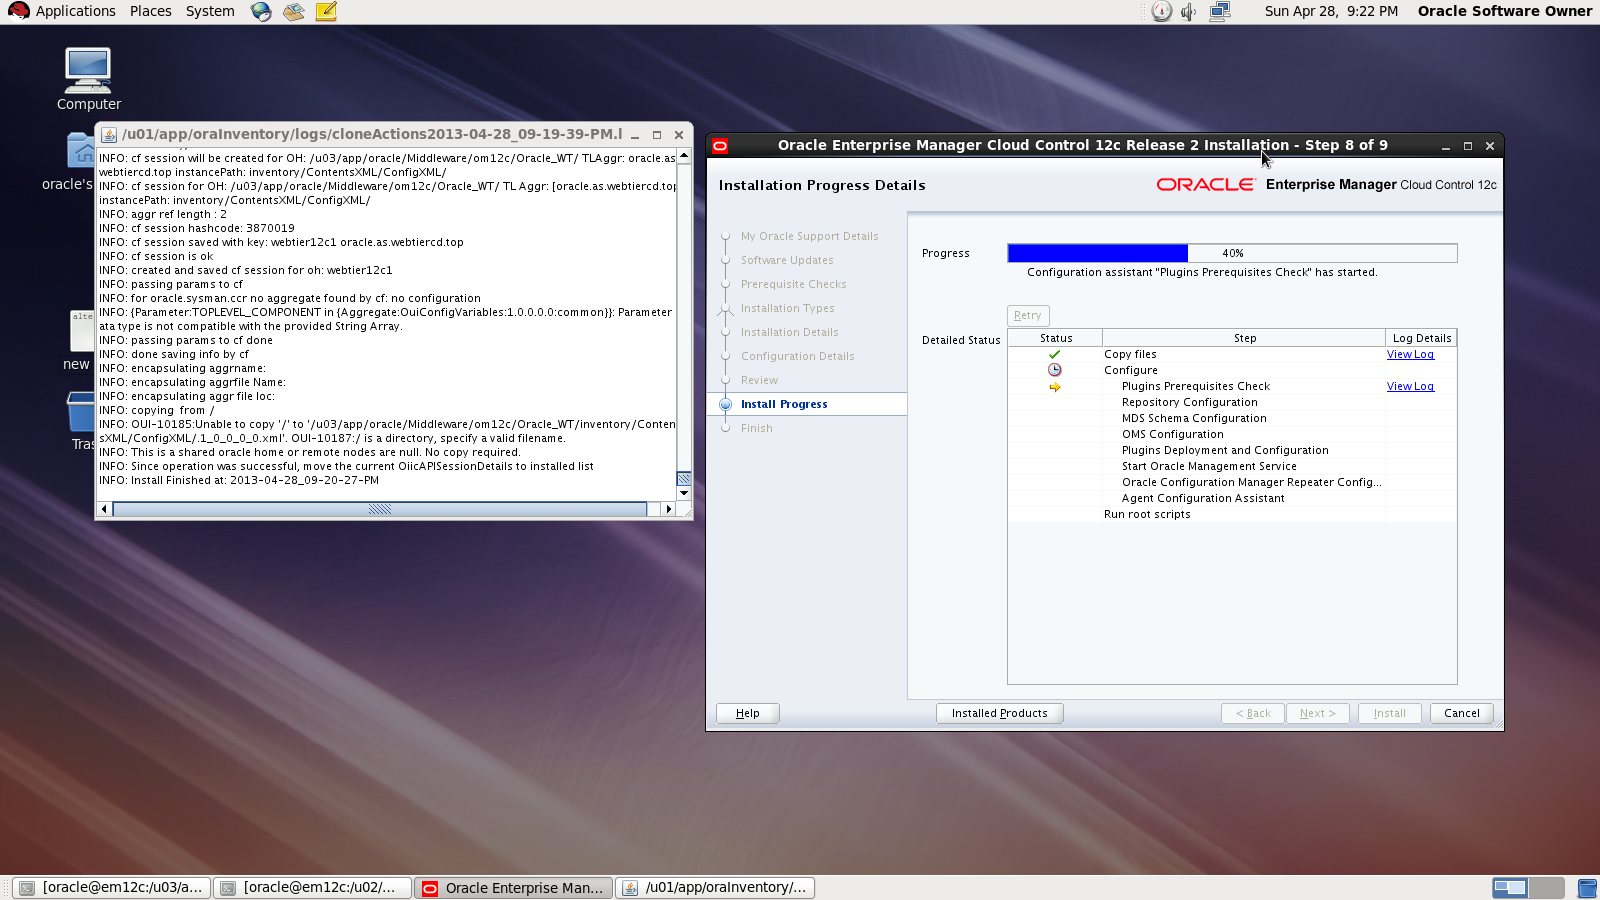
During the installation :

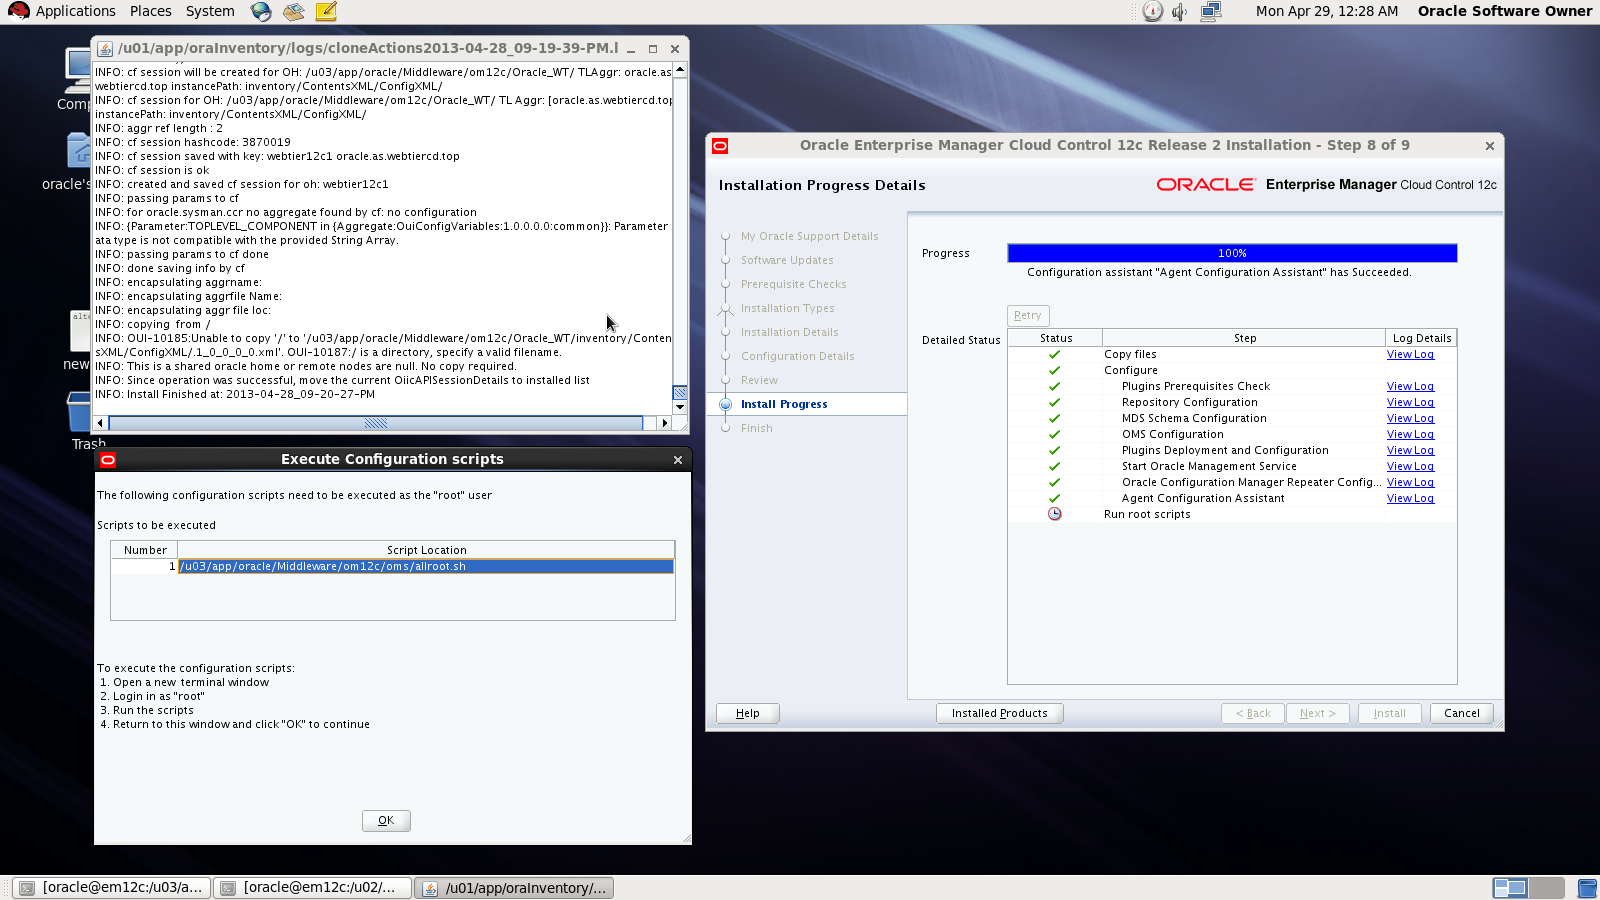
Done
also you can download this article from here
Thank you
Osama mustafa
[root@localhost Desktop]# fdisk -l
Disk /dev/sda: 85.9 GB, 85899345920 bytes
255 heads, 63 sectors/track, 10443 cylinders
Units = cylinders of 16065 * 512 = 8225280 bytes
Sector size (logical/physical): 512 bytes / 512 bytes
I/O size (minimum/optimal): 512 bytes / 512 bytes
Disk identifier: 0x000be2c2
Device Boot Start End Blocks Id System
/dev/sda1 * 1 262 2097152 83 Linux
Partition 1 does not end on cylinder boundary.
/dev/sda2 262 2220 15728640 83 Linux
/dev/sda3 2220 3525 10485760 83 Linux
/dev/sda4 3525 7833 34601984 5 Extended
/dev/sda5 3525 4831 10485760 83 Linux
/dev/sda6 4831 5484 5242880 82 Linux swap / Solaris
/dev/sda7 5484 5745 2097152 8e Linux LVM
/dev/sda8 5745 7833 16772096 83 Linux
Disk /dev/sdb: 26.8 GB, 26843545600 bytes
255 heads, 63 sectors/track, 3263 cylinders
Units = cylinders of 16065 * 512 = 8225280 bytes
Sector size (logical/physical): 512 bytes / 512 bytes
I/O size (minimum/optimal): 512 bytes / 512 bytes
Disk identifier: 0x00000000
[root@localhost Desktop]# fdisk /dev/sdb
Device contains neither a valid DOS partition table, nor Sun, SGI or OSF disklabel
Building a new DOS disklabel with disk identifier 0xe88f8de7.
Changes will remain in memory only, until you decide to write them.
After that, of course, the previous content won’t be recoverable.
Warning: invalid flag 0x0000 of partition table 4 will be corrected by w(rite)
WARNING: DOS-compatible mode is deprecated. It’s strongly recommended to
switch off the mode (command ‘c’) and change display units to
sectors (command ‘u’).
Command (m for help): n
Command action
e extended
p primary partition (1-4)
p
Partition number (1-4): 1
First cylinder (1-3263, default 1):
Using default value 1
Last cylinder, +cylinders or +size{K,M,G} (1-3263, default 3263):
Using default value 3263
Command (m for help): w
The partition table has been altered!
Calling ioctl() to re-read partition table.
Syncing disks.
[root@localhost Desktop]# mkfs -t ext3 /dev/sdb1
mke2fs 1.41.12 (17-May-2010)
Filesystem label=
OS type: Linux
Block size=4096 (log=2)
Fragment size=4096 (log=2)
Stride=0 blocks, Stripe width=0 blocks
1638400 inodes, 6552504 blocks
327625 blocks (5.00%) reserved for the super user
First data block=0
Maximum filesystem blocks=0
200 block groups
32768 blocks per group, 32768 fragments per group
8192 inodes per group
Superblock backups stored on blocks:
32768, 98304, 163840, 229376, 294912, 819200, 884736, 1605632, 2654208,
4096000
Writing inode tables: done
Creating journal (32768 blocks): done
Writing superblocks and filesystem accounting information: done
This filesystem will be automatically checked every 28 mounts or
180 days, whichever comes first. Use tune2fs -c or -i to override.
[root@localhost Desktop]#mkdir /u03
[root@localhost Desktop]# mount -t ext3 /dev/sdb1 /u03
[root@localhost Desktop]#
[root@localhost Desktop]#
[root@localhost Desktop]#
[root@localhost Desktop]# df -h
/dev/sdb1 25G 173M 24G 1% /u03
