Download Agent in EM12C manually

Adding target to EM12C needs to install agent to the Target Host Depend on Operating system, the agent is now always available which mean install Agent for this operating system is necessary, the below picture describe the above case :-

Enterprise manager cloud 12c contains two different type of Connection mode online and offline, this blog describe how to install manually :-

From Setup –> extensibility –> Self Update

Press On Agent Software., The below screen will appear :-

By pressing any of those agent new pop up will open included with link to download, copy the link and upload the file to OMS Host and run the below command :-

[oracle@EM12C emcli]$ ./emcli import_update -omslocal -file=….

File Path should be provided in the above command.

The output :-

Processing update: Agent Software – Agent Software (12.1.0.1.0) for Microsoft Windows x64 (64-bit)
Successfully uploaded the update to Enterprise Manager. Use the Self Update Console to manage this update.

After Run the above command Successfully, Back to Self Update screen –> Agent Software and Apply the Download Catalog by press apply.

Thank you
Osama mustafa

WorkFlowCA: NullError : Could not Connect to the Remote Server

This Error Appear When Trying to Run Oracle Ware-House Builder On Linux , in this tools you are connecting to Database to Setup some configuration for Workflow in DWH, Every Thing Run Successfully Till i received the error in the picture :

WorkFlowCA: NullError : Could not Connect to the Remote Server

You Can ignore this error simply , I didn’t configure Oracle Enterprise manager in my database , which is the reason for this Error.if you want create enterprise manager and re run the tool again.

Thank you
Osama Mustafa 

Steps To Create ODBC Connection in Linux


In this Document i will describe how to create ODBC Connection in Linux Step by Step. I uploaded my document to slideshare as usual you can download it from here.

Thanks for my friend Ilmar Kerm . 

Thank you 
Osama mustafa 

Steps to Create Linux Container

After my last post about Docker Project, i start testing Linux Container but this time for lxc which is another amazing Package and should be used, if you installed and follow my steps in Previous steps here  then you can use lxc command without any suffer of installation 🙂

lxc stand for Linux Container.

Now i will start to describe how to create container using this command 

  • You need to know when lxc installed, it’s create file under /etc/lxc/ called default.conf this file should contain your network interface name and you need to add it.

[root@OEL6 ~]# cat /etc/lxc/default.conf
lxc.network.type = veth
lxc.network.link = docker0
lxc.network.flags = up

Sample output for ifconfig command :

docker0   Link encap:Ethernet  HWaddr 00:00:00:00:00:00
          inet addr:172.17.42.1  Bcast:0.0.0.0  Mask:255.255.0.0
          inet6 addr: fe80::28ce:eeff:fe80:1fc8/64 Scope:Link
          UP BROADCAST MULTICAST  MTU:1500  Metric:1
          RX packets:17 errors:0 dropped:0 overruns:0 frame:0
          TX packets:4 errors:0 dropped:0 overruns:0 carrier:0
          collisions:0 txqueuelen:0
          RX bytes:1112 (1.0 KiB)  TX bytes:408 (408.0 b)

I used docker0 Interface because i already installed it , and configure the IP Address, if you don’t modify this file when you start container you will receive error :

[root@OEL6 container]# lxc-start –name test-container
lxc-start: failed to attach ‘vethaITNmu’ to the bridge ‘virbr0’ : No such device
lxc-start: failed to create netdev
lxc-start: failed to create the network
lxc-start: failed to spawn ‘test-container’

Anyway now after add the file with the right Interface name, you will be able to run and start working on lxc just follow the below steps :
  • Before Create any container you need to create Directory under /, if you don’t do this step another error will be appeared asking for this directory and telling you /container not found.

mkdir /container will solve the problem.

Now Let’s Start Creating new container called Test-container :

[root@OEL6 lxc]# lxc-create -n test-container -t oracle — -R 6.5

lxc-create: No config file specified, using the default config /etc/lxc/default.conf
Host is OracleServer 6.5
Create configuration file /container/test-container/config
Downloading release 6.5 for x86_64
Loaded plugins: refresh-packagekit, security
ol6_u5_base                                                     | 1.4 kB     00:00
ol6_u5_base/primary                                             | 3.2 MB     00:32
ol6_u5_base                                                                  8573/8573
Setting up Install Process

the above command will take some while to finish the configuration, it’s installing some packages needed by container you can have more than one container with different name.
After the creation is done you should be notice the below line :

Complete!
Rebuilding rpm database
Configuring container for Oracle Linux 6.5
Added container user:oracle password:oracle
Added container user:root password:root

Container : /container/test-container/rootfs
Config    : /container/test-container/config
Network   : eth0 (veth) on virbr0
‘oracle’ template installed
‘test-container’ created

the container is not started yet !!! so we need to do this using the below command :

[root@OEL6 lxc]# lxc-start -n test-container
                Welcome to Oracle Linux Server
Setting hostname test-container:                        [  OK  ]
Checking filesystems
                                                                        [  OK  ]
Mounting local filesystems:                                [  OK  ]
No such file or directory
Enabling /etc/fstab swaps:                                 [  OK  ]
Entering non-interactive startup
Bringing up loopback interface:                         [  OK  ]
Bringing up interface eth0:
Determining IP information for eth0… failed.
                                                                      [FAILED]
Starting system logger:                                    [  OK  ]
Mounting filesystems:                                      [  OK  ]
Generating SSH1 RSA host key: No such file or directory
                                                                      [  OK  ]
Generating SSH2 RSA host key: No such file or directory
                                                                     [  OK  ]
Generating SSH2 DSA host key: No such file or directory
                                                                     [  OK  ]
Starting sshd:                                                 [  OK  ]
Oracle Linux Server release 6.5
Kernel 3.8.13-16.2.1.el6uek.x86_64 on an x86_64
test-container login:

I will fix FAILED Later now you need to connect to the container using the above User name and password given to you in the above line.
After this 
[root@test-container ~]#
I am connected 🙂 

You can delete the container using command 

lxc-destroy -n test-container  

Reference :
1- Oracle Linux containers Here 
2- Oracle Linux 6.5 and Docker Here

Thank you
Osama mustafa

API5036: Client version 11.2.0.3.0 is not compatible with repository version 11.2.0.4.0

To Solve this error Follow the below Steps :

  • Edit /owb/bin/admin/Preference.properties
  • And set the following parameter :-
    • OverrideRepositoryVersionCheck=true
    • OverrideRuntimeVersionCheck=true
Thank you
Osama Mustafa

User Not Able To Drop Even When I killed the session.

Today while i was working on Database trying to Drop user called PRD_MDS the normal error appearing to me :

SQL> drop user PRD_MDS cascade ;
drop user PRD_MDS cascade
*
ERROR at line 1:
ORA-01940: cannot drop a user that is currently connected

Which is very normal error and the first thing you are trying to check is v$session

SQL> select sid,serial# ,username from v$session where username like ‘%PRD%’;
       SID    SERIAL# USERNAME
———- ———- ——————————
       745        821 PRD_MDS

SQL> alter system kill session ‘745,821’ immediate ;
System altered.

After this i should be able to drop this user without any problem BUT !!!!

SQL> drop user PRD_MDS ;
drop user PRD_MDS
*
ERROR at line 1:
ORA-01940: cannot drop a user that is currently connected

I tried to figure out what is going on , Even i tried alter system kill session 10 times the above error will appear BUT there’s always solutions :

SQL> startup force restrict;
ORACLE instance started.
Total System Global Area 7686086656 bytes
Fixed Size                  2228032 bytes
Variable Size            1811939520 bytes
Database Buffers         5729419264 bytes
Redo Buffers              142499840 bytes
Database mounted.
Database opened.

 SQL> drop user PRD_MDS cascade ;
User dropped.

Create Group using Em12c

Sometimes you need to create Certain group for Enterprise manager to make monitor more easy , sepcially if you have lot of agent and components such as database , Host , application server … so if you want to manage them individually it will consume time and seems to be impossible.

Enterprise manager provide you with Group Features to combine components, and there’s two type :

  • Target at the same type 
  • Target contain different components such as database, Application server , Host.

Check the below screenshot :

From Setup –> Add Target –> Group

you have five tab each one of them contain different parameters, Choose the right option that works with your Work:

After Choose the name for the group you need to add Agents, from search button new popup screen will be open choose which agent type you want.

Another example on Chart tab :

After Create Group :

For More information about Enterprise Manager 12c Group Read Oracle Documentation Here
Thank you 
Osama mustafa

Clone Pluggable Database

If you want to Clone One Of Pluggable database , How can you do that :

SQL> select name from v$pdbs ;

NAME
——————————
PDB$SEED
TEST_1
TEST_2

Let’s Clone Test_1 , Create folder on os level to move test_1 data. 

[oracle@test12c u01]$ mkdir clone
[oracle@test12c u01]$ cd clone/
[oracle@test12c clone]$ pwd
/u01/clone

Open Test_1 Read Only : 

SQL> alter pluggable database test_1 close immediate;Pluggable database altered.

SQL> alter pluggable database test_1 open read only ;Pluggable database altered.

Set this parameter to our created directory above : 

SQL> show parameter db_create_file_dest ;

NAME     TYPE VALUE
———————————— ———–
db_create_file_dest     string

SQL> alter system set db_create_file_dest=’/u01/clone’;             System altered.

SQL> show parameter db_create_file_dest ;

NAME     TYPE VALUE
———————————— ———–
db_create_file_dest     string /u01/clone

SQL> create pluggable database clone from test_1 ;Pluggable database created.

SQL> alter pluggable database clone open ;Pluggable database altered.

Test Clone Pluggable database 

[oracle@test12c ~]$ sqlplus sys/sys@test12c:1521/clone as sysdba

SQL*Plus: Release 12.1.0.1.0 Production on Sat Jul 13 20:20:24 2013
Copyright (c) 1982, 2013, Oracle.  All rights reserved.

Connected to:
Oracle Database 12c Enterprise Edition Release 12.1.0.1.0 – 64bit Production
With the Partitioning, OLAP, Advanced Analytics, Real Application Testing
and Unified Auditing options

SQL> show con_name ;CON_NAME
——————————
CLONE

SQL> select name from v$pdbs ;

NAME
——————————
PDB$SEED
TEST_1
TEST_2
CLONE

You can drop Clone Database using the below command

SQL > Alter Pluggable database Clone Including Datafiles ;

Thank you 
Osama mustafa

Point-In-Time Recovery for a Pluggable Database

Check Pluggable database that you have :

SQL> select name from v$pdbs ;

NAME
——————————
PDB$SEED
TEST_1
TEST_2
TEST_3

Shutdown database , to configure database archivelog

SQL> shutdown immediate ;

Database closed.
Database dismounted.
ORACLE instance shut down.
SQL> startup mount ;

 ORACLE instance started.

Total System Global Area 1252663296 bytes
Fixed Size    2287864 bytes
Variable Size  838862600 bytes
Database Buffers  402653184 bytes
Redo Buffers    8859648 bytes
Database mounted.

SQL> alter database archivelog ;

Database altered.

SQL> alter database open 

Database altered.

SQL> alter pluggable database all open; 

Pluggable database altered.

SQL> alter system set db_recovery_file_dest_size = 2G scope=both; 

System altered.

SQL> alter pluggable database all open; 

Pluggable database altered.

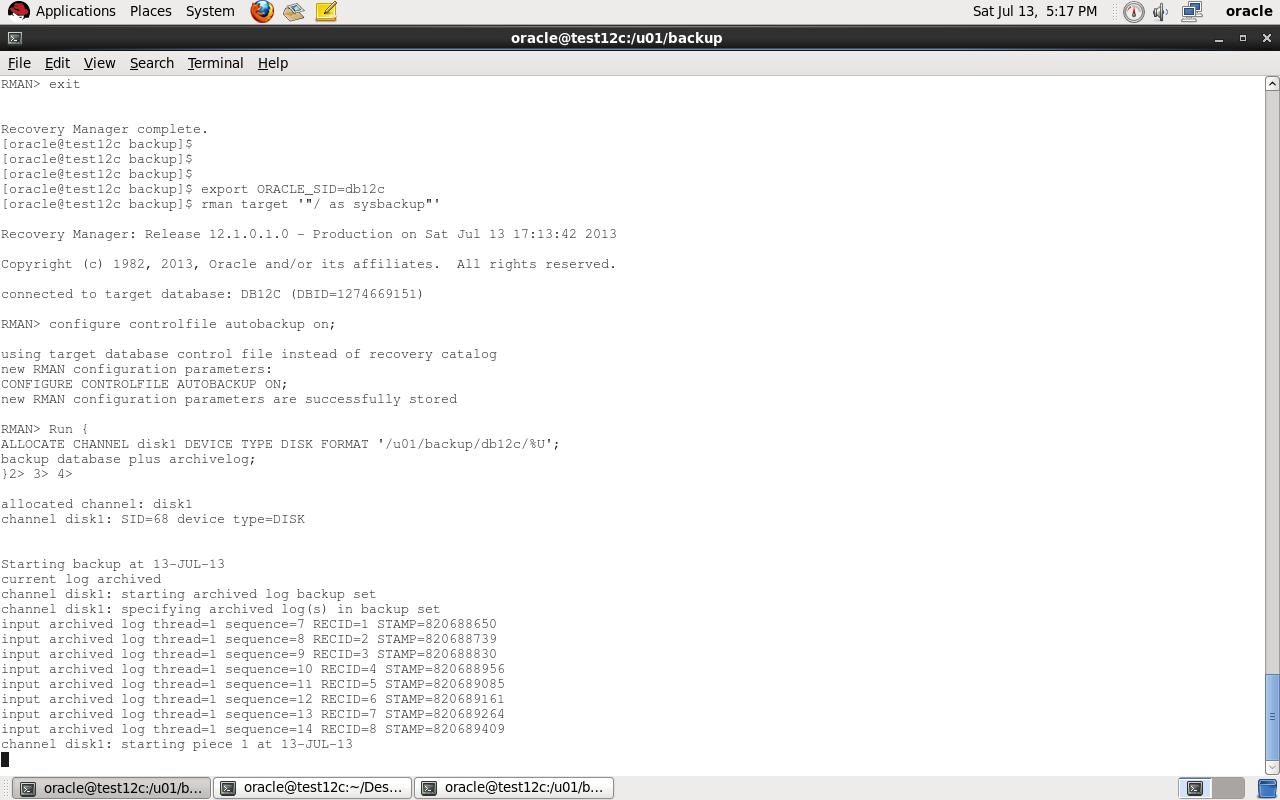
Export ORACLE_SID for container database and enter rman to backup  like below

[oracle@test12c backup]$ export ORACLE_SID=db12c
[oracle@test12c backup]$ rman target ‘”/ as sysbackup”‘

Recovery Manager: Release 12.1.0.1.0 – Production on Sat Jul 13 17:13:42 2013
Copyright (c) 1982, 2013, Oracle and/or its affiliates.  All rights reserved.
connected to target database: DB12C (DBID=1274669151)

Auto Backup controlfile :

RMAN> configure controlfile autobackup on;

using target database control file instead of recovery catalog
new RMAN configuration parameters:
CONFIGURE CONTROLFILE AUTOBACKUP ON;
new RMAN configuration parameters are successfully stored

Backup Script that we need :

Run {
ALLOCATE CHANNEL disk1 DEVICE TYPE DISK FORMAT ‘/u01/backup/db12c/%U’;
backup database plus archivelog;
}

 Where 
Format ‘/u01..’:  Location for backup

now move to our pluggable database

SQL>alter session set container=test_1 ;

SQL>create tablespace test_1  datafile ‘/u01/app/oracle/oradata/db12c/test_1/test_1.dbf’ size 10m;

SQL>create user test identified by test temporary tablespace temp default tablespace test_1;

SQL>grant create session, create table, unlimited tablespace to test ;

SQL>create table data (id varchar2(100)) tablespace test_1;

Enter Data using The Below code in above table :

begin
 for i in 1.. 10000 loop
    insert into data values (‘osama’);
 end loop;
 commit;
end;

After you insert data close pluggable database to start restore.

alter pluggable database test_1 CLOSE ;

Restore script :

run {
set until SCN = 1832026 ;
restore pluggable database test_1;
recover pluggable database Test_1 auxiliary destination=’/u01/backup/db12c’;
alter pluggable database TEST_1 open resetlogs;
}

Note :  To get SCN for database before insert use the query below :

SQL > select timestamp_to_scn(sysdate) from v$database;

After Restore :

sqlplus sys/sys@test12c:1521/test_1 ;
SQL> select count(*) from data ;
select count(*) from data
                     *
ERROR at line 1:
ORA-00942: table or view does not exist

Thank you
Osama Mustafa