Oracle Autonomous Database (ADB) on Oracle Cloud Infrastructure (OCI) is a cloud service that leverages machine learning to automate routine database tasks, offering users a self-driving, self-securing, and self-repairing database solution. This blog post will delve into setting up and interacting with an Autonomous Transaction Processing (ATP) instance, showcasing how to deploy a sample application to demonstrate its capabilities.
Overview of Oracle Autonomous Database
Self-Driving: Automates performance tuning and scaling.
Self-Repairing: Offers built-in high availability and backup solutions.
Step 1: Creating an Autonomous Database
Log into OCI Console: Go to console.oracle.com and log in to your account.
Create Autonomous Database:
Navigate to the Database section and click on Autonomous Database.
Click on Create Autonomous Database.
Fill in the required details:
Display Name: MyATPDB
Database Name: MYATPDB
Database Type: Autonomous Transaction Processing
CPU Count: 1 (can be adjusted later)
Storage: 1 TB (adjust as necessary)
Configure the Admin Password and ensure you store it securely.
Click Create Autonomous Database.
Step 2: Setting Up the Network
2.1: Create a Virtual Cloud Network (VCN)
Navigate to the Networking Section.
Click on Create VCN and fill in the necessary details:
VCN Name: MyVCN
CIDR Block: 10.0.0.0/16
Subnets: Create a public subnet with a CIDR block of 10.0.0.0/24.
2.2: Configure Security Lists
In the VCN settings, add a security rule to allow traffic to your database:
Source CIDR: Your public IP address (for SQL Developer access).
IP Protocol: TCP
Source Port Range: All
Destination Port Range: 1522 (default for ADB)
Step 3: Connecting to the Autonomous Database
3.1: Download Wallet
In the ADB console, navigate to your database and click on DB Connection.
Download the Client Credentials (Wallet). This will be a zip file containing the wallet and connection files.
3.2: Set Up SQL Developer
Open Oracle SQL Developer.
Go to Tools > Preferences > Database > Advanced and set the Use Wallet option to true.
In the Connections pane, click on the green + icon to create a new connection.
Set the connection type to Cloud Wallet, then specify:
Connection Name: MyATPConnection
Username: ADMIN
Password: Your admin password
Wallet Location: Path to the unzipped wallet directory
Click Test to verify the connection, then click Save.
Step 4: Creating a Sample Schema and Table
Once connected to your database, execute the following SQL commands to create a sample schema and a table:
-- Create a new user/schema
CREATE USER sample_user IDENTIFIED BY SamplePassword;
GRANT ALL PRIVILEGES TO sample_user;

-- Connect as the new user
ALTER SESSION SET CURRENT_SCHEMA = sample_user;

-- Create a sample table
CREATE TABLE employees (
    employee_id NUMBER GENERATED ALWAYS AS IDENTITY PRIMARY KEY,
    first_name VARCHAR2(50) NOT NULL,
    last_name VARCHAR2(50) NOT NULL,
    email VARCHAR2(100) NOT NULL UNIQUE,
    hire_date DATE DEFAULT CURRENT_DATE
);

-- Insert sample data
INSERT INTO employees (first_name, last_name, email)
VALUES ('John', 'Doe', 'john.doe@example.com');

INSERT INTO employees (first_name, last_name, email)
VALUES ('Jane', 'Smith', 'jane.smith@example.com');

COMMIT;
Querying the Data
To verify the data insertion, run:
SELECT * FROM employees;
Step 5: Using Autonomous Database Features
5.1: Auto-Scaling
ADB allows you to scale compute and storage resources automatically. To enable auto-scaling:
Navigate to your Autonomous Database instance in the OCI console.
Click on Edit.
Enable Auto Scaling for both CPU and storage.
Specify the minimum and maximum resources.
5.2: Monitoring Performance
Utilize the Performance Hub feature to monitor real-time database performance. You can view metrics like:
Amazon RDS is a web service that makes it easy to set up, operate, and scale a relational database in the cloud. It provides cost-efficient and resizable capacity while managing time-consuming database administration tasks. This allows you to focus on your applications and business. Amazon RDS gives you access to the full capabilities of a MySQL, Oracle, SQL Server, or Aurora database engines. This means that the code, applications, and tools you already use today with your existing databases can be used with Amazon RDS.
Amazon RDS automatically patches the database software and backs up your database. It stores the backups for a user-defined retention period and provides point-in-time recovery. You benefit from the flexibility of scaling the compute resources or storage capacity associated with your relational DB instance with a single API call.
Amazon RDS is available on six database engines, which optimize for memory, performance, or I/O. The database engines include:
Amazon Aurora
PostgreSQL
MySQL
MariaDB
Oracle Database
SQL Server
Amazon RDS Multi-AZ deployments
Amazon RDS Multi-AZ deployments provide enhanced availability and durability for DB instances, making them a natural fit for production database workloads. When you provision a Multi-AZ DB instance, Amazon RDS synchronously replicates the data to a standby instance in a different Availability Zone.
You can modify your environment from Single-AZ to Multi-AZ at any time. Each Availability Zone runs on its own physically distinct, independent infrastructure and is engineered to be highly reliable. Upon failure, the secondary instance picks up the load. Note that this is not used for read-only scenarios.
Read replicas
With Amazon RDS, you can create read replicas of your database. Amazon automatically keeps them in sync with the primary DB instance. Read replicas are available in Amazon RDS for Aurora, MySQL, MariaDB, PostgreSQL, Oracle, and Microsoft SQL Server. Read replicas can help you:
Relieve pressure on your primary node with additional read capacity.
Bring data close to your applications in different AWS Regions.
Promote a read replica to a standalone instance as a disaster recovery (DR) solution if the primary DB instance fails.
You can add read replicas to handle read workloads so your primary database doesn’t become overloaded with read requests. Depending on the database engine, you can also place your read replica in a different Region from your primary database. This gives you the ability to have a read replica closer to a particular locality.
You can configure a source database as Multi-AZ for high availability and create a read replica (in Single-AZ) for read scalability. With RDS for MySQL and MariaDB, you can also set the read replica as Multi-AZ, and as a DR target. When you promote the read replica to be a standalone database, it will be replicated to multiple Availability Zones.
Amazon DynamoDB tables
DynamoDB is a fully managed NoSQL database service. DynamoDB uses primary keys to uniquely identify each item in a table and secondary indexes to provide more querying flexibility. When creating a table, you must specify a table name and a primary key. These are the only two required entities.
There are two types of primary keys supported:
Simple primary key: A simple primary key is composed of just one attribute designated as the partition key. If you use only the partition, no two items can have the same value.
Composite primary key: A composite primary key is composed of both a partition key and a sort key. In this case the partition key value for multiple items can be the same, but their sort key values must be different.
You work with the core components: tables, items, and attributes. A table is a collection of items, and each item is a collection of attributes. In the example above, the table includes two items, with primary keys Nikki Wolf and John Stiles. The item with the primary key Nikki Wolf includes three attributes: Role, Year, and Genre. The primary key for John Stiles includes a Height attribute, and it does not include the Genre attribute.
Amazon DynamoDB consistency options
When your application writes data to a DynamoDB table and receives an HTTP 200 response (OK), the write has occurred and is durable. The data is eventually consistent across all storage locations, usually within one second or less. DynamoDB supports eventually consistent and strongly consistent reads.
DynamoDB uses eventually consistent reads, unless you specify otherwise. Read operations (such as GetItem, Query, and Scan) provide a ConsistentRead parameter. If you set this parameter to true, DynamoDB uses strongly consistent reads during the operation.
EVENTUALLY CONSISTENT READS
When you read data from a DynamoDB table, the response might not reflect the results of a recently completed write operation. The response might include some stale data. If you repeat your read request after a short time, the response should return the latest data.
STRONGLY CONSISTENT READS
When you request a strongly consistent read, DynamoDB returns a response with the most up-to-date data, reflecting the updates from all prior write operations that were successful. A strongly consistent read might not be available if there is a network delay or outage.
Amazon DynamoDB global tables
A global table is a collection of one or more DynamoDB tables, all owned by a single AWS account, identified as replica tables. A replica table (or replica, for short) is a single DynamoDB table that functions as part of a global table. Each replica stores the same set of data items. Any given global table can only have one replica table per Region, and every replica has the same table name and the same primary key schema.
DynamoDB global tables provide a fully managed solution for deploying a multi-Region, multi-active database, without having to build and maintain your own replication solution. When you create a global table, you specify the AWS Regions where you want the table to be available. DynamoDB performs all the necessary tasks to create identical tables in these Regions and propagate ongoing data changes to all of them.
Database Caching
Without caching, EC2 instances read and write directly to the database. With a caching, instances first attempt to read from a cache which uses high performance memory. They use a cache cluster that contains a set of cache nodes distributed between subnets. Resources within those subnets have high-speed access to those nodes.
Common caching strategies
There are multiple strategies for keeping information in the cache in sync with the database. Two common caching strategies include lazy loading and write-through.
Lazy loading
In lazy loading, updates are made to the database without updating the cache. In the case of a cache miss, the information retrieved from the database can be subsequently written to the cache. Lazy loading ensures that the data loaded in the cache is data needed by the application but can result in high cache-miss-to-cache-hit ratios in some use cases.
Write-through
An alternative strategy is to write through to the cache every time the database is accessed. This approach results in fewer cache misses. This improves performance but requires additional storage for data, which may not be needed by the applications.
Managing your cache
As your application writes to the cache, you need to consider cache validity and make sure that the data written to the cache is accurate. You also need to develop a strategy for managing cache memory. When your cache is full, you determine which items should be deleted by setting an eviction policy.
CACHE VALIDITY
Lazy loading allows for stale data but doesn’t fail with empty nodes. Write-through ensures that data is always fresh but can fail with empty nodes and can populate the cache with superfluous data. By adding a time to live (TTL) value to each write to the cache, you can ensure fresh data without cluttering up the cache with extra data.
TTL is an integer value that specifies the number of seconds or milliseconds, until the key expires. When an application attempts to read an expired key, it is treated as though the data is not found in cache, meaning that the database is queried and the cache is updated. This keeps data from getting too stale and requires that values in the cache are occasionally refreshed from the database.
MANAGING MEMORY
When cache memory is full, the cache engine removes data from memory to make space for new data. It chooses this data based on the eviction policy you set. An eviction policy evaluates the following characteristics of your data:
Which were accessed least recently?
Which have been accessed least frequently?
Which have a TTL set and the TTL value?
Amazon Elasticache
Amazon ElastiCache is a web service that makes it easy to set up, manage, and scale a distributed in-memory data store or cache environment in the cloud. When you’re using a cache for a backend data store, a side-cache is perhaps the most commonly known approach. Redis and Memcached are general-purpose caches that are decoupled from the underlying data store.
Use ElastiCache for Memcached for data-intensive apps. The service works as an in-memory data store and cache to support the most demanding applications requiring sub-millisecond response times. It is fully managed, scalable, and secure—making it an ideal candidate for cases where frequently accessed data must be in memory. The service is a popular choice for web, mobile apps, gaming, ad tech, and e-commerce.
ElastiCache for Redis is an in-memory data store that provides sub-millisecond latency at internet scale. It can power the most demanding real-time applications in gaming, ad tech, e-commerce, healthcare, financial services, and IoT.
ElastiCache engines
ElastiCache for Memcached
ElastiCache for Redis
Simple cache to offload database burden
Yes
Yes
Ability to scale horizontally for writes and storage
Yes
Yes (if cluster mode is enabled)
Multi-threaded performance
Yes
–
Advanced data types
–
Yes
Sorting and ranking data sets
–
Yes
Pub and sub capability
–
Yes
Multi-AZ with Auto Failover
–
Yes
Backup and restore
–
Yes
Amazon DynamoDB Accelerator
DynamoDB is designed for scale and performance. In most cases, the DynamoDB response times can be measured in single-digit milliseconds. However, there are certain use cases that require response times in microseconds. For those use cases, DynamoDB Accelerator (DAX) delivers fast response times for accessing eventually consistent data.
DAX is an Amazon DynamoDB compatible caching service that provides fast in-memory performance for demanding applications.
AWS Database Migration Service
AWS Database Migration Service (AWS DMS) supports migration between the most widely used databases like Oracle, PostgreSQL, SQL Server, Amazon Redshift, Aurora, MariaDB, and MySQL. AWS DMS supports both homogeneous (same engine) and heterogeneous (different engines) migrations.
The service can be used to migrate between databases on Amazon EC2, Amazon RDS, and on-premises. Either the target or the source database must be located in Amazon EC2. It cannot be used to migrate between two on-premises databases.
AWS DMS automatically handles formatting of the source data for consumption by the target database. It does not perform schema or code conversion.
For homogenous migrations, you can use native tools to perform these conversions. For heterogeneous migrations, you can use the AWS Schema Conversion Tool (AWS SCT).
AWS Schema Conversion Tool
The AWS Schema Conversion Tool (AWS SCT) automatically converts the source database schema and a majority of the database code objects. The conversion includes views, stored procedures, and functions. They are converted to a format that is compatible with the target database. Any objects that cannot be automatically converted are marked so that they can be manually converted to complete the migration.
Source databases
Target databases on AWS
Oracle database Oracle data warehouse Azure SQL SQL server Teradata IBM Netezza Greenplum HPE Vertica MySQL and MariaDB PostgreSQL Aurora IBM DB2 LUW Apache Cassandra SAP ASE
AWS SCT
MySQL PostgreSQL Oracle AmazonDB RDS for MySQL Aurora for MySQL RDS for PostgreSQL Aurora PostgreSQL
The AWS SCT can also scan your application source code for embedded SQL statements and convert them as part of a database schema conversion project. During this process, the AWS SCT performs cloud native code optimization by converting legacy Oracle and SQL Server functions to their equivalent AWS service, modernizing the applications at the same time of migration.
In this post, i will discuss how to migrate from mongoDB (in my case the database was hosted on AWS) to Azure CosmosDB, i searched online about different articles how to do that, the problem i faced most of them were discussing the same way which is Online and using 3rd party software which is not applicable for me due to security reason, thefore i decided to post about it maybe it will useful for someone else.
Usually the easiet way which is use Azure Database Migration Service to perform an offline/online migration of databases from an on-premises or cloud instance of MongoDB to Azure Cosmos DB’s API for MongoDB.
There are some prerequisite before start the migration to know more about it read here, the same link explained different ways for migrations, however before you start you should create an instance for Azure Cosmos DB.
Preparation of target Cosmos DB account
Create an Azure Cosmos DB account and select MongoDB as the API. Pre-create your databases through the Azure portal
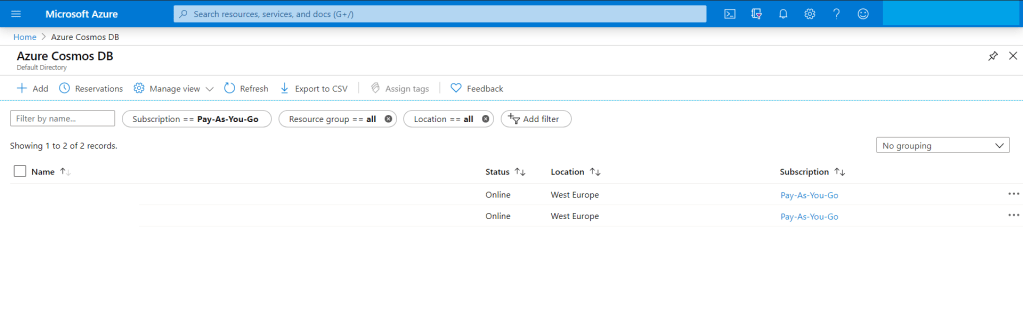
The home page for azure Cloud
from the search bar just search for “Azure Cosmos DB”
Azure Cosomo DB
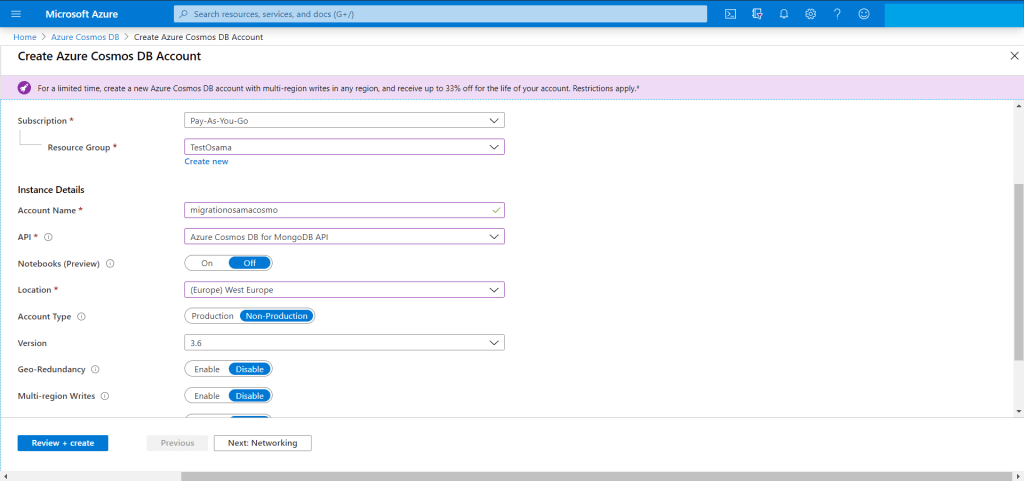
You have add new account for the new migration Since we are migrating from MongoDB then The API should be “Azure CosmosDB for MongoDB API”
Create cosmos db
The target is ready for migration but we have to check the connection string so we can use them in our migration from AWS to Azure.
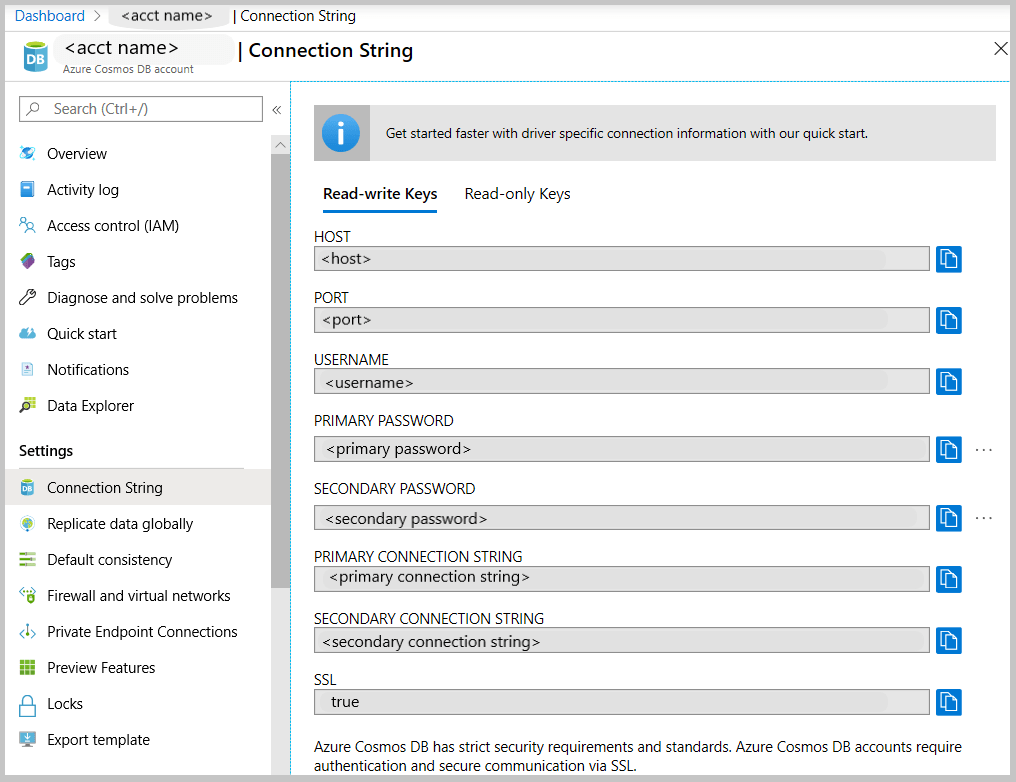
Get the MongoDB connection string to customize
the Azure Cosmos DB blade, select the API.
the left pane of the account blade, click Connection String.
The Connection String blade opens. It has all the information necessary to connect to the account by using a driver for MongoDB, including a preconstructed connection string.
Connection string
From MongoDB (Source server) you have to take backup for the database, now after the backup is completed, no need to move the backup for another server , mongo providing two way of backup either mongodump (dump) or mongoexport and will generate JSON file.
For example using monogdump
mongodump --host <hostname:port> --db <Databasename that you want to backup > --collection <collectionname> --gzip --out /u01/user/
For mongoexport
mongoexport --host<hostname:port> --db <Databasename that you want to backup > --collection <collectionname> --out=<Location for JSON file>
After the the above command will be finished, in my advice run them in the background specially if the database size is big and generate a log for the background process so you can check it frequently.
Run the restore/import command from the source server , do you remember the connection string, now we will use them to connect to Azure Cosmos DB using the following, if you used mongodump then to restore you have to use mongorestore like the below :-
mongorestore --host testserver.mongo.cosmos.azure.com --port 10255 -u testserver -p w3KQ5ZtJbjPwTmxa8nDzWhVYRuSe0BEOF8dROH6IUXq7rJgiinM3DCDeSWeEdcOIgyDuo4EQbrSngFS7kzVWlg== --db test --collection test /u01/user/notifications_service/user_notifications.bson.gz --gzip --ssl --sslAllowInvalidCertificates
notice the follwing :-
host : From Azure portal/connection string.
Port : From Azure portal/connection string.
Password : From Azure portal/connection string.
DB : The name of the database you want to be created in azure cosmo,this name will be created during the migration to azure.
Collection : The name of the collection you want to be created in azure cosmo,this name will be created during the migration to azure.
Location for the backup.
gzip because i compressed the backup
Migration required to use ssl authication otherwise it will fail.
using mongoimport.
mongoimport --host testserver.mongo.cosmos.azure.com:10255 -u testserver -p w3KQ5ZtJbjPwTmxa8nDzWhVYRuSe0BEOF8dROH6IUXq7rJgiinM3DCDeSWeEdcOIgyDuo4EQbrSngFS7kzVWlg== --db test --collection test --ssl --sslAllowInvalidCertificates --type json --file /u01/dump/users_notifications/service_notifications.json
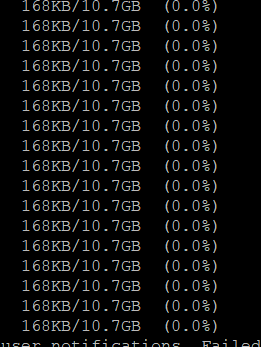
Once you run the command
Note: if you migrating huge or big databases you need to increase the cosmosdb throughout and database level after the migration will be finished return everything to the normal situation because of the cost.
For the first time the book which is dicussed critcal security issues such as database threats, and how to void them, the book also include advance topics about Oracle internet directory, Oracle access manager and how to implement full cycle single sign on,
Focus on the security aspects of designing, building, and maintaining a secure Oracle Database application. Starting with data encryption, you will learn to work with transparent data, back-up, and networks. You will then go through the key principles of audits, where you will get to know more about identity preservation, policies and fine-grained audits. Moving on to virtual private databases, you’ll set up and configure a VPD to work in concert with other security features in Oracle, followed by tips on managing configuration drift, profiles, and default users.
What You Will Learn:-
Work with Oracle Internet Directory using the command-line and the console.
Integrate Oracle Access Manager with different applications.
Work with the Oracle Identity Manager console and connectors, while creating your own custom one.
Troubleshooting issues with OID, OAM, and OID.
Dive deep into file system and network security concepts.
First time chapter that include most of the critical database threats in real life.
In this lesson i will show you how to configure AWS command line, and how to start working with your AWS account thru command line with very simple and basic steps :-
First of i will assume that you don’t have any user or group in your AWS console
from the AWS Console :-
From IAM ( Identity access management ) Choose Group Create Group with permission Administrator access and then hit create.
create user and add that user to the group in my case the group name shown above, save the secret key and access ID as CSV.
Now from this link here, Download AWS Command Line Interface depend on your operating system and open cmd , terminal … etc.
Now from Dos enter AWS configure and fill the information like the below:-
Open the command line and test if it’s connected to AWS now.
You can learn more about the command line from AWS documentation , if you recive the following error
in this post you will find 10 ways make your database easy to hack ,Special thank for Team Shatter , I post online Article about Database security before and as reminder read it again it . LETS START
1-default-blank-and-weak-username-and-passwords
We All know What we mean by Defaults and weak password (which not complex)
To create a strong password:
Don’t use words that can be easily guessed or found in the dictionary
Use a combination of letters, numbers and characters
Create a complex sentence instead of a word
Do not share your password with anyone or write it down and leave it in your desk drawer
2-sql-injections-in-the-database sql injection : attack vector in the DBMS through Web applications because of a failure to sanitize user inputs. SQL Injection in the DBMS exploits passing SQL commands as a parameter of a function or stored procedure. This will then execute the malicious SQL commands in the context of the component that provides the called function. This is often done using components with system or admin privileges resulting in privilege escalation.
3-excessive-user-and-group-privileges
avoid extensive user and group privileges:
Map Job Functions to Privileges on IT assets
Never Assign Privileges Directly to Guest Accounts or Public
Untangle The Web of User Entitlements
Implement Compensating Controls for What You Can’t Fix
4-Unnecessary Enabled Database Features. These features provide database application developers with a lot more power when working with a DBMS. The flipside of the coin is, the more power you give a developer, the more attack vectors you potentially expose to the bad guys. 5-check-your-database-configurations with your company Goal. 6-Buffer Overflows A buffer overflow is when the input to a function contains more data than the input buffer can hold. If the size of the input is not checked during the copy to that buffer, adjacent memory that is used for other purposes might get overwritten.
In most cases, this will be more or less random and can lead to unpredictable behavior, like crashing the server. However, if an attacker is able to also change the code execution pointer to the location of the overwritten memory, it is possible to execute any kind of malicious code using the context of the DBMS process.
This could lead to a potential total compromise of the system, resulting in loss of sensitive information and overall security. To protect against these types of attacks, it is important to always keep your DBMS updated with the latest security patches available from the vendor, as well as monitoring for known attack signatures.
7-Privilege Escalation
privilege escalation attack is when the attacker is exploiting a known vulnerability in a DBMS that allows a user account with restricted privileges to execute instructions or query data that that typically requires higher privileges. Thus unlocking the locks in the candy store.
There are different common vulnerabilities that allow for privilege escalation. Sometimes misusing a function that runs under a sysdba, sa or similar security context. In other cases it is done by exploiting vulnerabilities that allow a low-privileged account to grant itself more rights.
To protect against these types of attacks, it is important to always keep your DBMS updated with the latest security patches available from the vendor, as well as continuously monitor for known attack signatures.
8-Denial of Service Attack DoS
Think of a washing machine. The more clothes you put in it, the more work it needs to do. If you overfill it with clothes, it gets overwhelmed and stops working.
The same thing happens with a Denial of Service attack. It creates so much traffic on a site, a server or even sections of the internet that it cannot function and shuts down.
The most infamous DoS involving database servers was in 2003 when a computer worm called the SQL Slammer compromised more than 75,000 servers and slowed internet traffic to a halt.
9-Unpatched Databases
Many organizations don’t implement patches right away – some even wait a year or more. The most common excuses are the downtime involved with implementing patches and the time involved with testing these patches to make sure they don’t affect the production software. Whatever the excuse may be, organizations should use database activity monitoring to manage the gap between patches on its databases containing critical information PII data.
10-Unencrypted sensitive data
Encryption is an important part of housing sensitive data. Network traffic should also be encrypted to ensure that the passwords used to access sensitive, critical data cannot be seen by traffic.
Any information that goes over the network or stored in the database should be encrypted and kept from prying eyes. Some network configurations and database management systems might allow for critical information to be sent in clear text. To ensure this doesn’t occur, make sure you have the latest version of software and turn off text indexing.
First find the user with direct quota on tablespace SYSTEM.
SELECT username,tablespace_name, bytes, max_bytes FROM dba_ts_quotas WHERE max_bytes =–1AND tablespace_name =‘SYSTEM’;
USERNAME TABLESPACE_NAME BYTES MAX_BYTES ————————- ————————- ———- ———- SCOTT SYSTEM 0–1 TEST SYSTEM 0–1
why do we want to know who has unlimited quota on the SYSTEM tablespace?
User who have unlimited quota on SYSTEM as well the privilege to create tables or clusters could do some kind of denial of service attack to the database. The just have to fill up the free space in the SYSTEM tablespace. If there default tablespace is as well SYSTEM the could even do this without intention.
Find user with system privilege UNLIMITED TABLESPACE.
SELECT*FROM dba_sys_privs WHERE privilege =‘UNLIMITED TABLESPACE’
GRANTEE PRIVILEGE ADM —————————— —————————— — WMSYS UNLIMITED TABLESPACE NO RRDOMREG UNLIMITED TABLESPACE NO HR UNLIMITED TABLESPACE NO OE UNLIMITED TABLESPACE NO SYS UNLIMITED TABLESPACE NO LOGSTDBY_ADMINISTRATOR UNLIMITED TABLESPACE NO SCOTT UNLIMITED TABLESPACE NO BI UNLIMITED TABLESPACE NO OUTLN UNLIMITED TABLESPACE NO DBSNMP UNLIMITED TABLESPACE NO IX UNLIMITED TABLESPACE NO SH UNLIMITED TABLESPACE NO DBA UNLIMITED TABLESPACE YES SYSTEM UNLIMITED TABLESPACE YES
What about cascaded roles?
Mmh, but since Oracle 11g it is possible to grant UNLIMITED TABLESPACE to a role and this can be granted to an other role which is granted again to an other role. It could be a role concept or somebody who want to hide a little bit some privileges. To test it I’ve created three roles DBA3, DBA2 and DBA1, granted UNLIMITED TABLESPACE to DBA3.
SELECT grantee, privilege, DECODE(p,‘=>’||grantee,‘direct’,p) path FROM( SELECT grantee, privilege, SYS_CONNECT_BY_PATH(grantee,‘=>’) p FROM( SELECT grantee, privilege FROM dba_sys_privs UNIONALL SELECT grantee, granted_role privilege FROM dba_role_privs) STARTWITH privilege =‘UNLIMITED TABLESPACE’ CONNECTBY PRIOR grantee = privilege ) WHERE (grantee IN(SELECT username FROM dba_users) OR grantee =‘PUBLIC’);
GRANTEE PRIVILEGE PATH ——— ———————– ——————————- BI UNLIMITED TABLESPACE direct SYS DBA =>DBA=>SYS SYSTEM DBA =>DBA=>SYSTEM SCOTT DBA1 =>DBA3=>DBA2=>DBA1=>SCOTT SYS DBA1 =>DBA3=>DBA2=>DBA1=>SYS SYS DBA2 =>DBA3=>DBA2=>SYS SYS DBA3 =>DBA3=>SYS DBSNMP UNLIMITED TABLESPACE direct HR UNLIMITED TABLESPACE direct IX UNLIMITED TABLESPACE direct SYS LOGSTDBY_ADMINISTRATOR =>LOGSTDBY_ADMINISTRATOR=>SYS OE UNLIMITED TABLESPACE direct OUTLN UNLIMITED TABLESPACE direct RRDOMREG UNLIMITED TABLESPACE direct SH UNLIMITED TABLESPACE direct SYS UNLIMITED TABLESPACE direct SYSTEM UNLIMITED TABLESPACE direct WMSYS UNLIMITED TABLESPACE direct
18ROWS selected.
create one to find user’s with direct quotas as well through a system privilege will give something like this.
SELECT username, tablespace_name, privilege FROM( SELECT grantee username,‘Any Tablespace’ tablespace_name, privilege FROM( — first get the users with direct grants SELECT p1.grantee grantee, privilege FROM dba_sys_privs p1 WHERE p1.privilege=‘UNLIMITED TABLESPACE’ UNIONALL — and then the ones with UNLIMITED TABLESPACE through a role… SELECT r3.grantee, granted_role privilege FROM dba_role_privs r3 STARTWITH r3.granted_role IN( SELECT DISTINCT p4.grantee FROM dba_role_privs r4, dba_sys_privs p4 WHERE r4.granted_role=p4.grantee AND p4.privilege =‘UNLIMITED TABLESPACE’) CONNECTBY PRIOR grantee = granted_role) — we just whant to see the users not the roles WHERE grantee IN(SELECT username FROM dba_users)OR grantee =‘PUBLIC’ UNIONALL — list the user with unimited quota on a dedicated tablespace SELECT username,tablespace_name,‘DBA_TS_QUOTA’ privilege FROM dba_ts_quotas WHERE max_bytes =–1) WHERE tablespace_name LIKEUPPER(‘SYSTEM’) OR tablespace_name =‘Any Tablespace’;
USERNAME TABLESPACE_NAME PRIVILEGE ————————- ————————- —————————— … SYSTEM Any Tablespace UNLIMITED TABLESPACE SYS Any Tablespace DBA SYSTEM Any Tablespace DBA SCOTT Any Tablespace DBA1 SYS Any Tablespace DBA1 SYS Any Tablespace DBA2 SYS Any Tablespace DBA3 SYS Any Tablespace LOGSTDBY_ADMINISTRATOR TEST SYSTEM DBA_TS_QUOTA